
Warehouses
When a user returns assets to you, you can choose from your phone which warehouse they go to and what status each one is left in. You make both choices when you create the return, and GLPI applies them to the assets as soon as the user signs. Replacements work in the same way.
The choice of warehouse and status only appears if your organisation has set up warehouses in GLPI. Administrators will find the instructions in For administrators: Warehouses options.
Where to find it
You create returns from the Asset Handover module on the main menu. Open it, tap Select user and choose the user who is returning the assets. The Handed over assets list then shows the assets that user has been given.
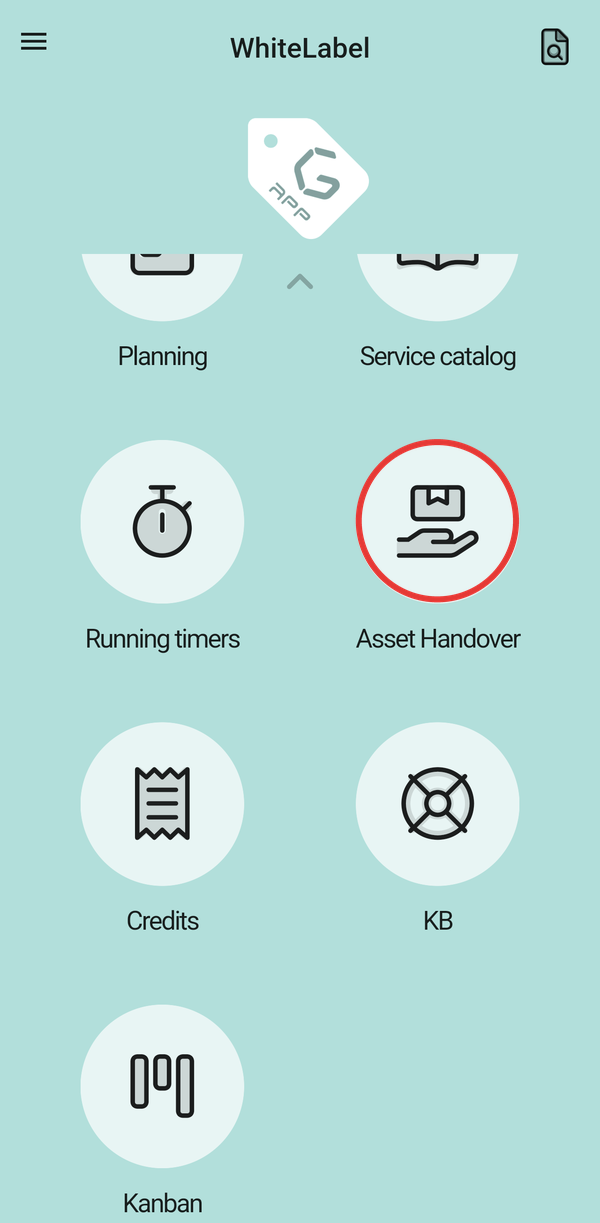
The main menu, scrolled down to Asset Handover, which is marked.
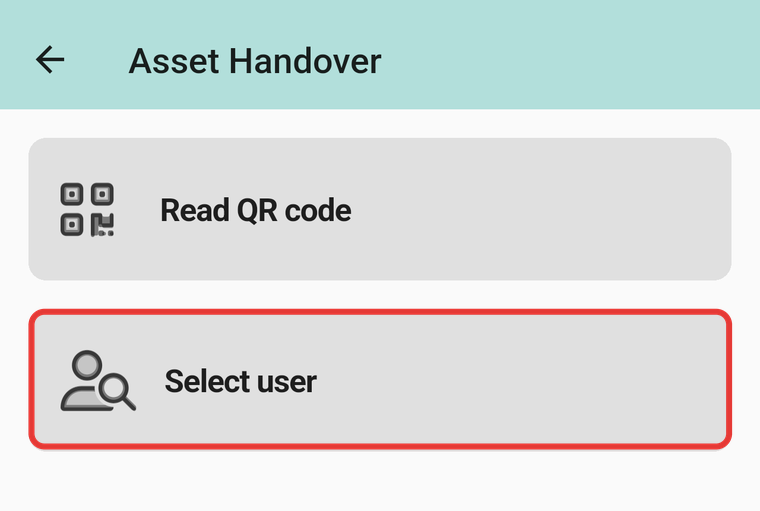
The Asset Handover screen, with Select user marked.
Returning assets
- In Handed over assets, press and hold one of the assets for a second. The list title changes to Assets to return and each asset now has a checkbox.
- Tick the other assets the user is returning.
- Tap Create Handover at the bottom of the screen. The Return destination screen opens.
- Under Warehouse, choose the warehouse the assets will go to.
- For each asset, open its Status dropdown and choose the status it will be left in.
- Tap CONTINUE. The app shows a summary of the return, with the user and the assets.
- Tap CONTINUE again to create the return and move on to the signature (see Signing the return).
A short tap on an asset does nothing; you need to press and hold. This only works while the Assets to hand over list is empty. Alternatively, you can start a return by scanning the QR code of an asset that has already been handed over.
In the image:
- The asset you pressed and held, already ticked.
- A second asset, ticked using its checkbox.
- The Create Handover button.
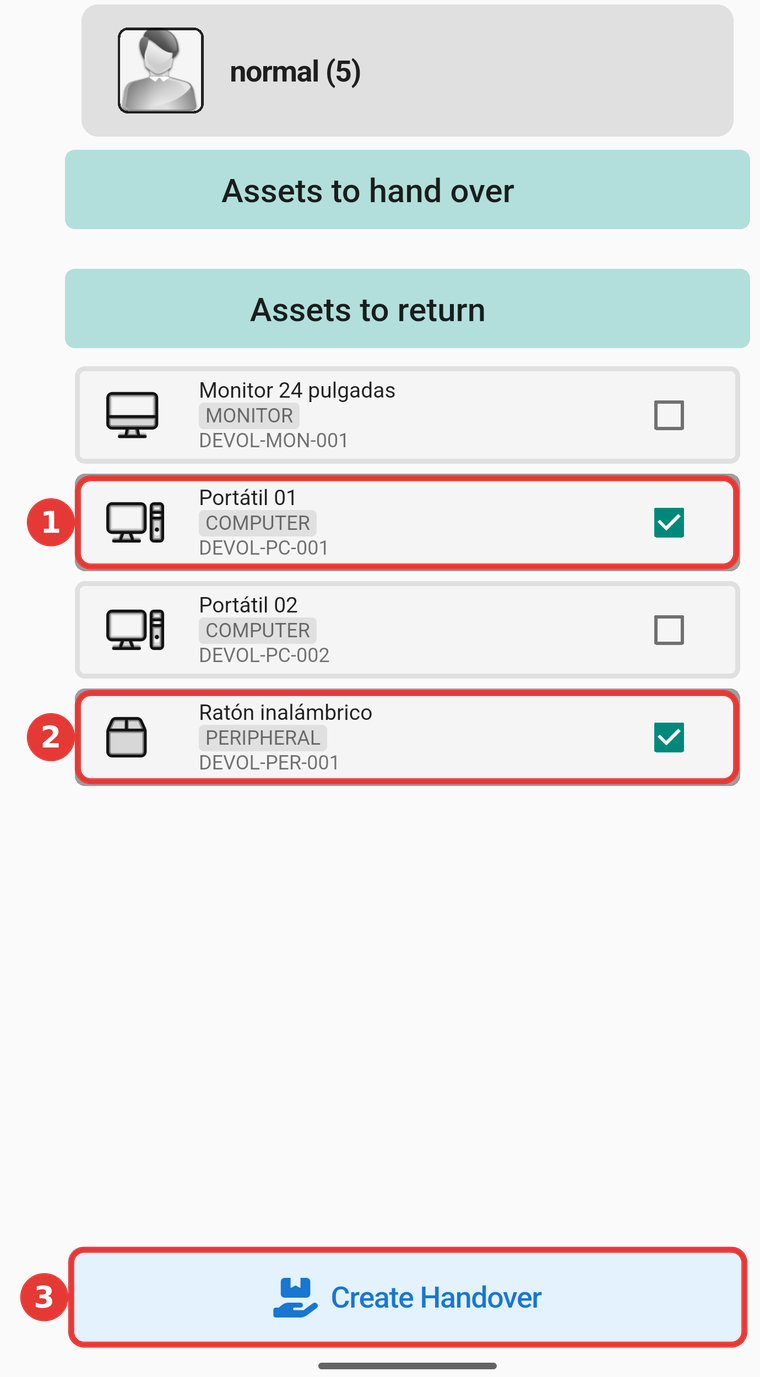
The Assets to return list, with two assets ticked.
The Return destination screen
Below the message is a single Warehouse dropdown, because all the assets in a return go to the same warehouse. Under that there is one Status dropdown for each asset, labelled with the asset's icon and name. CONTINUE stays greyed out until you have chosen the warehouse and a status for every asset.
In the image:
- The Warehouse dropdown.
- The Status dropdown for the asset (here, Portátil 01).
- CONTINUE, greyed out until both are filled in.
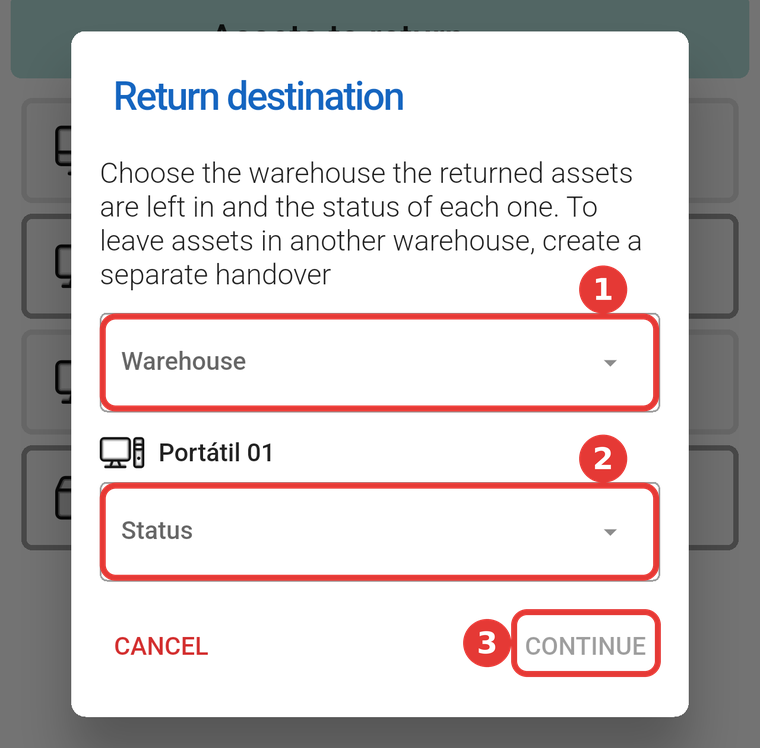
The Return destination screen before it is filled in.
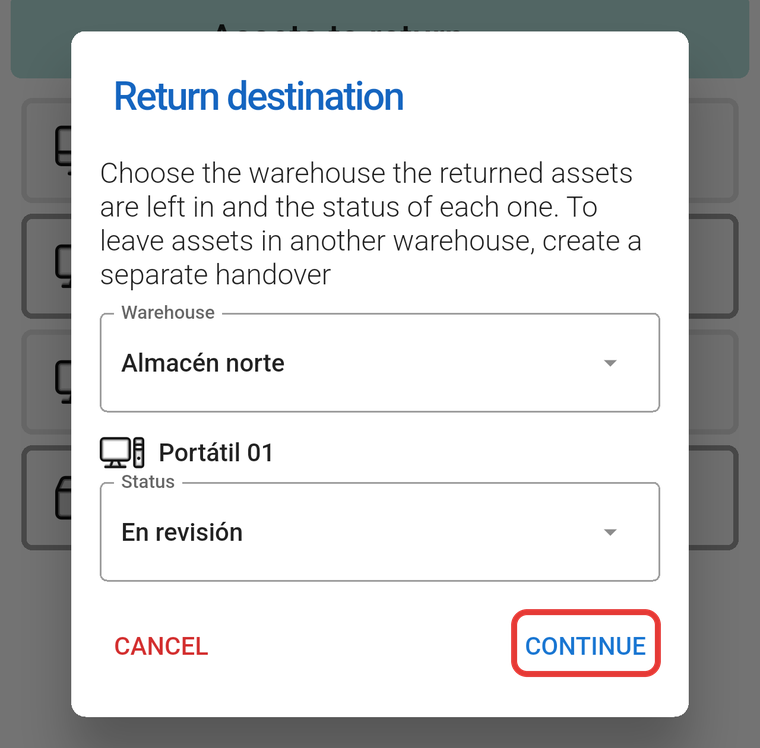
The Return destination screen, filled in, with CONTINUE (marked) now blue.
Some assets in a return may not appear on this screen. This happens when GLPI has no status available for that type of asset, so there is nothing to choose. The asset still goes to the chosen warehouse with the others, and once the return is signed it is given the return status configured in Handover. In the screenshots, a laptop and a mouse are being returned, but only the laptop is listed.
The list does not include the asset's current status, which is normally 'handed over'.
To send some assets to one warehouse and the rest to another, create two returns, one for each warehouse.
Cancelling
You can back out with CANCEL or with your phone's Back button, both on the Return destination screen and on the summary. Until you tap the final CONTINUE, nothing is created in GLPI and the assets stay as they were. Tapping outside the Return destination screen does not close it.
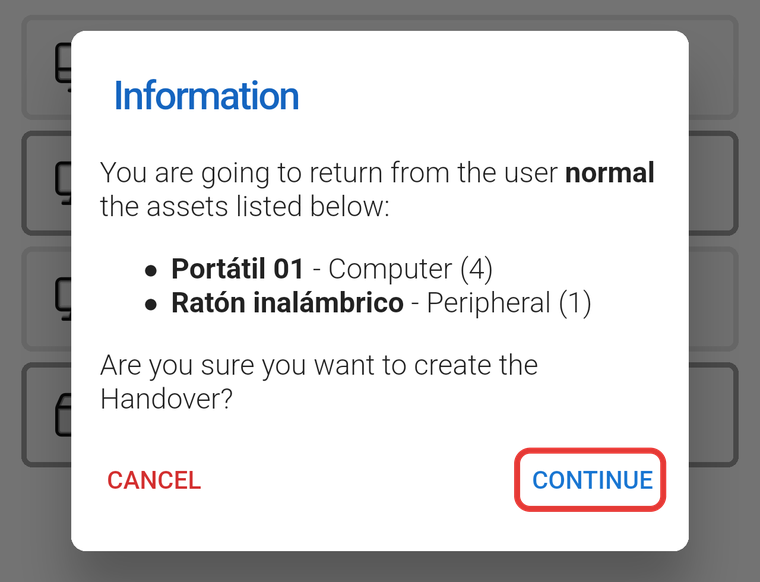
The summary of the return, with CONTINUE marked.
Replacing an asset
In a replacement, you hand over a new asset and the user returns one of the same type. The returned asset also goes through the Return destination screen.
- In Assets to hand over, tap +, tap the asset type's arrow and choose the asset you are handing over.
- In Handed over assets, assets of the same type now show a blue button with two arrows. Tap this button on the asset the user is returning.
- On the Return destination screen, choose the warehouse and the status for the returned asset, then tap CONTINUE.
- Read the confirmation message and tap CONTINUE to move on to the signature.
The two-arrow button only appears when Assets to hand over contains exactly one asset, of the same type as the one being returned.
In the image:
- The asset you are handing over.
- The two-arrow button on the asset being returned.
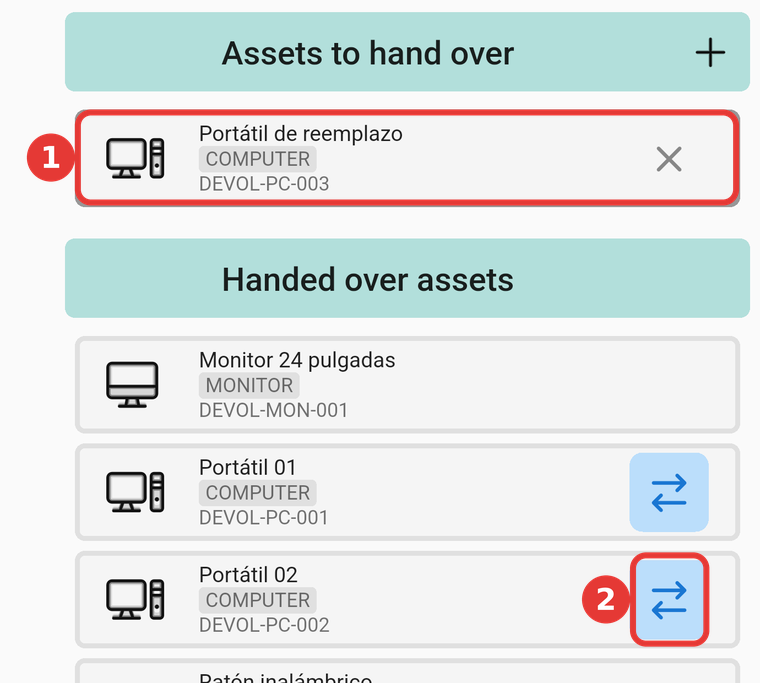
Assets to hand over containing one asset, and the replace button.
The confirmation message reads, for example: 'You are going to replace the Computer "Portátil de reemplazo" with the Computer "Portátil 02" for the user normal' (normal is the user's name in this example). Note the order: the asset you are handing over comes first, and the one you are receiving comes second.
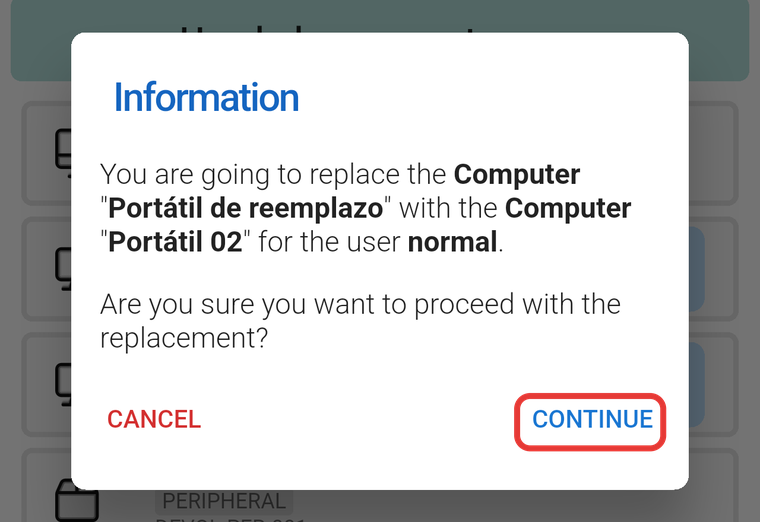
The replacement confirmation, with CONTINUE marked.
Signing the return
Once you confirm, the signature screen opens with the Handover document. In the table of returned assets, the Warehouse column shows the warehouse you chose; the status is not shown in the document. To sign:
- Tick 'I have read and accept the conditions of the document.'
- Tap Sign, sign in the 'Sign here' box and tap Send.
- The app shows 'Handover has been signed successfully'. Tap OK.
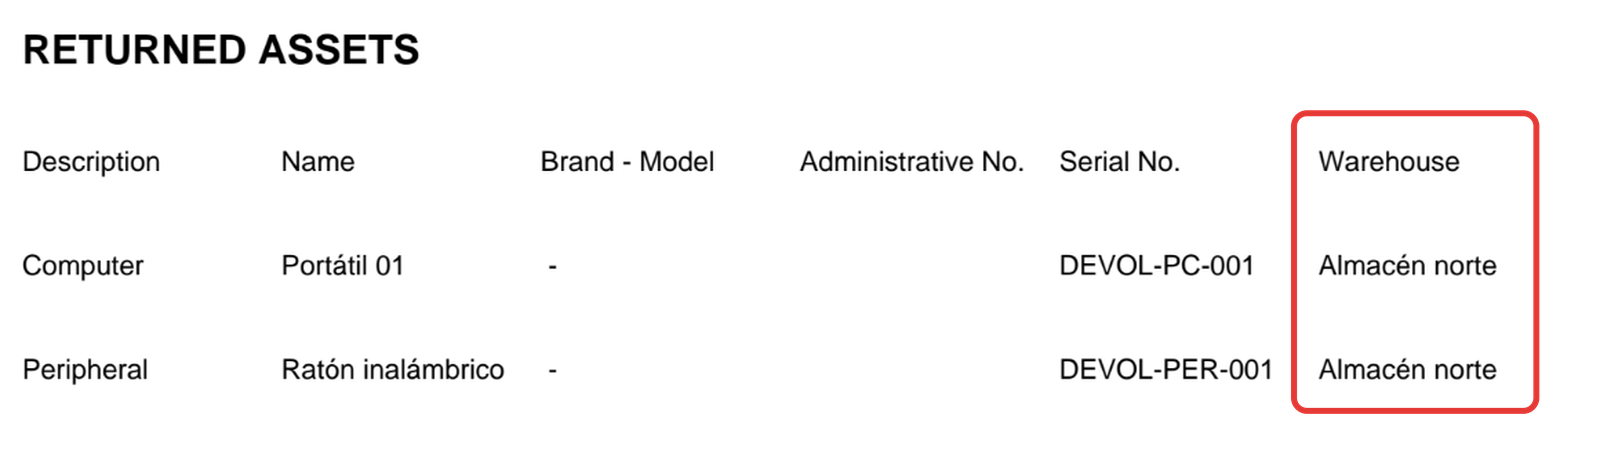
The table of returned assets in the Handover document, with the Warehouse column marked.
For a replacement, the document has two tables: one for the returned asset and one for the asset being handed over. In the second table, the Warehouse column shows the warehouse that matches the asset's current location, or is empty if that location is not a warehouse.
Rejecting a return or leaving it unsigned
If the user does not agree, tap Reject on the signature screen. When the app asks 'Are you sure you want to proceed? This action cannot be undone.', tap REJECT, and then tap OK on the 'Handover has been rejected successfully' message. The return is cancelled: the assets go back to being handed over to the user, and neither the warehouse nor the status is applied.
If you leave the signature screen without signing or rejecting, the return stays pending. Back in Asset Handover, an orange Resume Handover button appears, and Read QR code and Select user are disabled until the return is signed or rejected.
What changes in GLPI
The location and status you chose are applied to the asset when the return is signed. The GLPI screenshots on this page show GLPI in Spanish.
| Stage | Asset status | Location | User |
|---|---|---|---|
| Return created, not signed | Handover's pending status (for example 'Pending return') | Unchanged | Still assigned to the user |
| Signed | The status you chose, or Handover's return status if none was asked for | The location of the chosen warehouse | None |
| Rejected | Handed over again | Unchanged | Still assigned to the user |
The asset's group never changes.
In the image:
- The status you chose.
- The location of the warehouse you chose.

Portátil 01 in the GLPI computer list, after the return was signed.
If you chose the wrong warehouse or status, reject the return on the signature screen and create it again. If it has already been signed, correct the asset's location or status in GLPI.
Frequently asked questions
The Return destination screen does not appear
In that case the return works as it did before this feature existed: once signed, the asset is given Handover's return status and no location. This happens when no warehouse is available to you (see I cannot see a newly created warehouse) or when the server or the app is older than the required version (see For administrators: Warehouses (CEFA) options). Ask your GLPI administrator.
The app skips the status for one of the assets
GLPI has no visible status for that type of asset other than the one the asset already has. The asset still goes to the chosen warehouse. Your administrator can make a status visible for that type (see For administrators: Warehouses options).
The asset's current status is not in the list
This is intentional: the list only offers statuses other than the current one.
I want to send the assets to two warehouses
Each return has a single warehouse, so create one return per warehouse.
I cannot see a newly created warehouse
The app fetches the list of warehouses every time you tap Create Handover or the replace button, so there is no need to clear the cache. If the warehouse still does not appear, you may not have GLPI's root entity active; that is where warehouses are stored (see For administrators: Warehouses (CEFA) options).
For administrators: Warehouses options
Options in GLPI
Warehouses are set in GLPI, under Setup → General, on the Gapp Xtended tab, in the Warehouses section, and statuses are set under Setup → Dropdowns → Statuses of items. Warehouses are stored in GLPI's root entity, and child entities do not inherit them. They require Gapp 3.2.0 or later on the phone.
| Option | Factory value | What changes in the app |
|---|---|---|
| Warehouses (Locations selector) | None | Each location added becomes a choice in the Warehouse dropdown of the Return destination screen. The app shows only the short name of the location, and a location can be a warehouse only once. |
| Visibility of a status, per asset type | Visible for all types (statuses created from the GLPI form) | Each asset's Status dropdown lists only the statuses visible for its type, sorted by name, except the asset's current status. |
If a requirement is missing, the app does not show the Return destination screen, and returns work as before. Changes in GLPI show up in the next return without clearing the cache or logging in again.
Interactions with other plugins
Handover
Warehouses need Handover 4.3.0 or later on the server.
Gapp Xtended
Warehouses need Gapp Xtended 3.6.0 or later on the server.