
Tasks
The Tasks module brings together the tasks from your tickets in a single list, so you can work on them from your phone. A task is one piece of work inside a ticket, for example a repair or a site visit. From a task, you can add documents or photos and mark it as finished.
Your organisation turns some of the options on this screen on or off in GLPI. Administrators will find the instructions in For administrators: Tasks options.
Where to find it
Tasks is one of the modules in the main menu on the home screen. The modules you see depend on your GLPI profile.
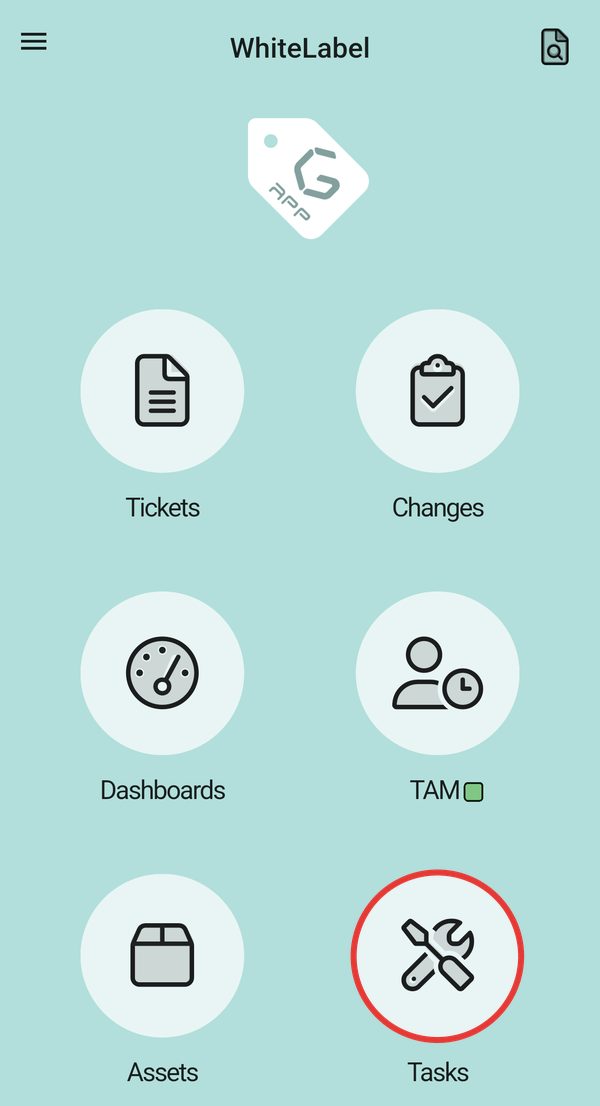
Home screen, with Tasks marked in red.
The task list
The list shows one card per task. Use the dropdown and the buttons at the top to choose which tasks you see. Tap the refresh icon (top right) to reload the list.
Each card shows the ticket number, the technician and the group, the ticket title and the task description. If the task has a category or belongs to a project, the card shows that as well.
In the image:
- The task type dropdown.
- The My tasks button.
- The My groups button.
- The filters icon.
- The refresh icon.
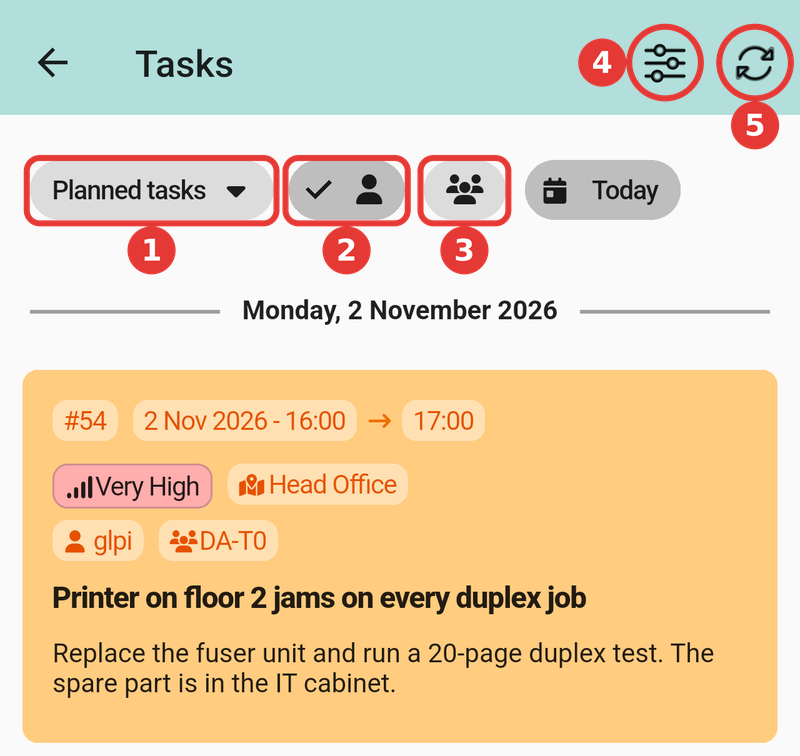
The top of the task list.
The filters icon, the Today chip and the priority and location on each card only appear if your organisation has turned those options on (see For administrators: Tasks options at the end of the page).
Choosing which tasks to show
The list opens on Planned tasks. To change it, tap the dropdown at the top left and pick one of these options:
- Planned tasks: tasks with a date and time. The list groups them by day, and each card also shows the start and end time.
- Unplanned tasks: tasks that do not have a date yet.
- Unassigned tasks: tasks with neither a technician nor a group.
The list only shows tasks from tickets that are still open.
In the image:
- The dropdown: tap it to open the menu.
- Planned tasks.
- Unplanned tasks.
- Unassigned tasks.
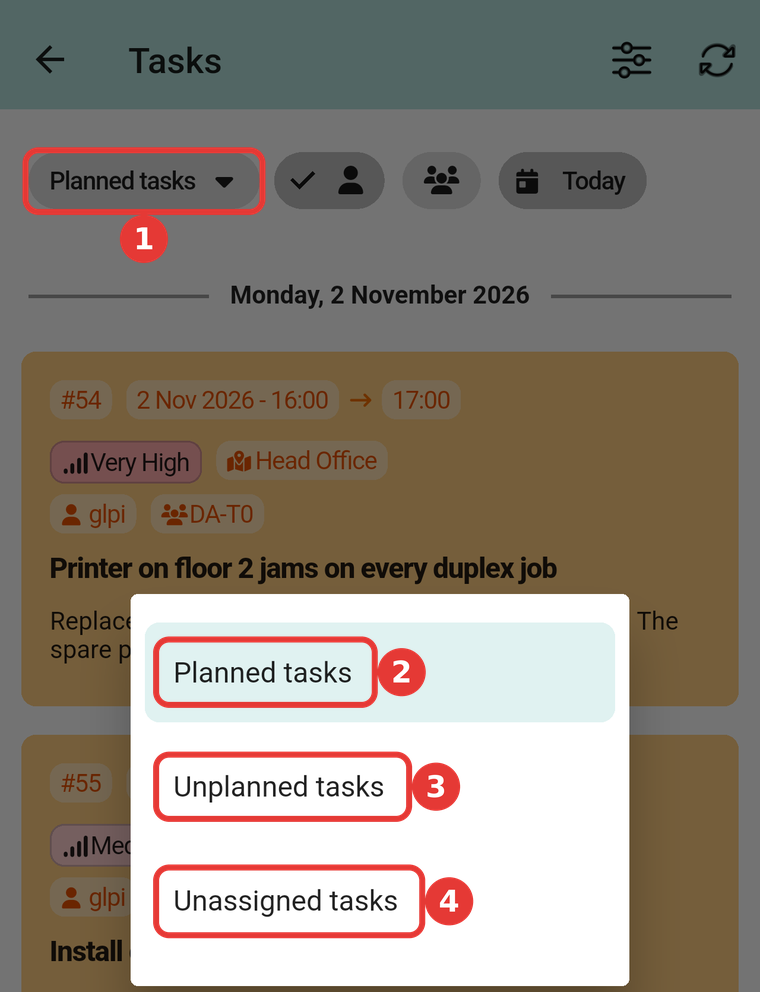
The dropdown, open.
Your tasks and your groups' tasks
Two buttons to the right of the dropdown can be switched on and off separately. The button with one person, My tasks, adds your tasks to the list, and the button with three people, My groups, adds your groups' tasks. A button that is on looks darker and shows a tick. Both can be on at the same time.
When you open Tasks, only My tasks is on. These buttons do not appear in Unassigned tasks.
In the image:
- The task type dropdown.
- The My tasks button.
- The My groups button.
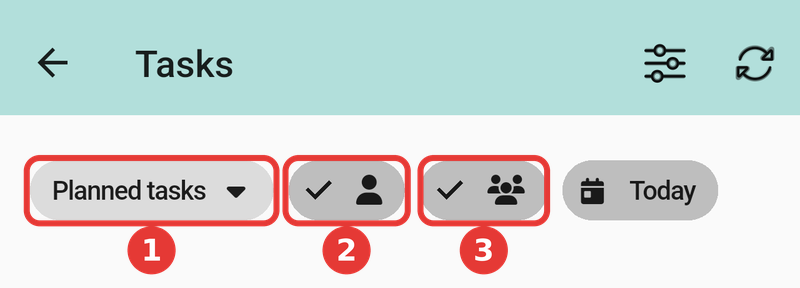
Task filters
If your organisation has turned on the day or location filter, you will see the filters icon in the top bar. Tap it to open the Task filters sheet, where you can change everything you see in the list at once:
- Period: All or Today. With Today, you only see the planned tasks that start today.
- Tasks: the task type and the My tasks and My groups buttons.
- Location: pick a location to see only the tasks from tickets at that place.
Nothing changes in the list until you tap Apply. Reset puts everything back as it was when you opened Tasks.
In the image:
- The filters icon: tap it to open the sheet.
- Period: All or Today.
- Tasks: the task type and the My tasks and My groups buttons.
- Location: pick a place.
- Apply: applies the changes to the list.
- Reset: puts everything back as it was when you opened Tasks.
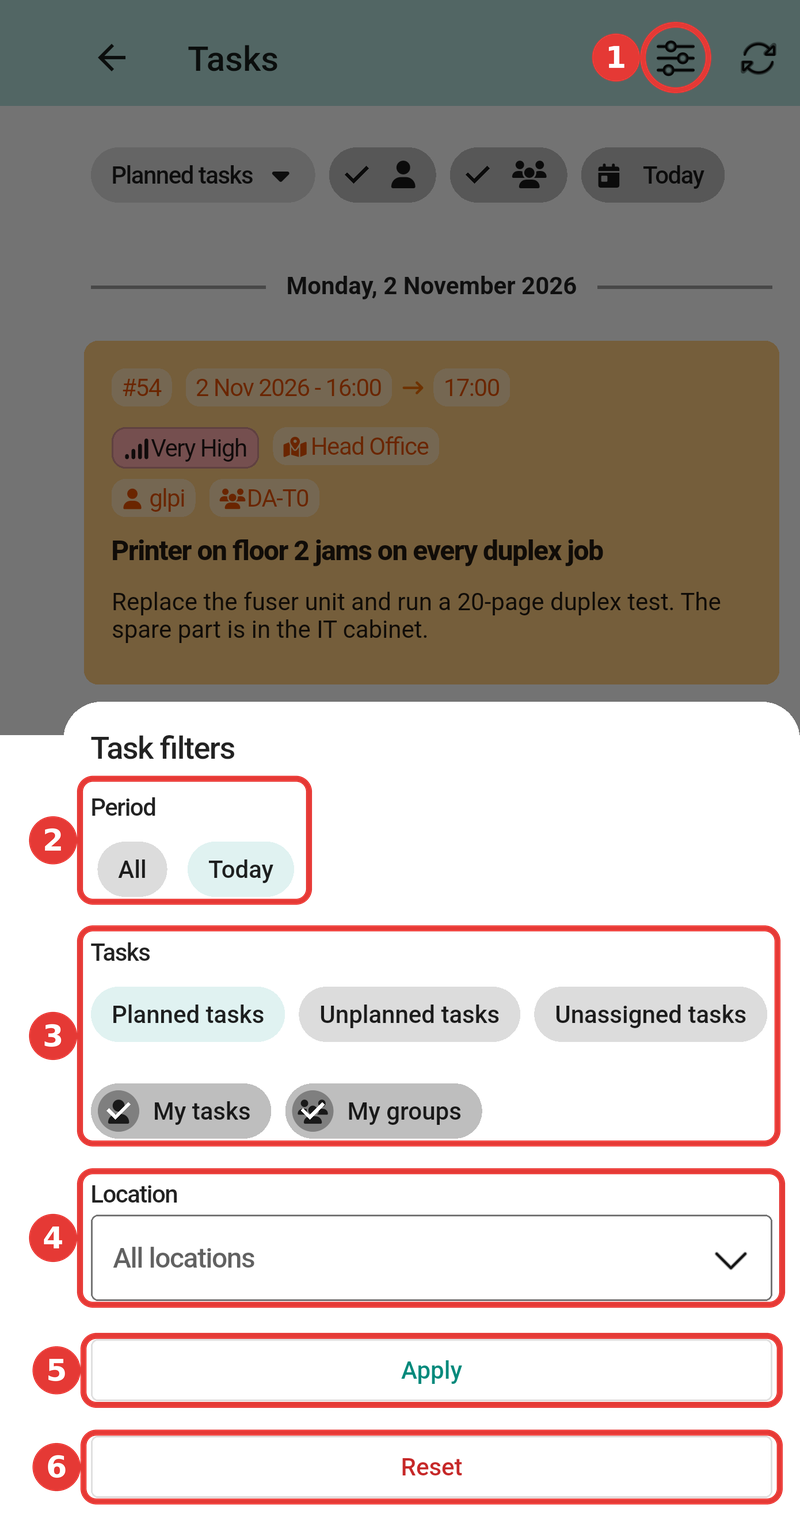
The filters sheet, open.
The filters you have set appear as chips next to the list buttons, for example Today or the name of the location. Tap one to open the sheet. When you leave Tasks, the filters go back to how they were at the start.
About the location filter:
- It only offers the locations of the tasks you have loaded.
- It uses the location of the ticket.
- Tasks from tickets without a location disappear when you pick a location.
Priority and location
With the Priority and location option on, each card shows the ticket's priority, with its colour, and its location (you can see it on the card in The task list). The priority is the ticket's priority in GLPI: Very low, Low, Medium, High, Very high or Major.
In Planned tasks, the list sorts each day from highest to lowest priority and, where priorities are equal, by start time.
Finished tasks
Finished tasks stay in the list with a faded card: lighter background, paler text and a large check mark in the centre. The card still shows all its details. In Unplanned tasks and Unassigned tasks, finished tasks go to the end of the list. To finish a task, see Opening a task below.
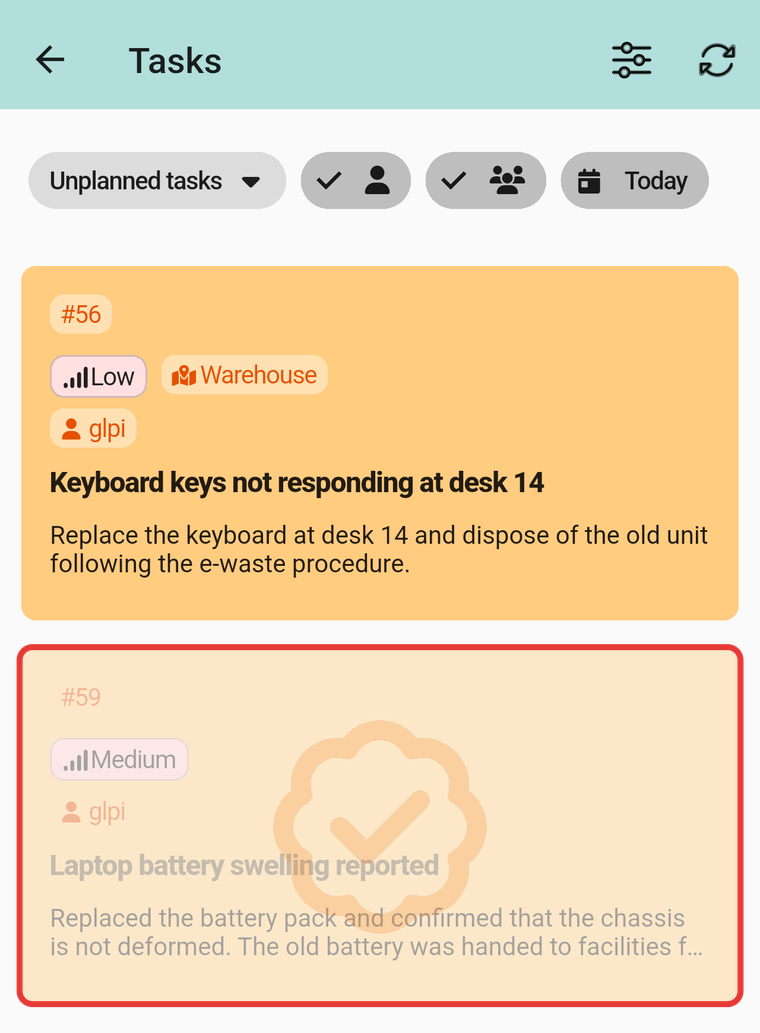
A pending task (top) and a finished one (bottom, marked), in Unplanned tasks.
Other technicians' tasks
Depending on how your organisation has set it up, the My groups button can also show tasks that belong to another technician. Those cards look faded and are for reference only: they do not open when you tap them and cannot be finished, reopened or assigned. To see their ticket, look it up in the Tickets module.
In the image:
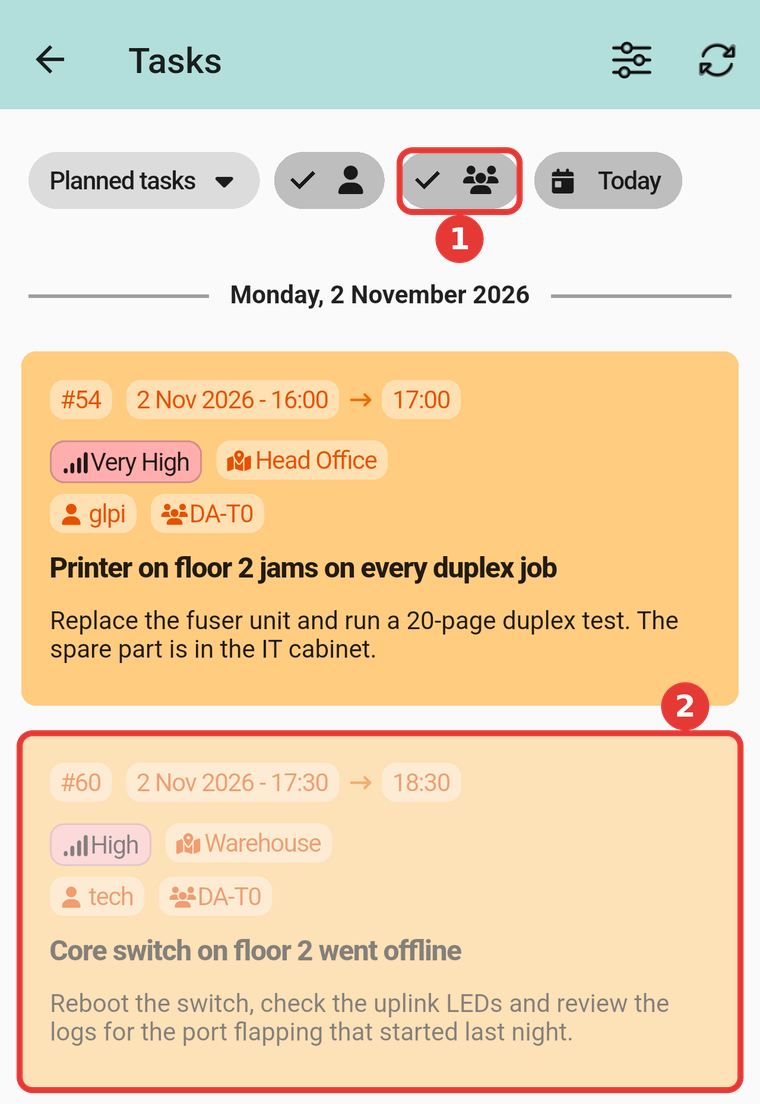
One of your tasks (top) and one from another technician (bottom).
Assigning a task to yourself
With the Self-assign button option on, tasks that do not have a technician yet show the Assign to me button, both in Unassigned tasks and among your groups' tasks. To take one:
- Tap Assign to me on the card.
- In the confirmation dialog, tap Continue.
The list refreshes by itself and the task moves to your tasks. If another technician took it before you, the app tells you and nothing changes.
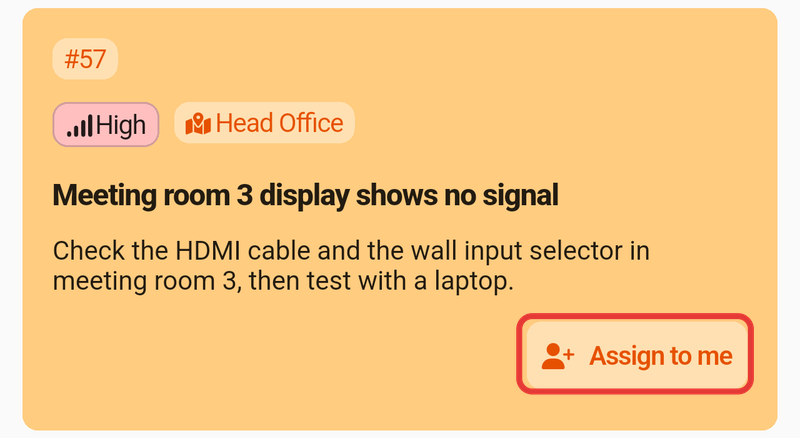
A task with no technician, with Assign to me marked.
Continue assigns the task to you. Cancel leaves it as it is.
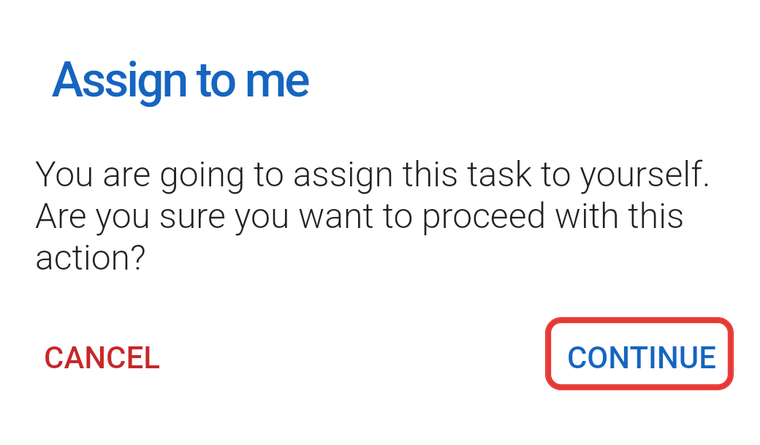
The confirmation dialog, with Continue marked.
Opening a task
Tap a card in the list to open the task. The task detail shows when it is scheduled, the ticket, the technician and the group, and the full description. Tap the icon at the top right to open the ticket the task belongs to.
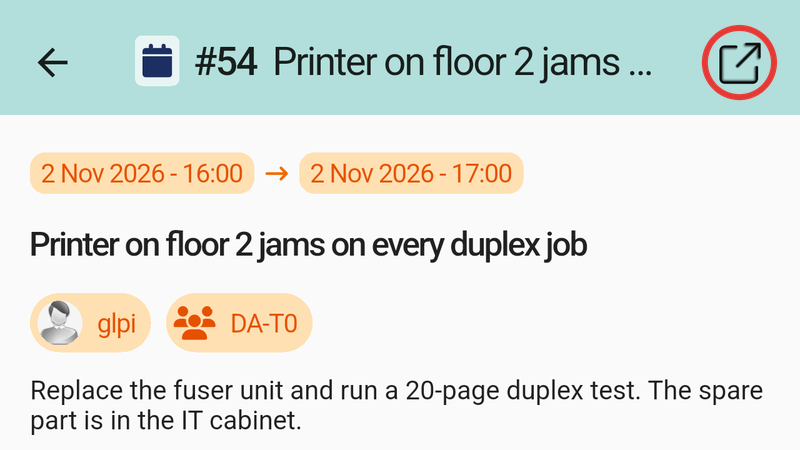
Task detail (start and end date and time, title, technician, group and description), with the icon that opens the ticket marked.
At the bottom you can:
- Add documents or photos: in the Documents section, tap the image icon with a +. The Upload documents panel opens, where you can take a photo or choose a file. The panel shows the maximum size your server accepts. The number next to Documents shows how many files are attached.
- Finish the task: tap Finish task when the work is done, then confirm. The card then looks like a finished task (see Finished tasks).
Below Documents you also see the date of the task's last update.
In the image:
- Add a document or a photo.
- Finish task.
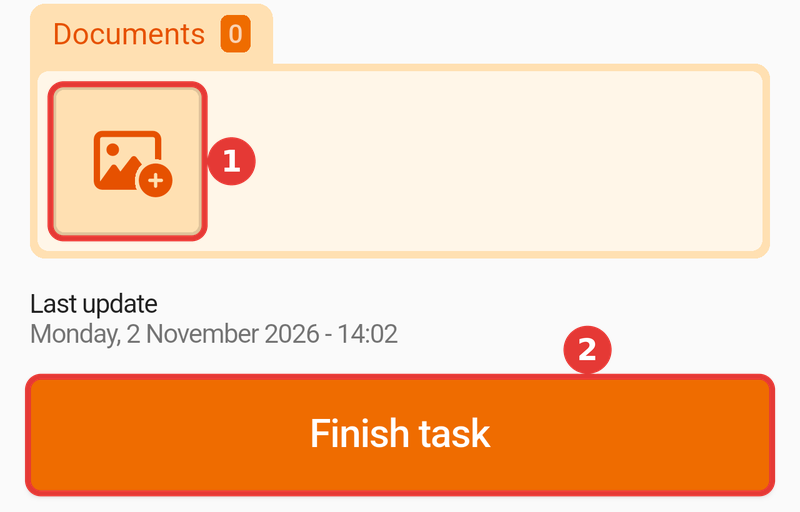
Bottom of the task detail.
Reopening a finished task
You cannot add documents to a finished task, and a Task closed bar appears at the bottom. To reopen it:
- Slide the lock on the bar to the left.
- Tap Reopen task, then confirm.

The bar of a finished task, with the lock marked.

The same bar after sliding, with Reopen task marked.
Note: the Actualtime plugin tracks the time you spend on a task. It is separate from the Tasks module. If your organisation uses it, see the Actualtime page.
For administrators: Tasks options
Options in Xtended
These options are set in GLPI, on the Gapp Xtended tab (1), in the Task list view section (2). They apply to the whole installation: they cannot be changed per entity, profile or technician. They also require Gapp 3.2.0 or later on the phone.
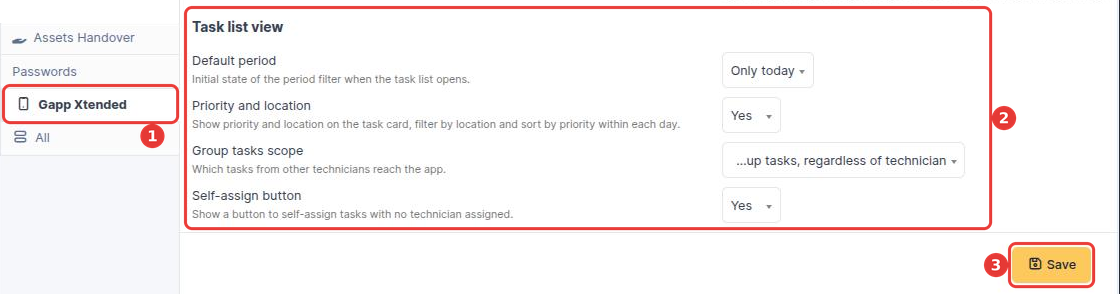
| Option | Factory value | What changes in the app |
|---|---|---|
| Default period | All | Only today opens the list with the planned tasks that start today and adds the period filter. |
| Priority and location | No | Cards show the priority and the location, each day is sorted by priority, and you can filter by location. |
| Group tasks scope | Only unassigned group tasks | What the groups button adds:
|
| Self-assign button | No | With Yes, tasks with no technician show Assign to me. |
These options do not change the Planning (calendar) view. If you change one and do not see it in the app, see A change made in GLPI doesn't show up in the app.
Interactions with other plugins
Gapp Xtended
These options need Gapp Xtended 3.6.0 or later. With an earlier version, the task list keeps its factory behaviour.