
Create Ticket
Create a ticket from your phone to report a problem or to ask for something you need. The ticket goes straight into GLPI, just like one created from the web interface.
Your organisation decides in GLPI which fields this form shows and which of them are required. Administrators will find the instructions in For administrators: Create Ticket options.
Where to find it
Tap the menu icon (☰, top-left of the home screen) to open the side drawer, then tap Create Ticket. It is not in the main menu. You can also open the same form from the Tickets list with the + button (bottom right).
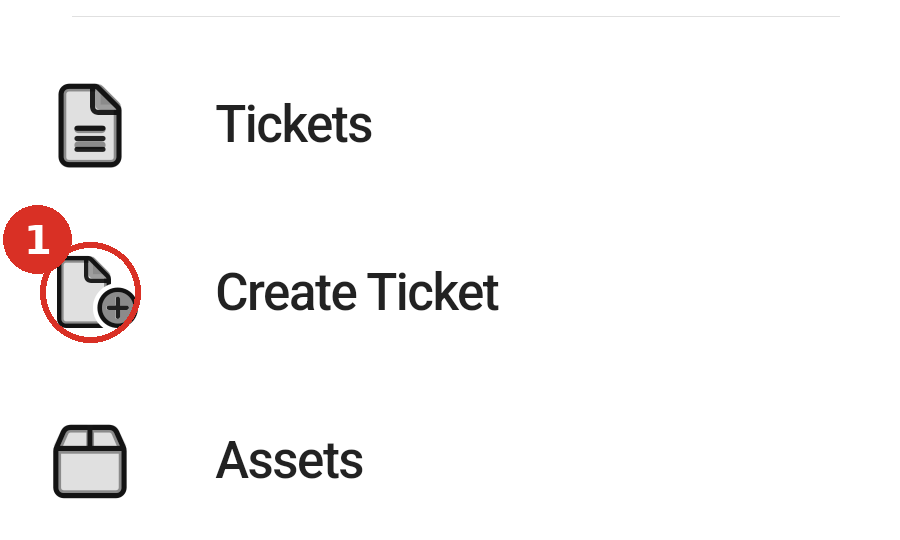
From the side drawer, tap Create Ticket (circled).
Filling in the form
Fill in the form from top to bottom, then submit the ticket.
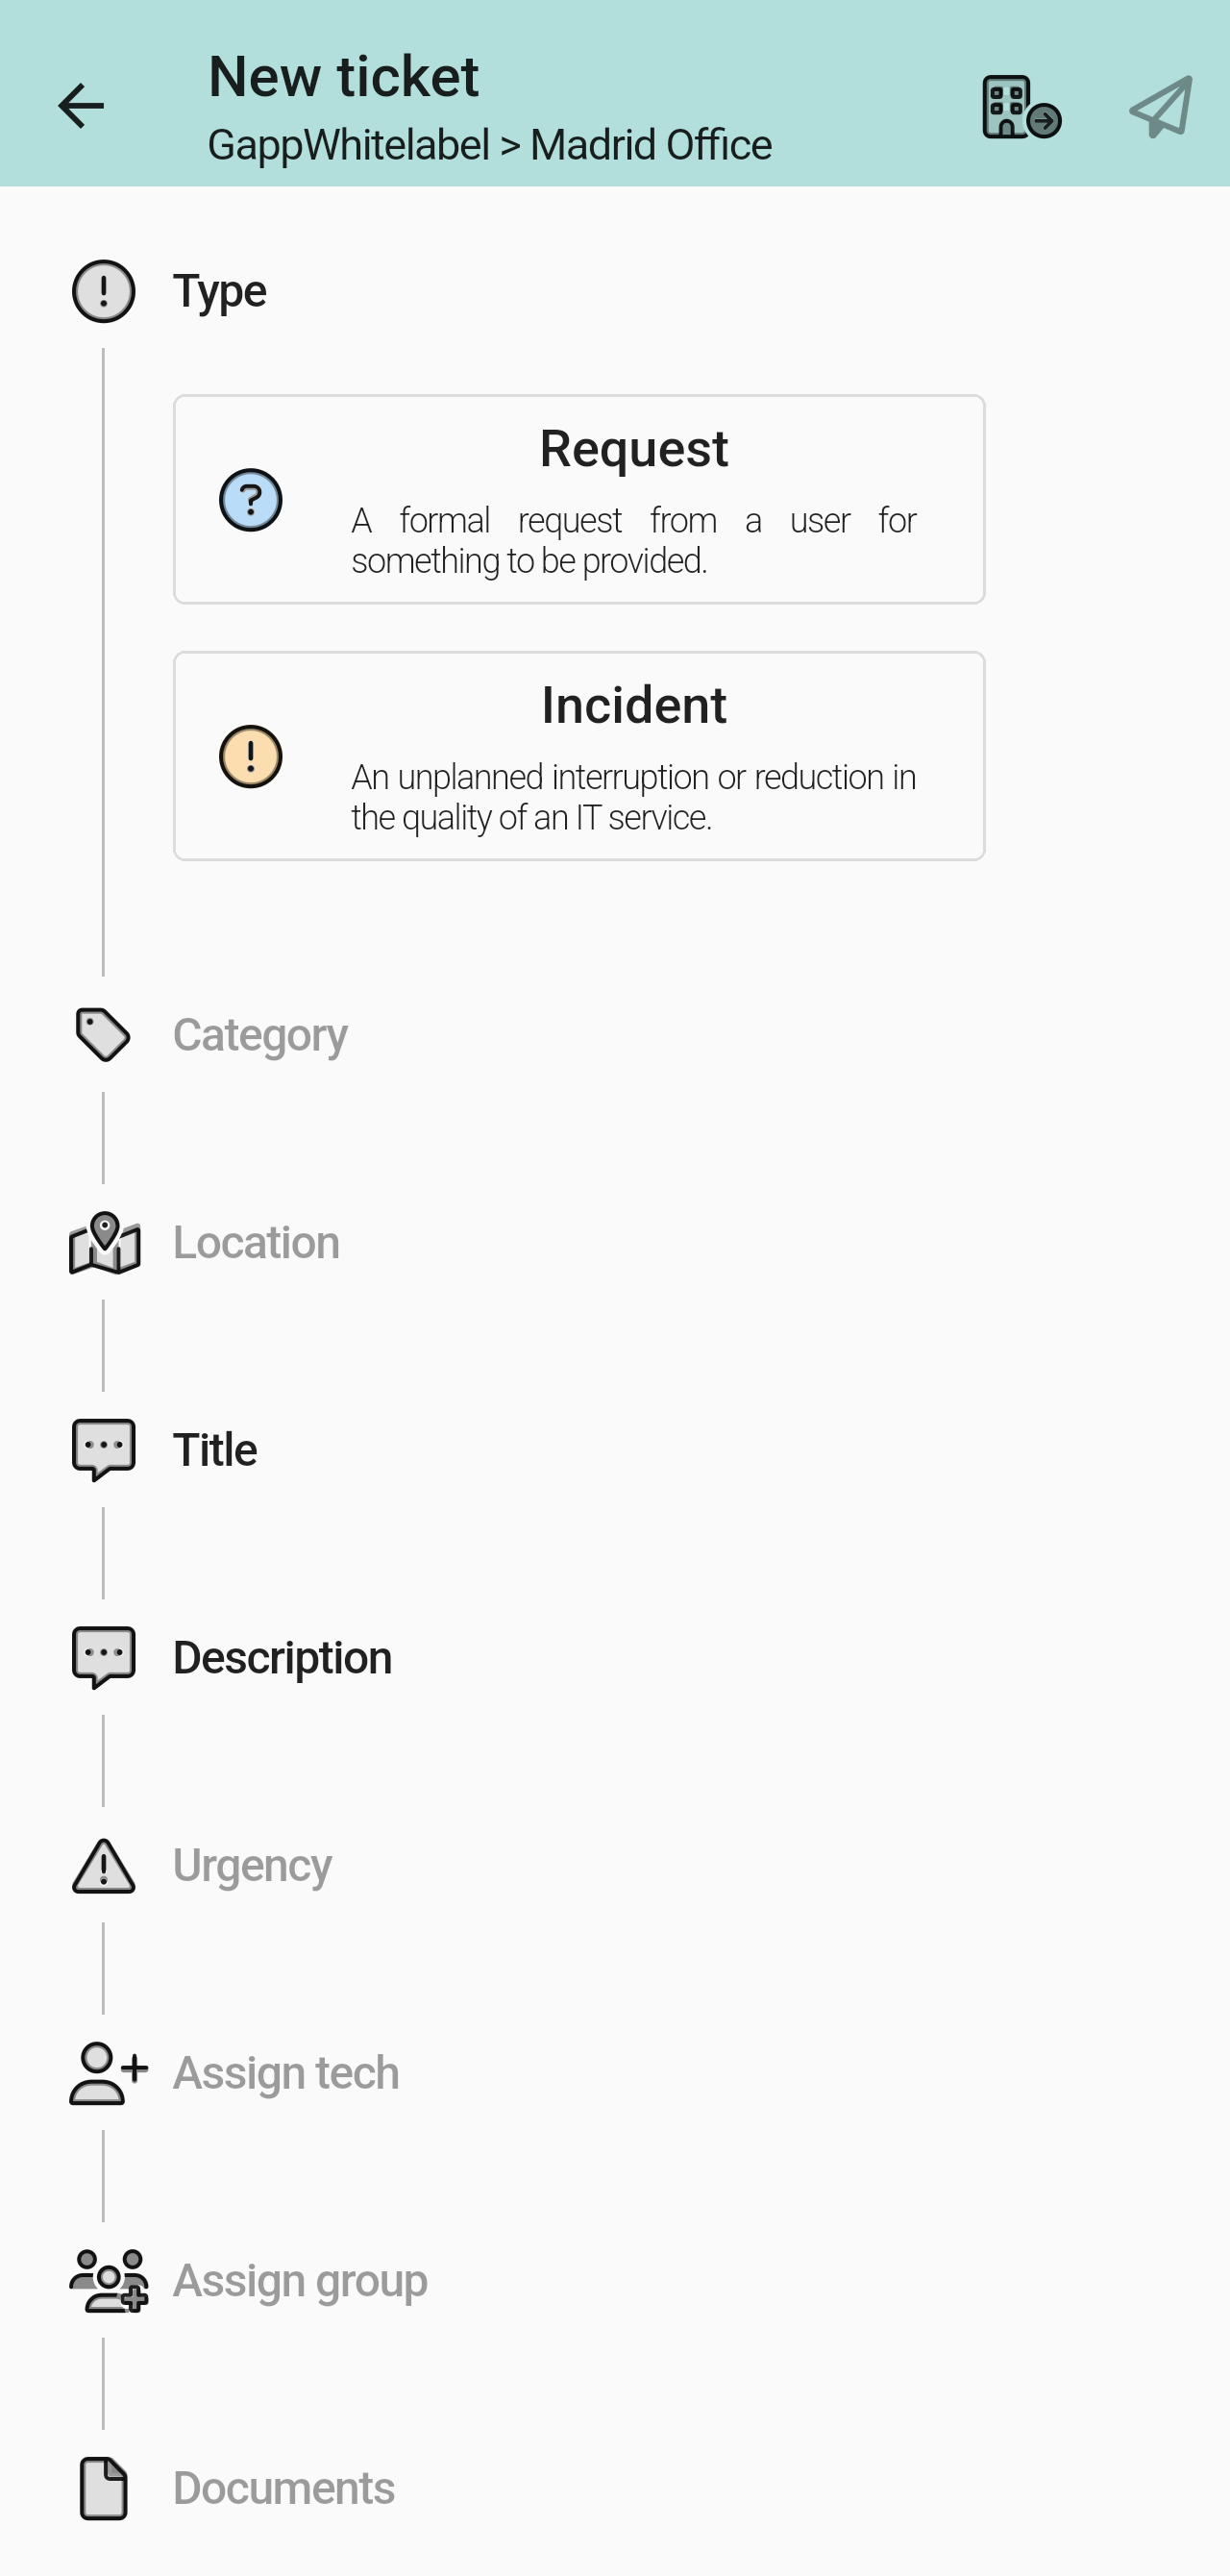
The New ticket form. Under the title you can see the entity the ticket will be created in (here "GappWhitelabel > Madrid Office"). The building icon (top-right) changes the entity. The paper-plane icon next to it submits the ticket.
- Check the entity shown under the New ticket title. To create the ticket in a different entity, tap the building icon (top-right).
- Choose the Type: Request if you need something (for example, new equipment or access), or Incident if something is broken or not working as it should.
- Optionally set a Category and a Location.
- Enter a Title and a Description of the problem or request.
- Optionally set the Urgency.
- Optionally, choose who will handle the ticket: a technician in Assign tech, a group in Assign group, or both.
- Optionally, attach photos or files in Documents (see "Attaching documents" below).
- Tap the paper-plane icon (top-right) to submit the ticket.
Which fields are required
The form shows which fields you must fill in before you can submit the ticket. Required fields have a dark, bold label. Optional fields have a lighter grey label. This applies to every field on the form, not only the ones in the picture below.
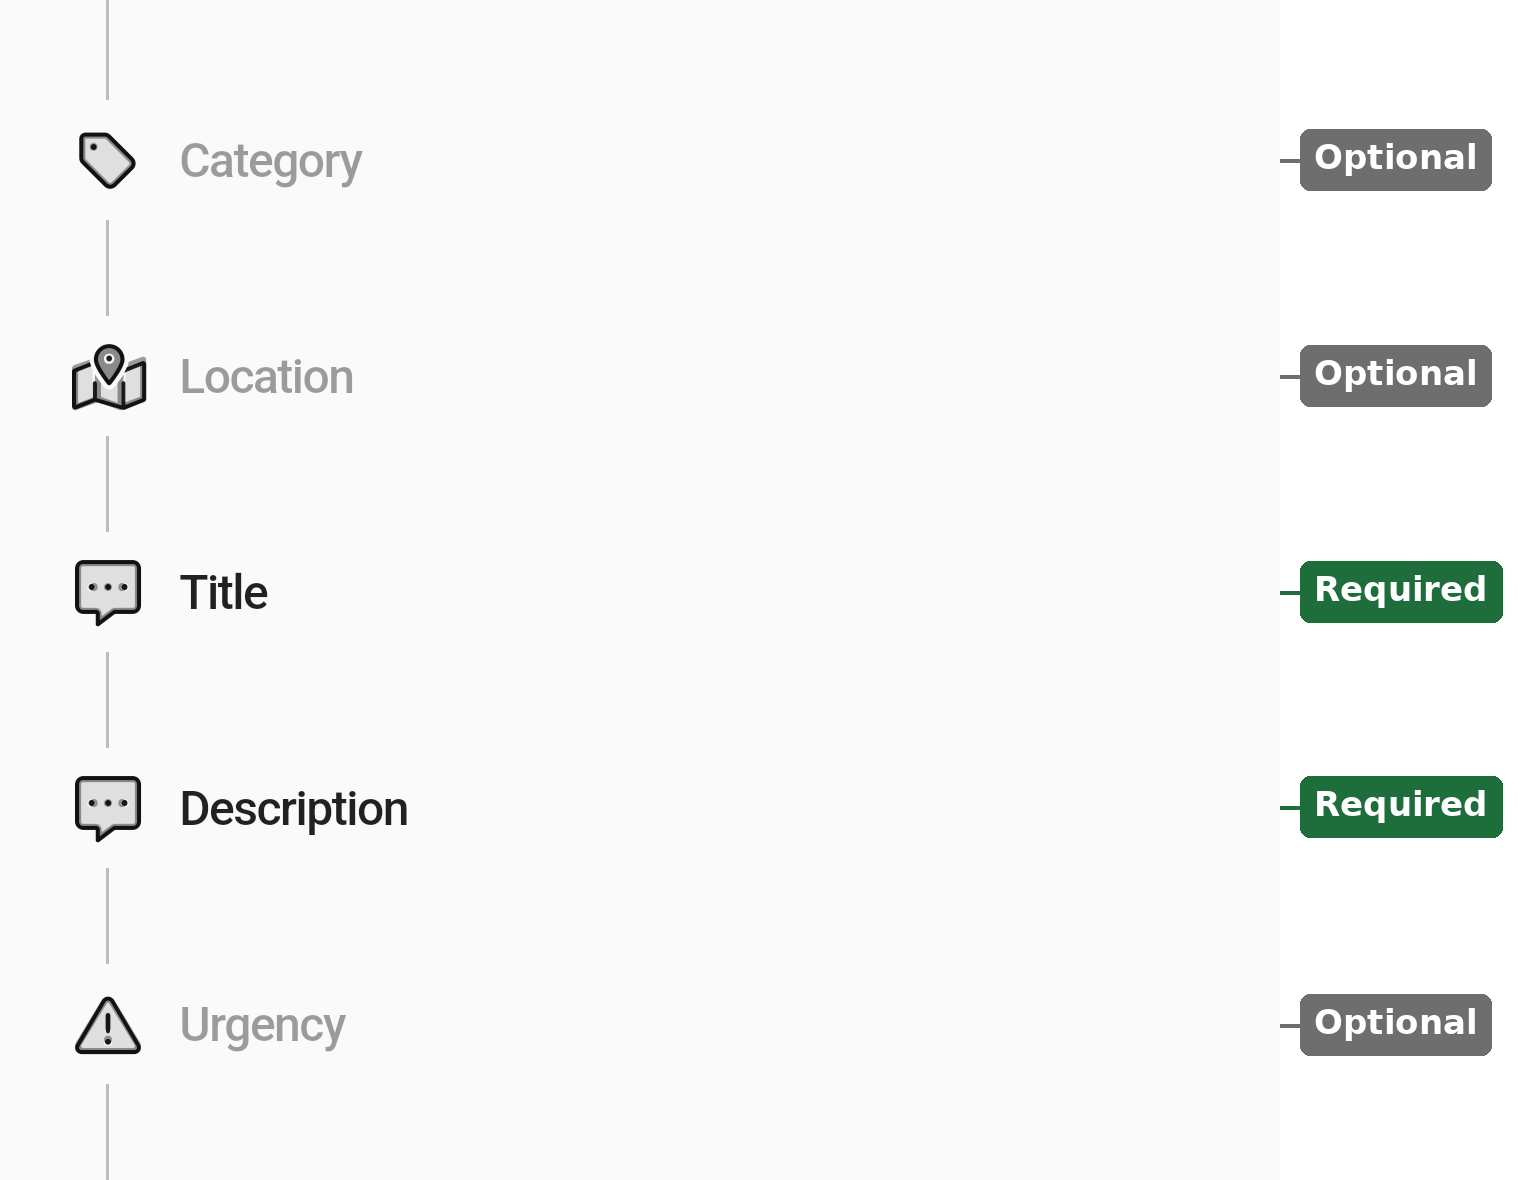
Title and Description are always required (dark, bold label). Category, Location and Urgency are optional (lighter grey label) unless your GLPI administration makes them required.
Your GLPI administration can also make other fields required, such as Category, Location or Urgency. If they do, you can't submit the ticket until that field is filled in, just like Title and Description.
Attaching documents
To attach photos or files, tap Documents (the last field on the form) before you submit the ticket. The Upload documents panel opens.

Attach a file either by taking a photo on the spot (camera icon) or by picking an existing file (file icon). The maximum size per upload comes from your GLPI server (here, 50 MB).
For administrators: Create Ticket options
Options in GLPI
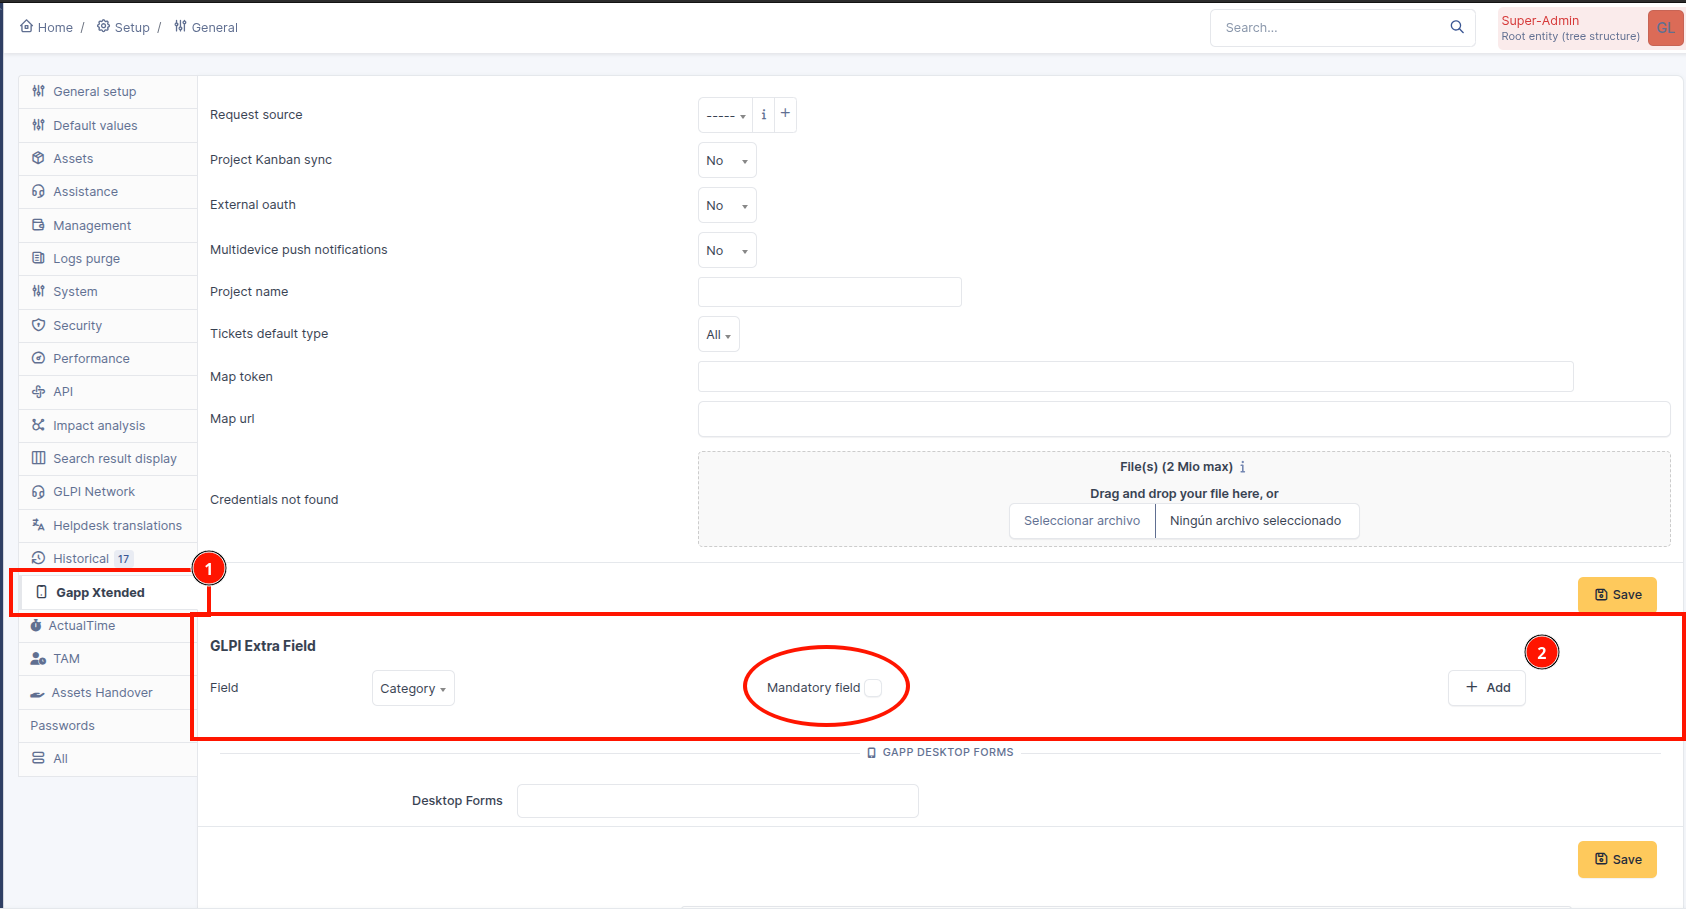
These options are set in GLPI, under Setup → General, on the Gapp Xtended tab (1), in the GLPI Extra Field section (2). The app reads them when the technician signs in, so a change shows up after signing in again. They require Gapp 3.2.0 or later on the phone.
| Option | Factory value | What changes in the app |
|---|---|---|
| Category, Location, Urgency and Observers (one Extra Field entry per field) | Not shown: the field is not in the Extra Field section | With Mandatory field unticked, the field is shown as optional. With it ticked, the field is required before the ticket can be submitted. |
Ticket type (ticket_type) |
Not set: the technician chooses the type | When a type is set, the app uses it and does not show the type step. |
The location in GLPI of the ticket type option is still to be confirmed. A field that is not added to the Extra Field section does not appear in the app.
Interactions with other plugins
Form Creator
Some ticket types can open a custom Form Creator form instead of the general one.