
4. Setup

Install the app, connect your calendar and follow the tutorial.
4.1 Installation
Install Time Zone Orbit from Google Play and open it. The first time, two welcome screens connect it to your calendar and a short tutorial shows the main controls; see the walkthrough below.
4.2 Configuration
The app works straight away with your device's time zone, Madrid as its first city and working hours from 09:00 to 18:00. Everything else is optional and lives in Settings: how the dial snaps, your base time zone, working and night hours, the calendar shown, colors, language and date format. See Settings in the Usage part of this manual.
4.2.1 Automatic actions
- Update check (Location: runs when the app starts) — if a newer version is available, the app shows an Update available message for a few seconds, with an Update button.
- Crash reports (Location: always on) — if the app stops because of an error, a technical report of the error is sent to TICGAL (Firebase Crashlytics) so it can be fixed.
4.3 Permissions
- Calendar (Location: asked on the welcome screen; status in Settings > Calendar permission) — needed to read your events and show them on the dial and in the city details. On Android the app also asks for write access, which the component that reads repeating events requires; the app never creates, changes or deletes events. Without this permission the dial and your cities still work, but no events are shown.
4.4 First launch and tutorial
The first time you open Time Zone Orbit, two welcome screens connect it to your calendar, and a short tutorial then shows the main controls.
4.4.1 Start with the welcome screen
After the splash screen, the welcome screen sums up what the app is for: turn the dial and see at a glance whether a time falls within working hours or at night in each city. Tap Get started.
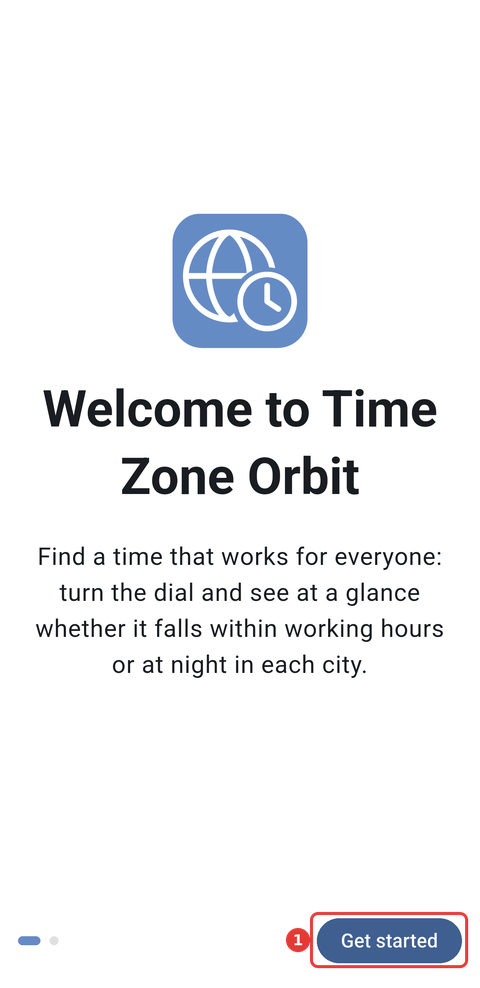
The welcome screen, shown only the first time you open the app: (1) Get started.
4.4.2 Allow access to your calendar
The next screen, Your events on the dial, explains that the app draws the events of one of your calendars around the dial, so you can tell which slots are already taken. Tap Allow calendar access, then Allow in the Android dialog. The app only reads your events; it does not need an account of its own.
Tap Not now to skip this step and go straight to the home screen. You can choose your calendar at any time in Settings → Calendar.
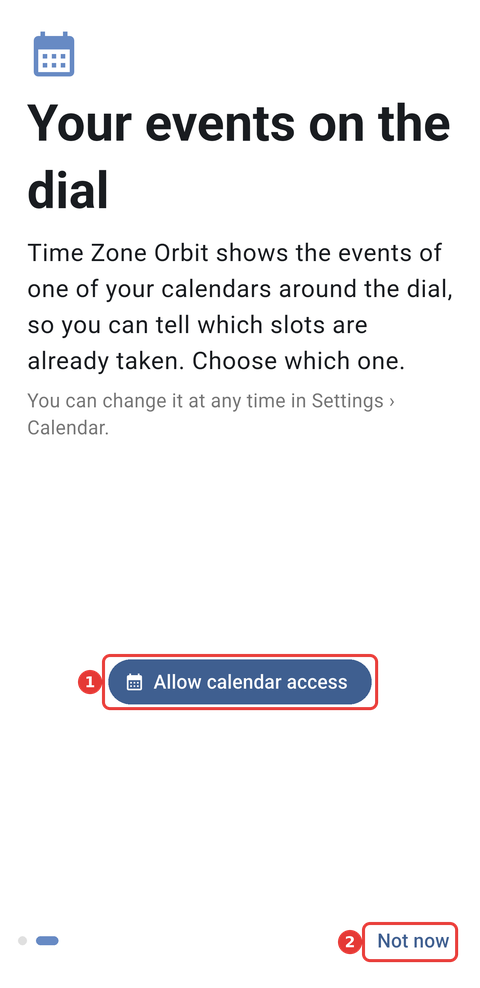
The Your events on the dial screen, before access is allowed: (1) Allow calendar access and (2) Not now.
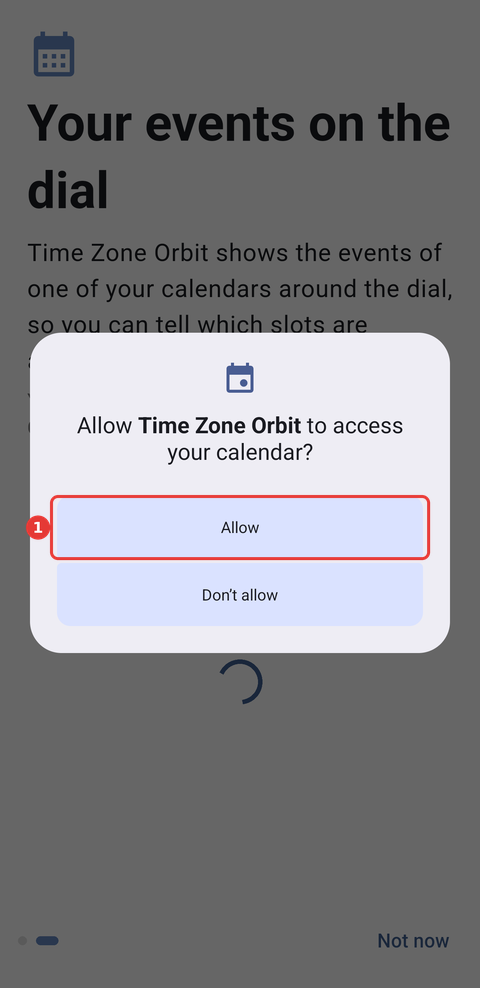
The Android dialog that opens after tapping Allow calendar access: (1) Allow.
4.4.3 Choose your calendar
Once access is allowed, the screen lists the calendars on your phone, each with the account it belongs to. Choose the one whose events you want to see and tap Continue. The app shows the events of one calendar at a time; you can switch to another one later in Settings → Calendar shown.
If you denied access, the screen says so instead and offers Open app settings, where you can allow it.
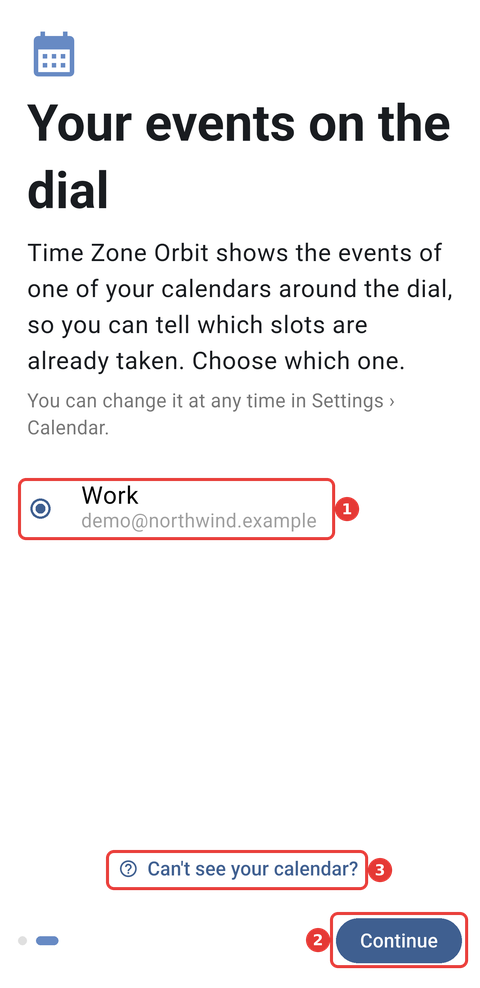
The list of calendars: (1) the Work calendar of [email protected], selected; (2) Continue; (3) Can't see your calendar?
4.4.4 If your calendar is not in the list
Tap Can't see your calendar? to open Getting your calendars to show up, a checklist of the usual causes:
- Calendar access: in the app's settings, open Permissions → Calendar and choose Allow.
- Your account on the device: in the phone's Settings → Accounts, add your Google, Microsoft Exchange or other account and turn on calendar sync.
- Calendar sync: in the Google Calendar app, open Menu → Settings, tap the calendar and turn on Sync. Calendars that are not synced have no events on the phone and do not show up in the list.
- Outlook calendars: the Outlook app only shares its calendars if you turn on Sync calendars in Outlook's Settings, under your account. You can also add the account to the phone, as in step 2.
Open app settings takes you to the app's Android settings. Search again closes the checklist and reloads the list of calendars. A newly synced calendar can take a few minutes to arrive.
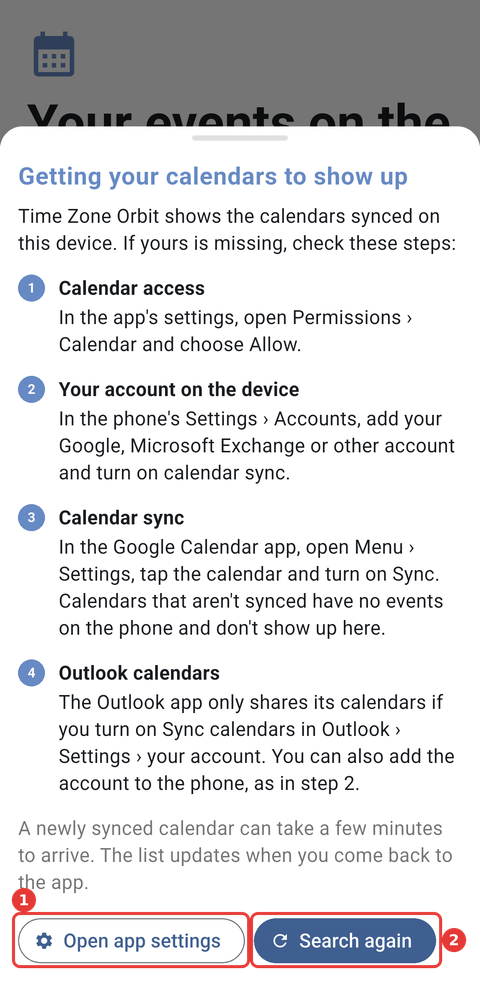
The Getting your calendars to show up checklist: (1) Open app settings and (2) Search again.
4.4.5 Follow the tutorial
The home screen then opens with a short tutorial. It darkens the screen, highlights one control at a time and explains what it is for. Tap the highlighted area to move on. It goes through three steps:
- Use the dial: the dial is where you choose the time for all your cities at once.
- Manage your city: tap a city in the list to highlight it on the dial, or swipe it to the right to remove it.
- Precise minutes: the tutorial opens Settings to show the buttons that make the time snap to steps of 15, 30 or 60 minutes, or move freely with ✕.
After the last step the app goes back to the home screen.
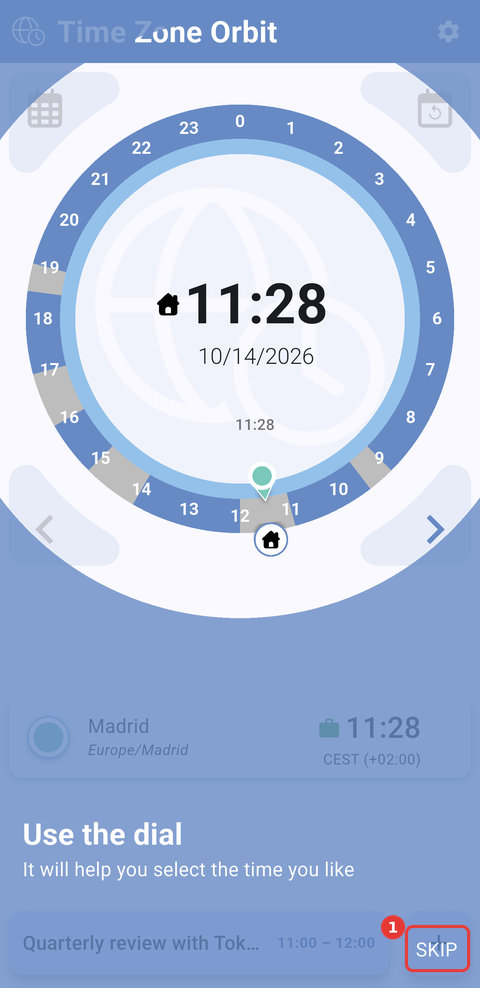
The first step of the tutorial, which highlights the Orbit dial: (1) SKIP closes the tutorial.
Note: Tap SKIP, in the bottom-right corner, to close the tutorial at any step. To see it again, go to Settings → Sync and time zone → Watch tutorial.
Part of the Time Zone Orbit manual — see also 1. Introduction, 2. What's New, 3. Scope, 5.1 Home screen, 5.2 The Orbit dial, 5.3 Managing cities, 5.4 City details and events, 5.5 Settings, 6. Troubleshooting.
Generated for Time Zone Orbit 1.2.0 on Android — 2026-10-14.