
Configuration
5.1 Plugin settings
All options below are grouped under Setup > General > Gapp eXtended (not a dedicated "Waypoint" page — Waypoint's settings share that tab with a few unrelated Gapp eXtended options, further up on the same screen).
| Setting | Description |
|---|---|
| API | Mandatory. Your Google API key. Route optimisation and all distance calculations depend on it. If it is missing, routes cannot be created and distance fields stay empty. |
| Task categories with waypoints | Which GLPI task categories generate a travel waypoint. |
| Task categories with vehicle waypoints | Same as above, for journeys made with a company vehicle. |
| Max duration | Safety limit for a running timer. A timer left open beyond this duration is stopped automatically, so a forgotten timer does not record an entire night as travel time. |
| Enable user geolocation | General user tracking, independent of routes. Leave this disabled if you use Waypoint routes — the two tracking modes are not compatible and will interfere with each other. |
| Billing includes return trip (from 1.7.0) |
No (default): only the outbound trip, base → ticket, is billed. This also halves the number of Google API calls. Yes: outbound and return distances and durations are added together. |
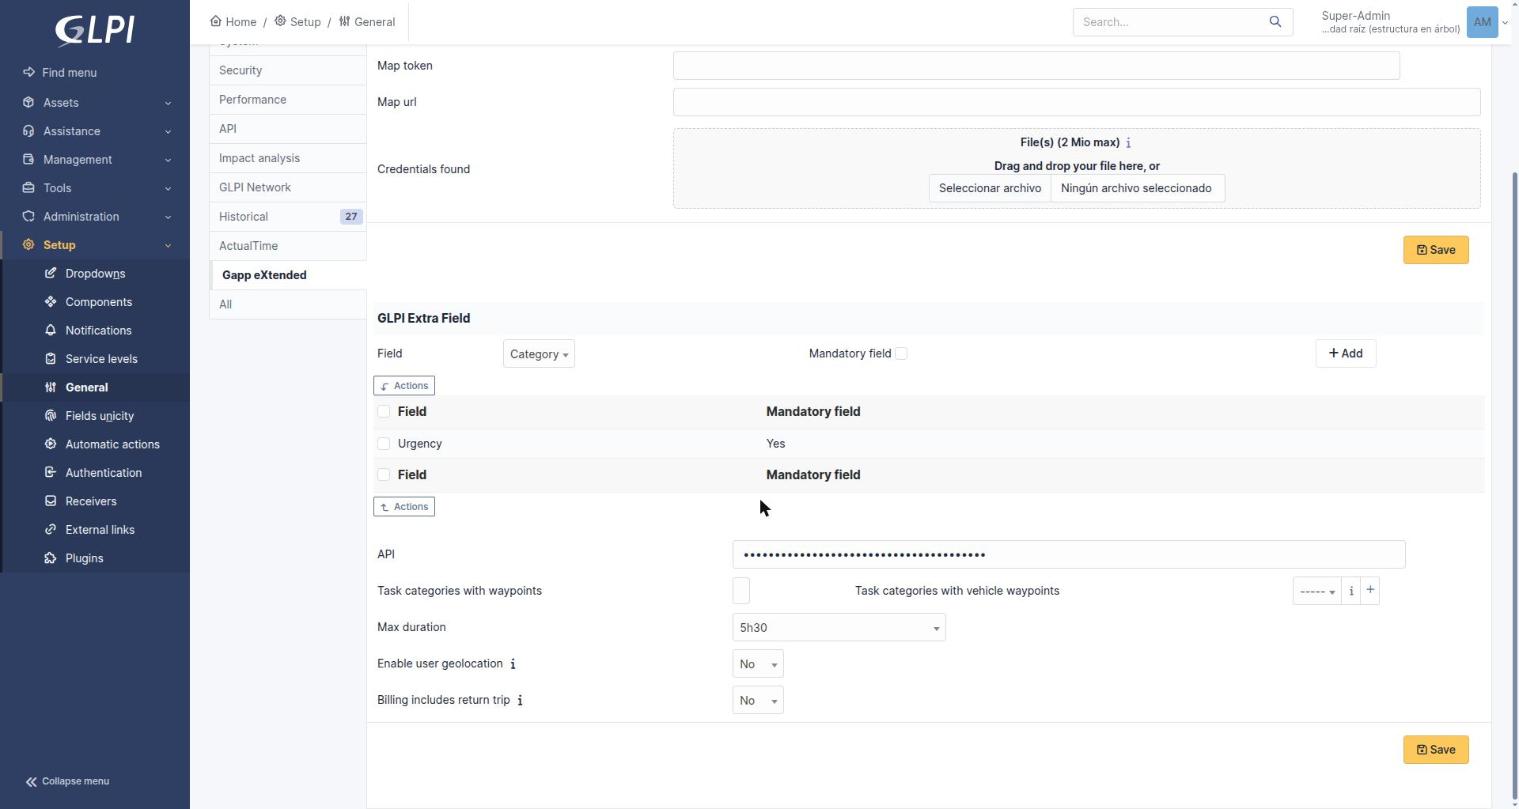
Setup > General > Gapp eXtended — every Waypoint setting from the table above, on the lower half of the same tab (API key field masked).
5.2 Create locations with coordinates
Define in GLPI the locations your technicians will visit, and give each one its latitude and longitude. This step is mandatory: a ticket whose location has no coordinates cannot be included in a route.
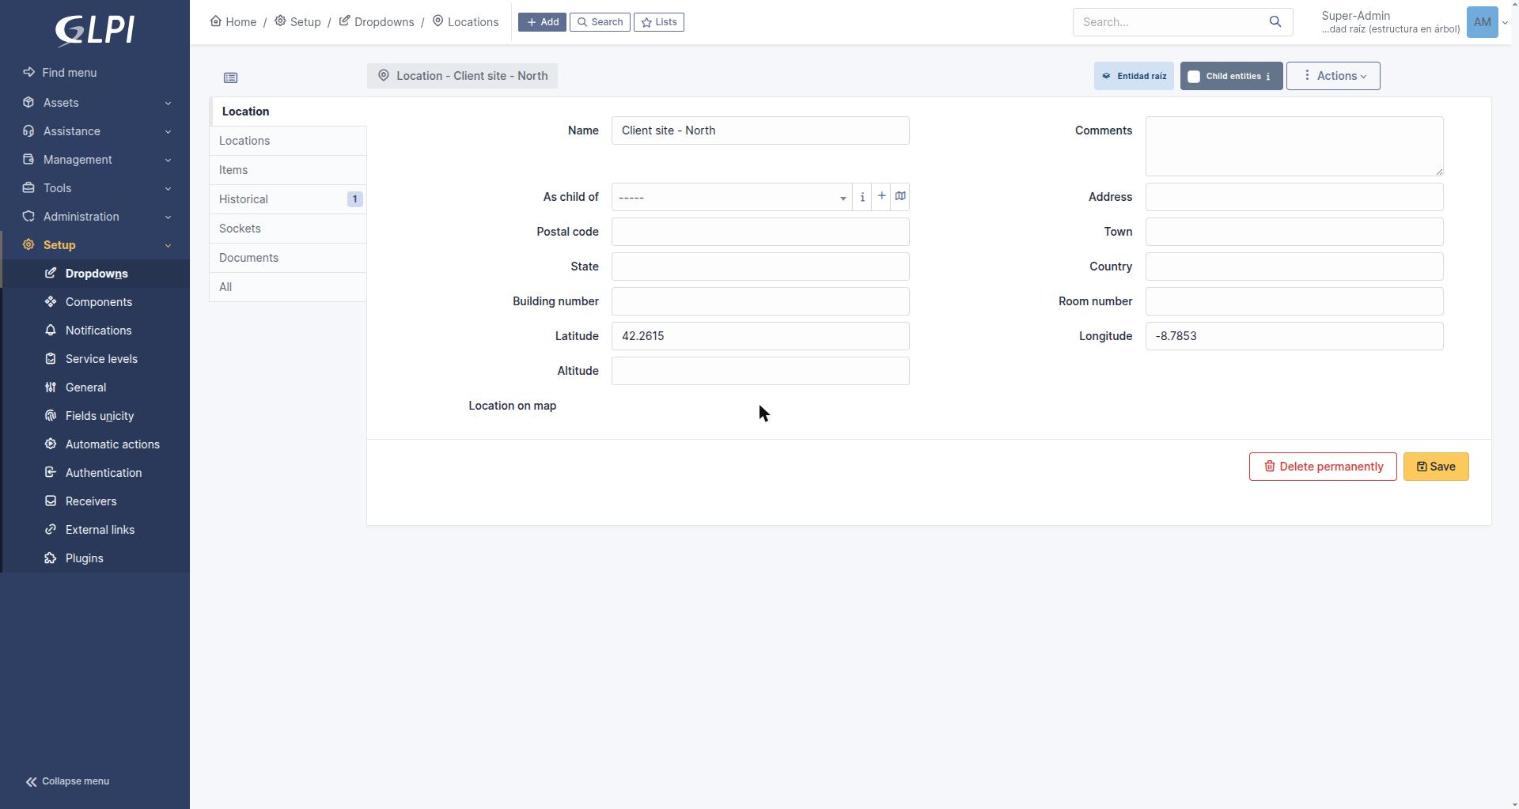
A GLPI Location form with the Latitude and Longitude fields filled in.
5.3 Configure profile permissions
Go to Administration > Profiles, choose a profile and open its Waypoint section. Assign rights according to each role's responsibilities.
| Right | What it allows | Typical role |
|---|---|---|
| View routes | Access the Routes administration area and its history. | Supervisor, manager |
| Link tickets to routes | Mark a ticket as eligible to be included in a route. | Dispatcher, technician |
| Export route data | Download the CSV export from the ticket list. | Manager, billing |
| View live routes | See routes currently in progress in real time. | Supervisor, dispatcher |
The Geolocation section has its own separate right, provided by the gappextended plugin. Grant it to the profiles that need to see technician positions; without it, the Geolocation tabs are not accessible.
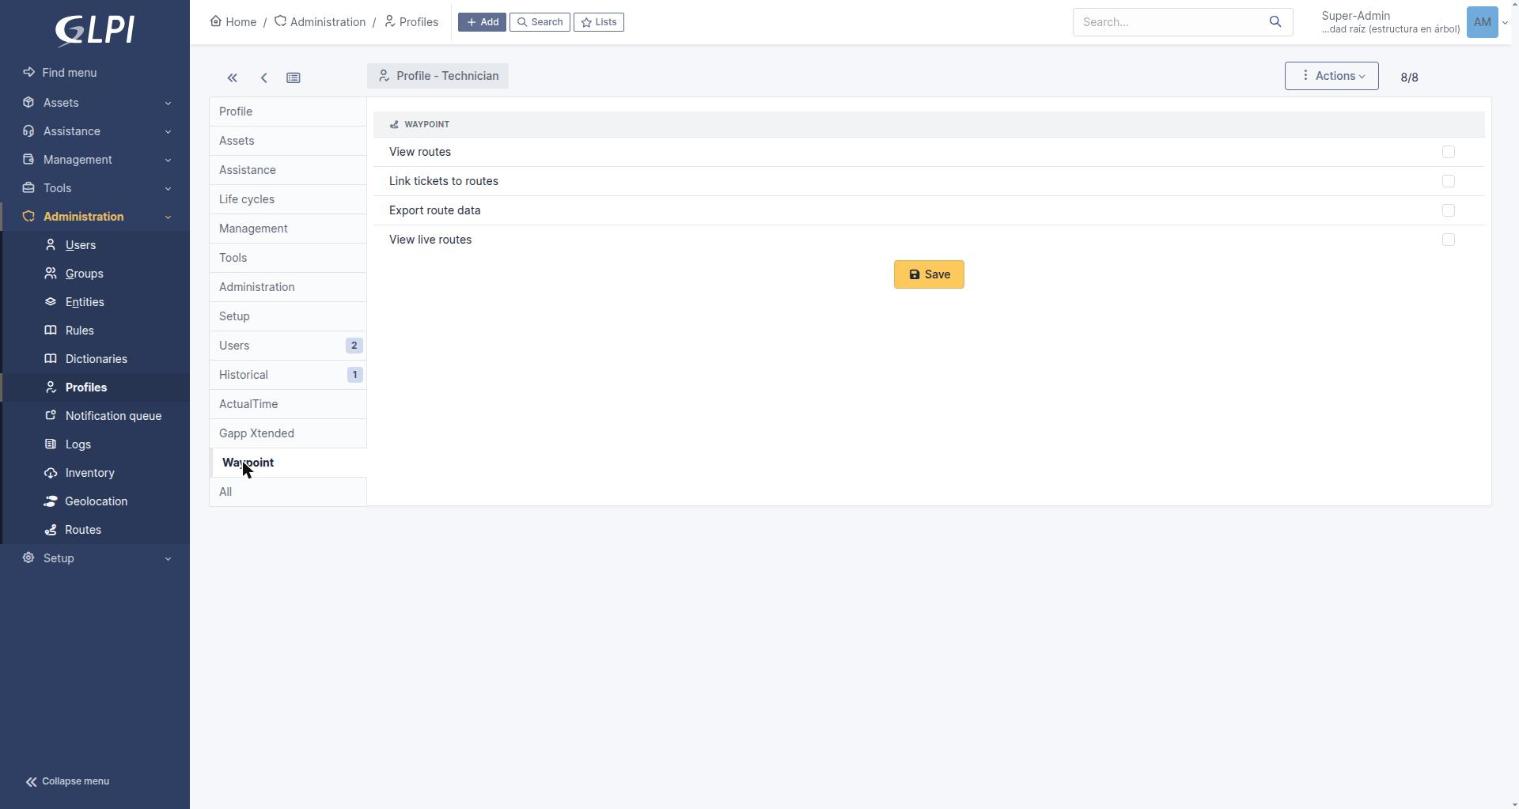
Administration > Profiles > Technician > Waypoint — the four rights matrix, all unchecked by default on a fresh profile.
5.4 Make tickets eligible for routes
For a ticket to appear in the app when building a route, two conditions must both be met:
- The ticket has the "Linking to route" option set to Yes on its form, and a location with coordinates.
- The ticket is assigned to the technician who is building the route.
If a ticket does not show up in the app's selection list, one of these two is almost always the reason.
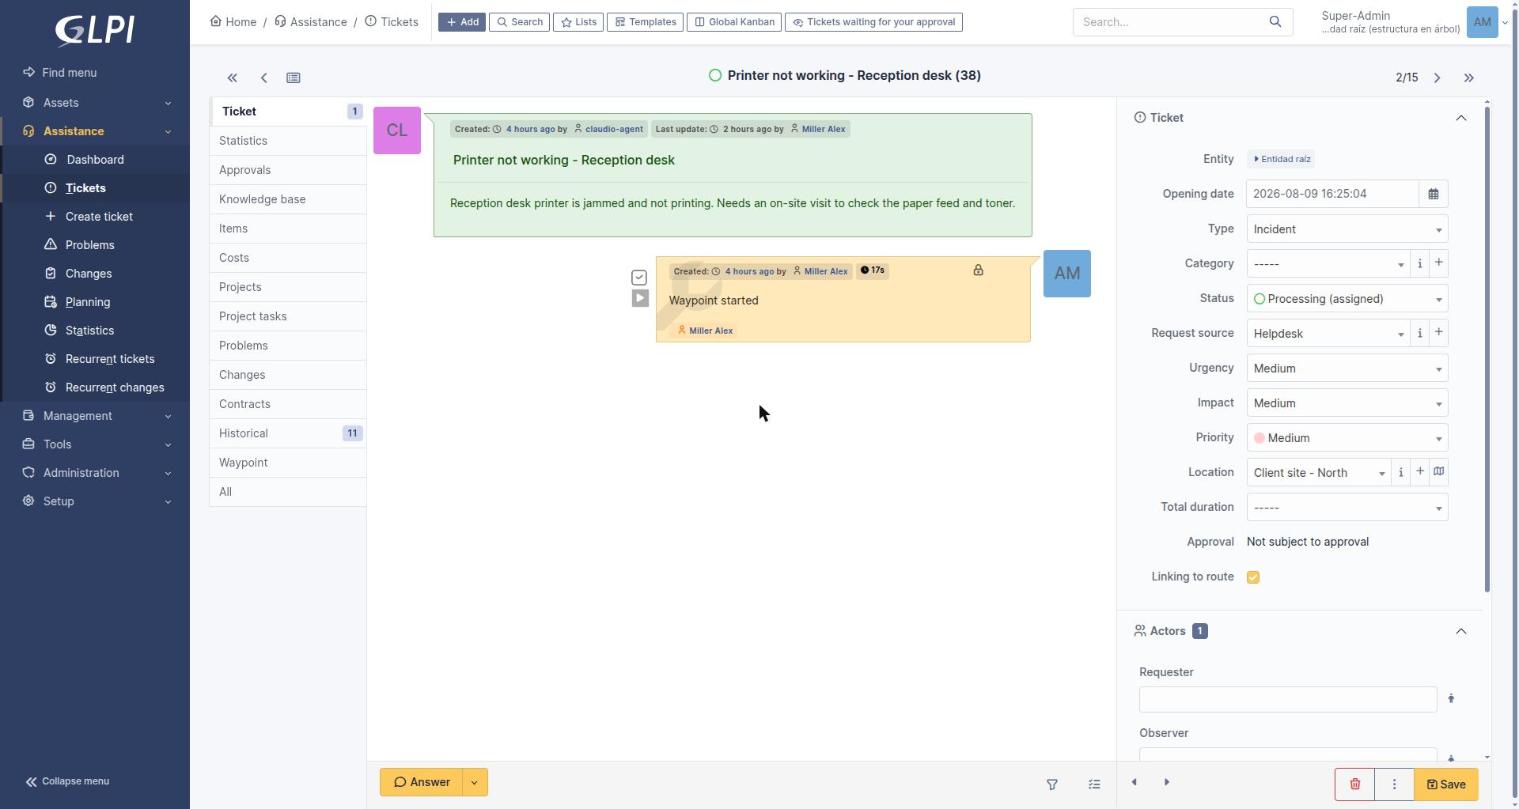
A ticket form with "Linking to route" set to Yes and a Location assigned (right-hand panel).