
4. Setup

4.1 Installation
Extract the plugin into GLPI's plugins directory so that plugins/stamp/setup.php exists, then install and activate Stamp from Setup > Plugins, the same as any other GLPI plugin. A new installation starts disabled: nothing appears on screen until an administrator turns Stamp on. Reinstalling keeps the saved settings, deactivating removes the display, and uninstalling deletes Stamp's settings.
4.2 Configuration
Open Setup > General and choose the Stamp tab (the Configure link of the plugin in Setup > Plugins opens it directly). Settings apply to the whole instance; there are no profile or entity filters.
The tab is organised in three groups, Environment, Display and Watermark. While Enable is off, every other field is greyed out and keeps its saved value.
Environment — what the stamp says and its colour:
- Enable — What: turns the banner and watermark on or off for everyone, keeping the other settings. Where: the first switch in the Environment group. Example: switch it on once the other settings are right; switch it off to hide the stamp during a demo.
- Environment — What: the kind of environment this instance is. Choose Preproduction, Testing, Development or Custom; the three presets show their own translated name in a fixed colour (green, orange or red). Where: the row of choices under Enable. Example: select Testing on a test instance to get an orange stamp reading "Testing".
- Text — What: the label shown when Custom is chosen, up to 500 characters, displayed exactly as typed (HTML-like text is shown literally). The "?" tooltip next to it lists the placeholders. Where: appears only when Custom is selected; switching to a preset keeps the saved text. Example:
Training {entity} - {username}. - Stamp color — What: the colour of the banner and watermark for Custom. Where: appears only when Custom is selected, below Text; switching to a preset keeps the saved colour. Example: a purple
#6f42c1for a training instance.
Display — where and how the stamp is shown:
Watermark — only used when Type includes the watermark:
- Opacity (%) — What: how see-through the watermark is, from 5 to 100. Where: first field of the Watermark group. Example: 20 for a discreet watermark.
- Font size (px) — What: the size of the watermark lettering, from 20 to 120. Where: Watermark group. Example: 60.
- Rotation (degrees) — What: the angle of the watermark text, from -90 to 90 (90 or -90 gives vertical text). Where: Watermark group. Example: 30.
- Position — What: where the watermark sits on the page: Center, Top left, Top right, Bottom left or Bottom right. Where: Watermark group. Example: Bottom right keeps it away from page titles.
Click Save to apply the settings. On GLPI 12, GLPI may ask you to confirm your identity before saving; GLPI 11 does not.
Placeholders available in Text (they apply to Custom only and are replaced once, when each page is drawn):
| Placeholder | Value |
|---|---|
{entity} |
The current entity's complete name; empty on pages shown before sign-in |
{username} |
The signed-in user's login name; empty on pages shown before sign-in |
{url} |
The address of the instance (host, port if any and GLPI path, for example testing.example.com:8443/glpi), with no https://, page or query string |
{environment} |
The word "Custom" |
If the text ends up empty after replacement, the stamp reads "Custom". The presets use these fixed colours, following the common "traffic light" convention (the closer to production, the warmer the colour). Production is deliberately not a preset, so red stays available for Custom:
| Environment | Colour |
|---|---|
| Development | Green #48c063 |
| Testing | Orange #ffa500 |
| Preproduction | Red #d9302c |
| Custom | The colour you choose |
4.2.1 Automatic actions
None.
4.3 Permissions
Stamp adds no rights of its own to the profile screen. Two groups of people are involved:
- Everyone who signs in sees the stamp, whatever their profile or entity, including Self-Service users. Visitors who are not signed in see it on the login and password pages only while Display on login page is on.
- Changing the settings needs GLPI's own right to update the general setup (in Administration > Profiles, the General setup right on the Setup tab, with Update). Users without it do not see the Stamp tab, and a direct request to save is refused.
4.4 Configuring Stamp
Stamp has a single settings tab. It decides what the stamp says, what colour it is, whether it is a banner, a watermark or both, and whether visitors see it before they sign in. Settings apply to the whole instance and everyone sees the result.
4.4.1 Open the Stamp settings
Go to Setup > General and choose the Stamp tab. The Configure link of the plugin in Setup > Plugins opens the same tab. You need the right to update GLPI's general setup; without it the tab is not shown. A new installation starts with Stamp turned off, so nothing is displayed yet.
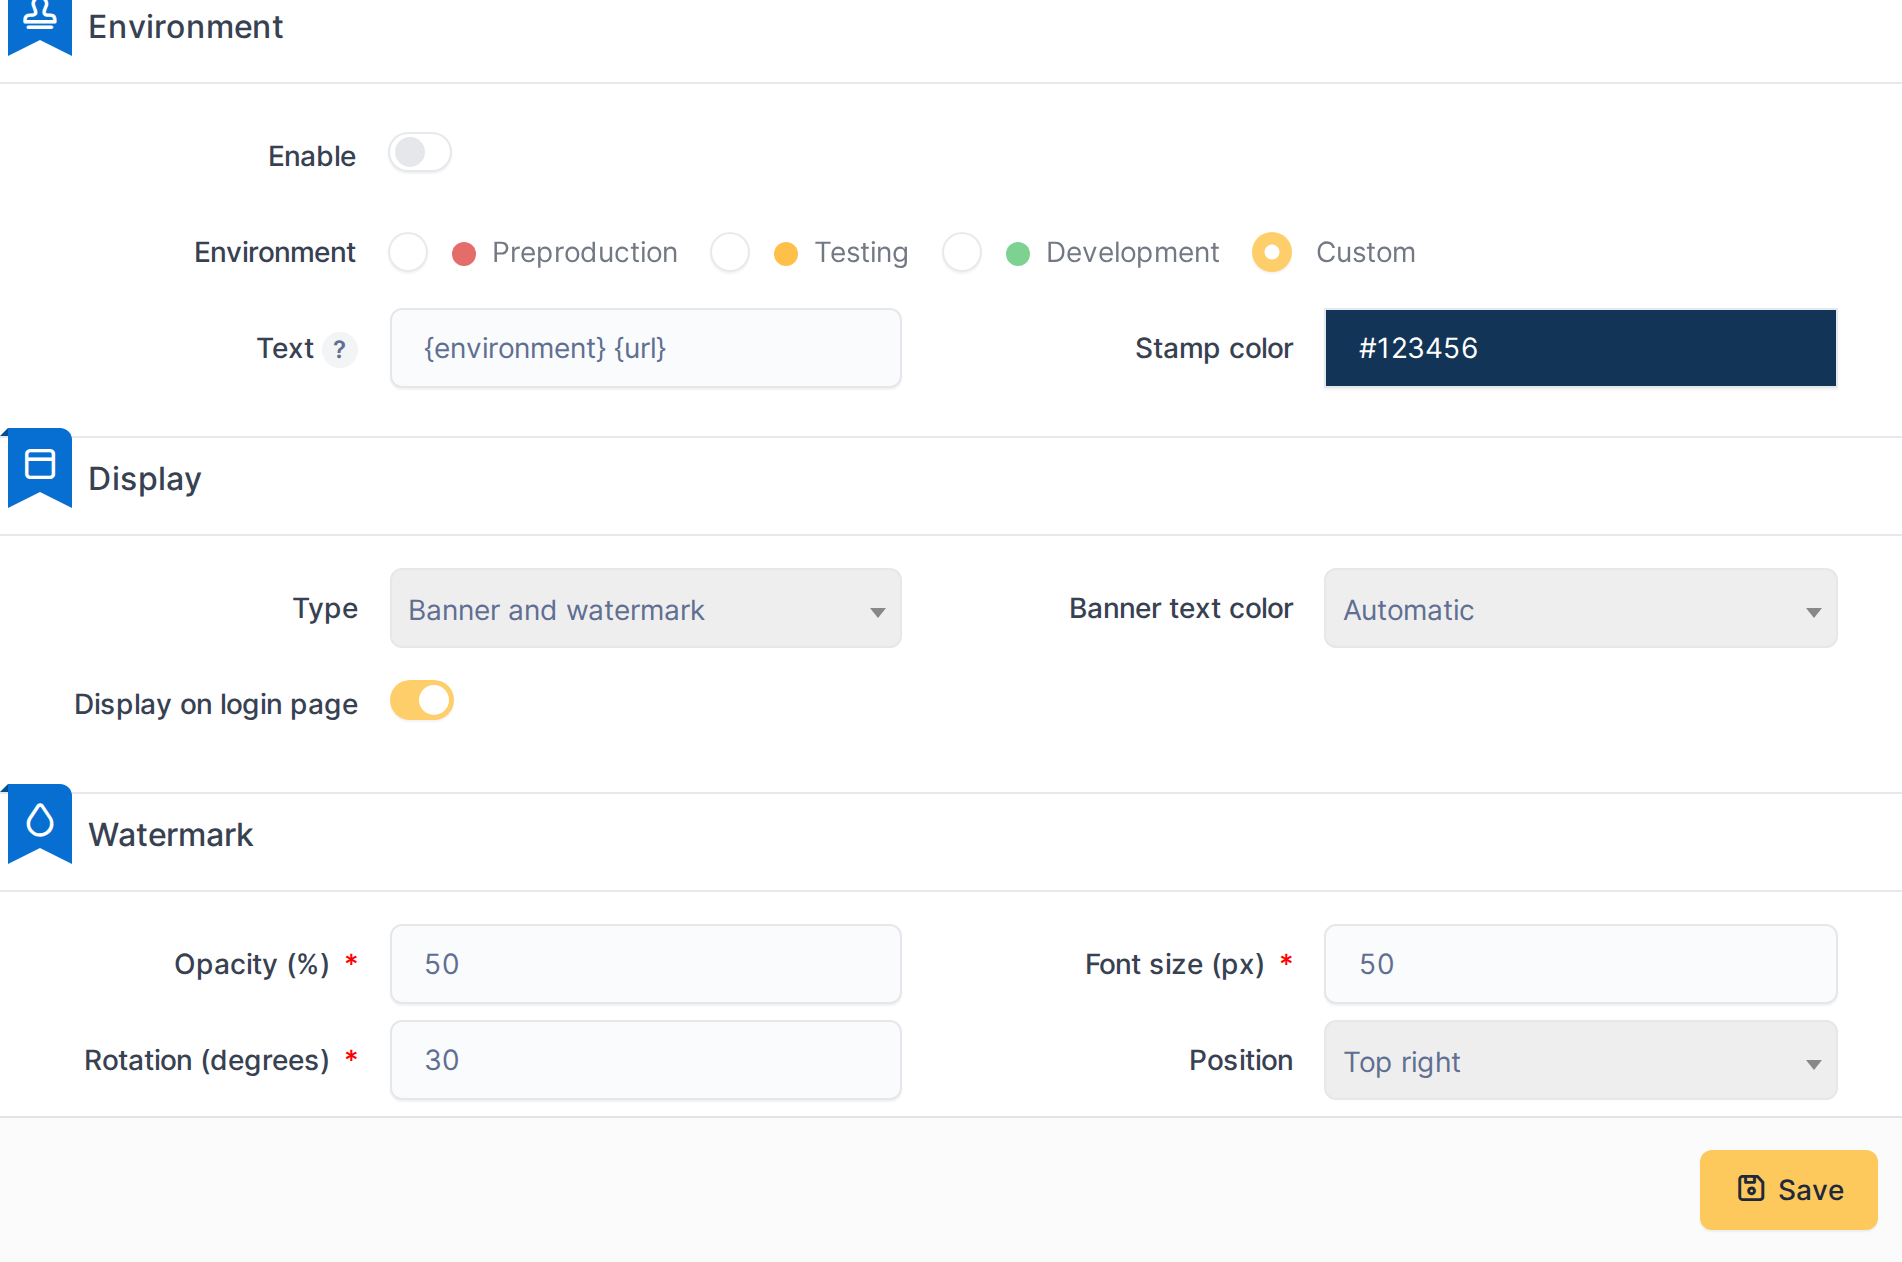
The Stamp tab under Setup > General, as installed
4.4.2 Choose the environment
Switch Enable on, then choose what kind of environment this instance is.
- Preproduction, Testing and Development use a fixed colour (red, orange and green) so every Stamp installation signals the same environment the same way.
- Custom lets you write your own Text and pick your own Stamp color. These two fields only appear when Custom is selected.
The ? next to Text lists the placeholders you can use in it, such as {entity} or {username}.

The environment choices; each preset shows its colour
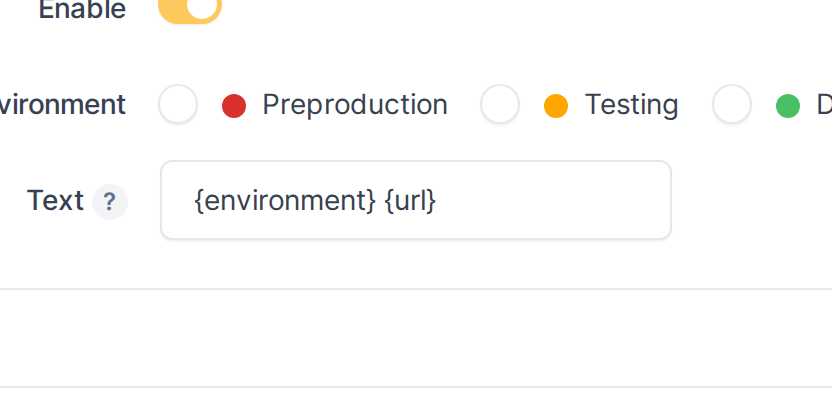
With Custom selected, the Text and Stamp color fields appear
4.4.3 Choose what is shown
The Display group controls how the stamp looks on every page.
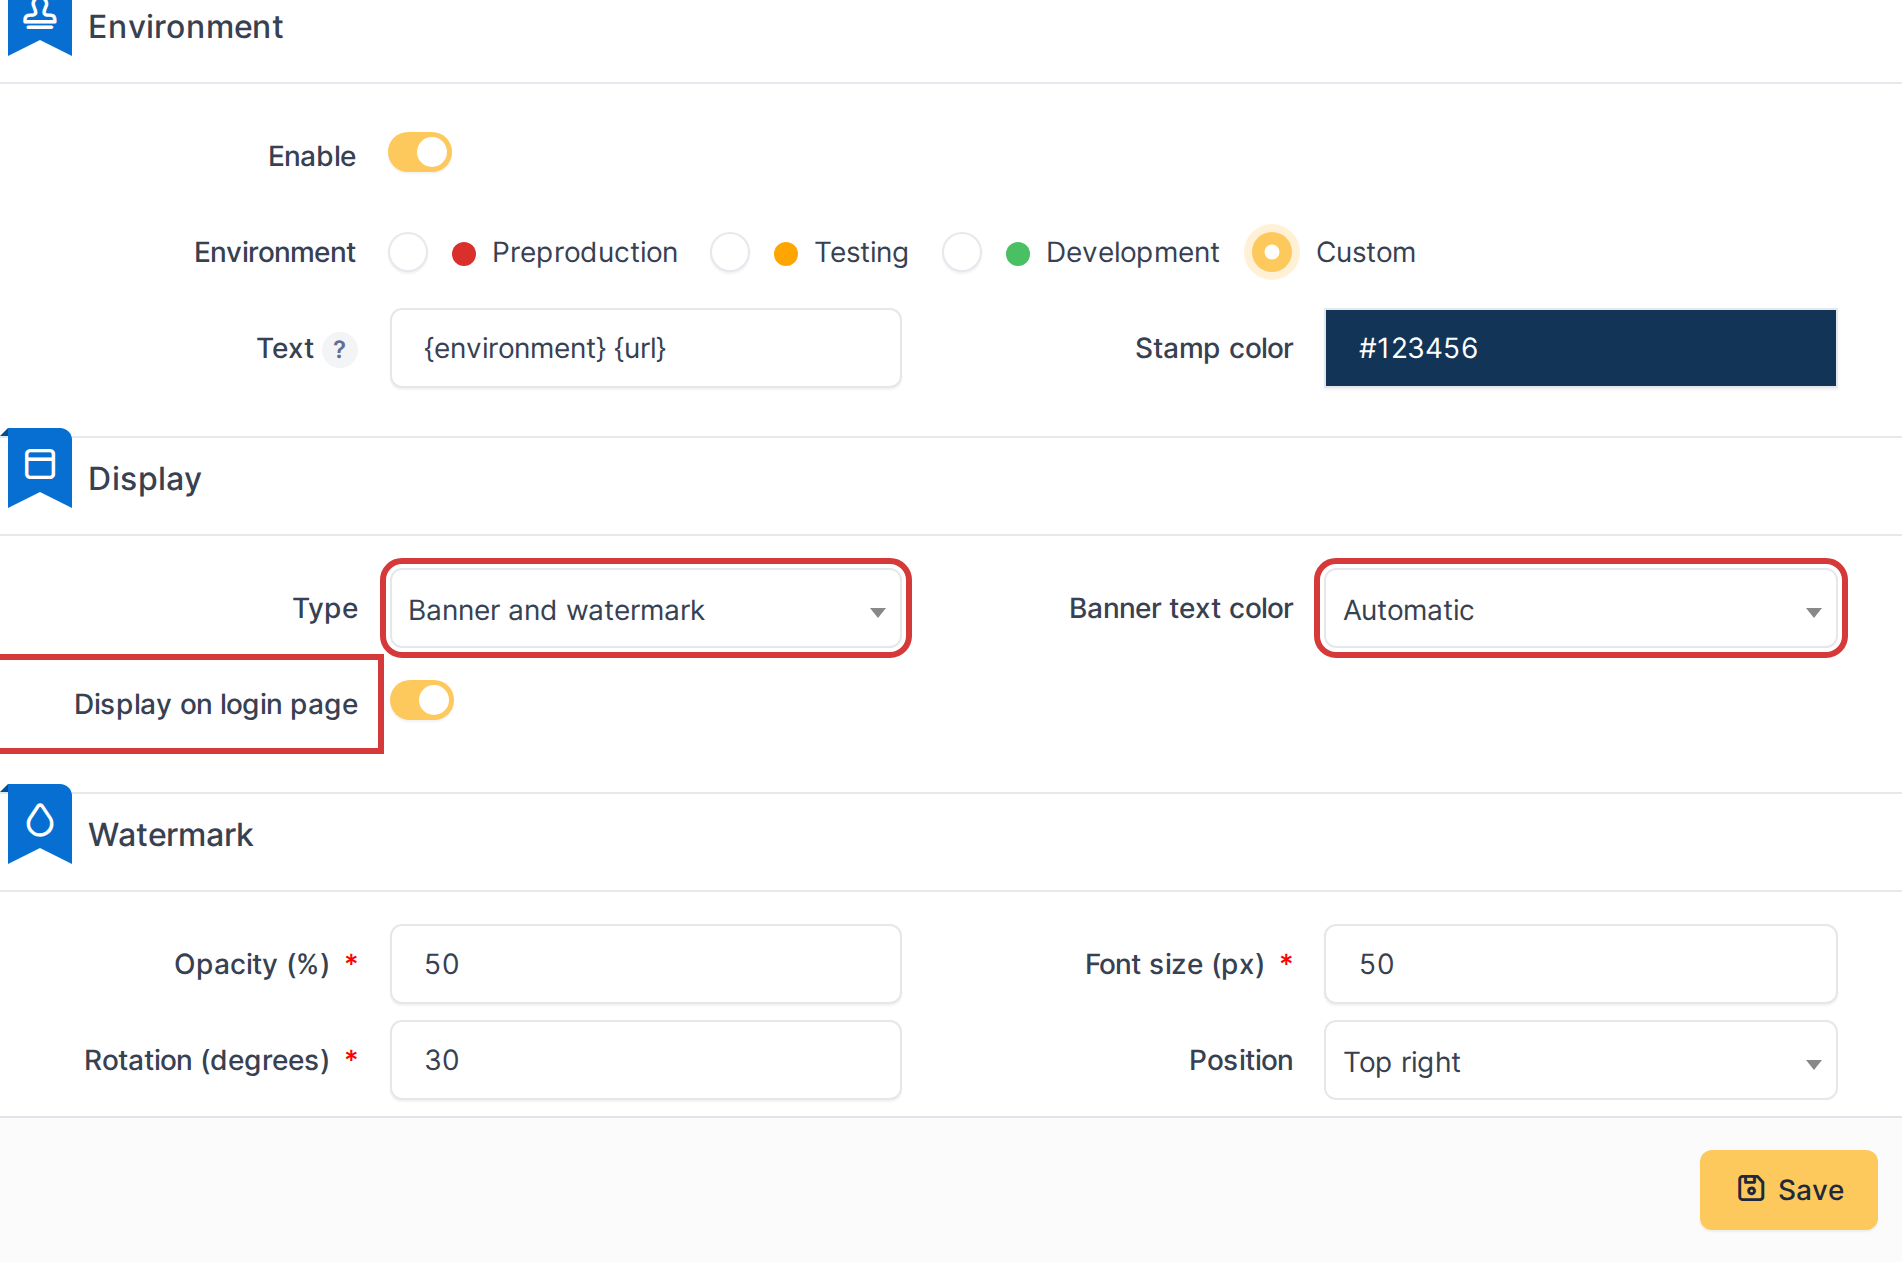
The Display group: Type, Banner text color and Display on login page
4.4.4 Adjust the watermark
These fields only matter when the Type includes the watermark.
- Opacity (%) — how faint the watermark is, from 5 to 100.
- Font size (px) — the size of its lettering, from 20 to 120.
- Rotation (degrees) — the angle of the text, from -90 to 90. Use 90 or -90 for vertical text.
- Position — Center, Top left, Top right, Bottom left or Bottom right.
The watermark never blocks clicks, so it is safe to place anywhere.
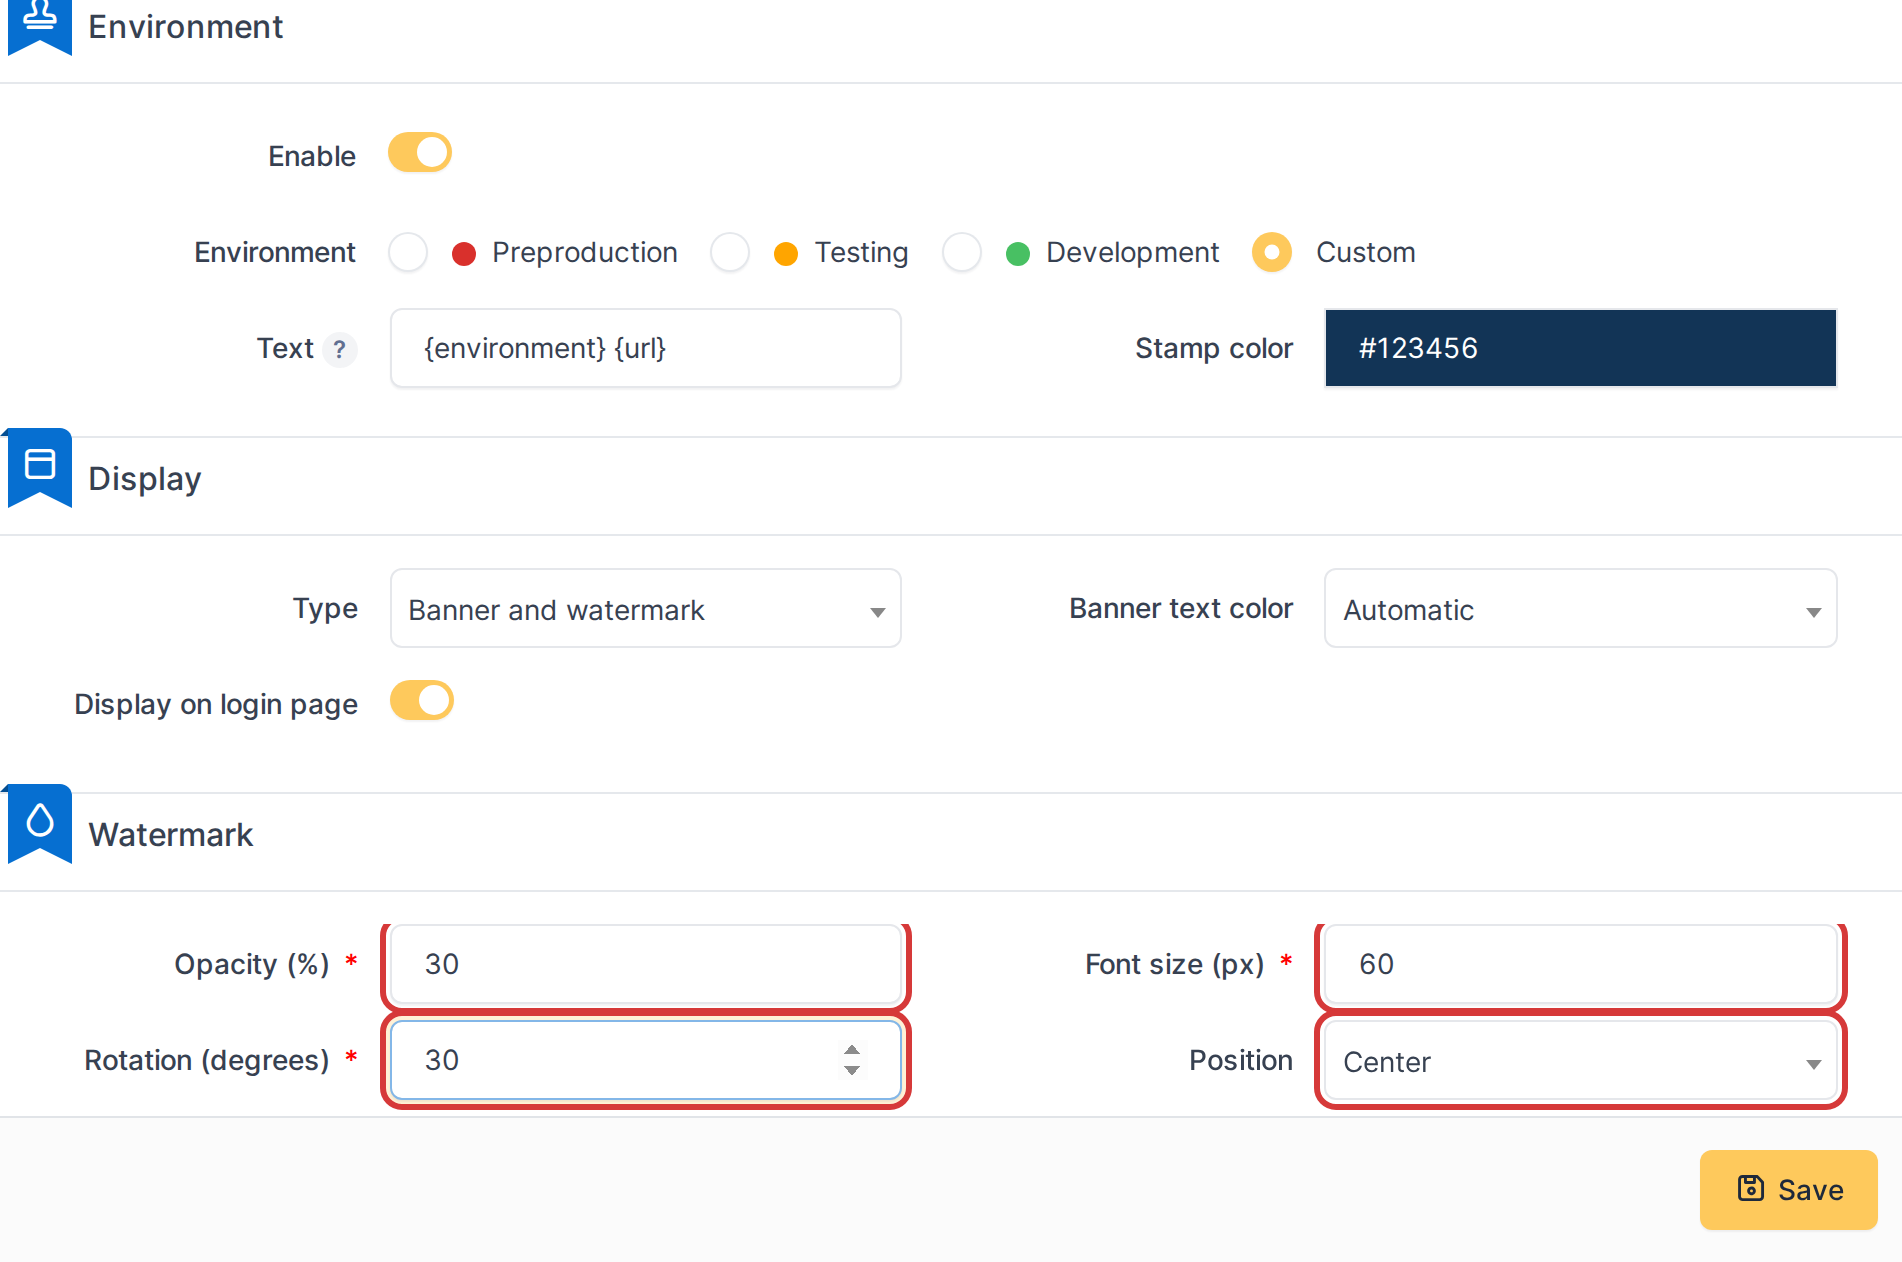
The Watermark group
4.4.5 Save the settings
Click Save. GLPI confirms with "Settings saved." and the stamp appears straight away on the next page. Switch Enable off at any time to hide the stamp; every other setting is greyed out and kept for when you switch it back on.
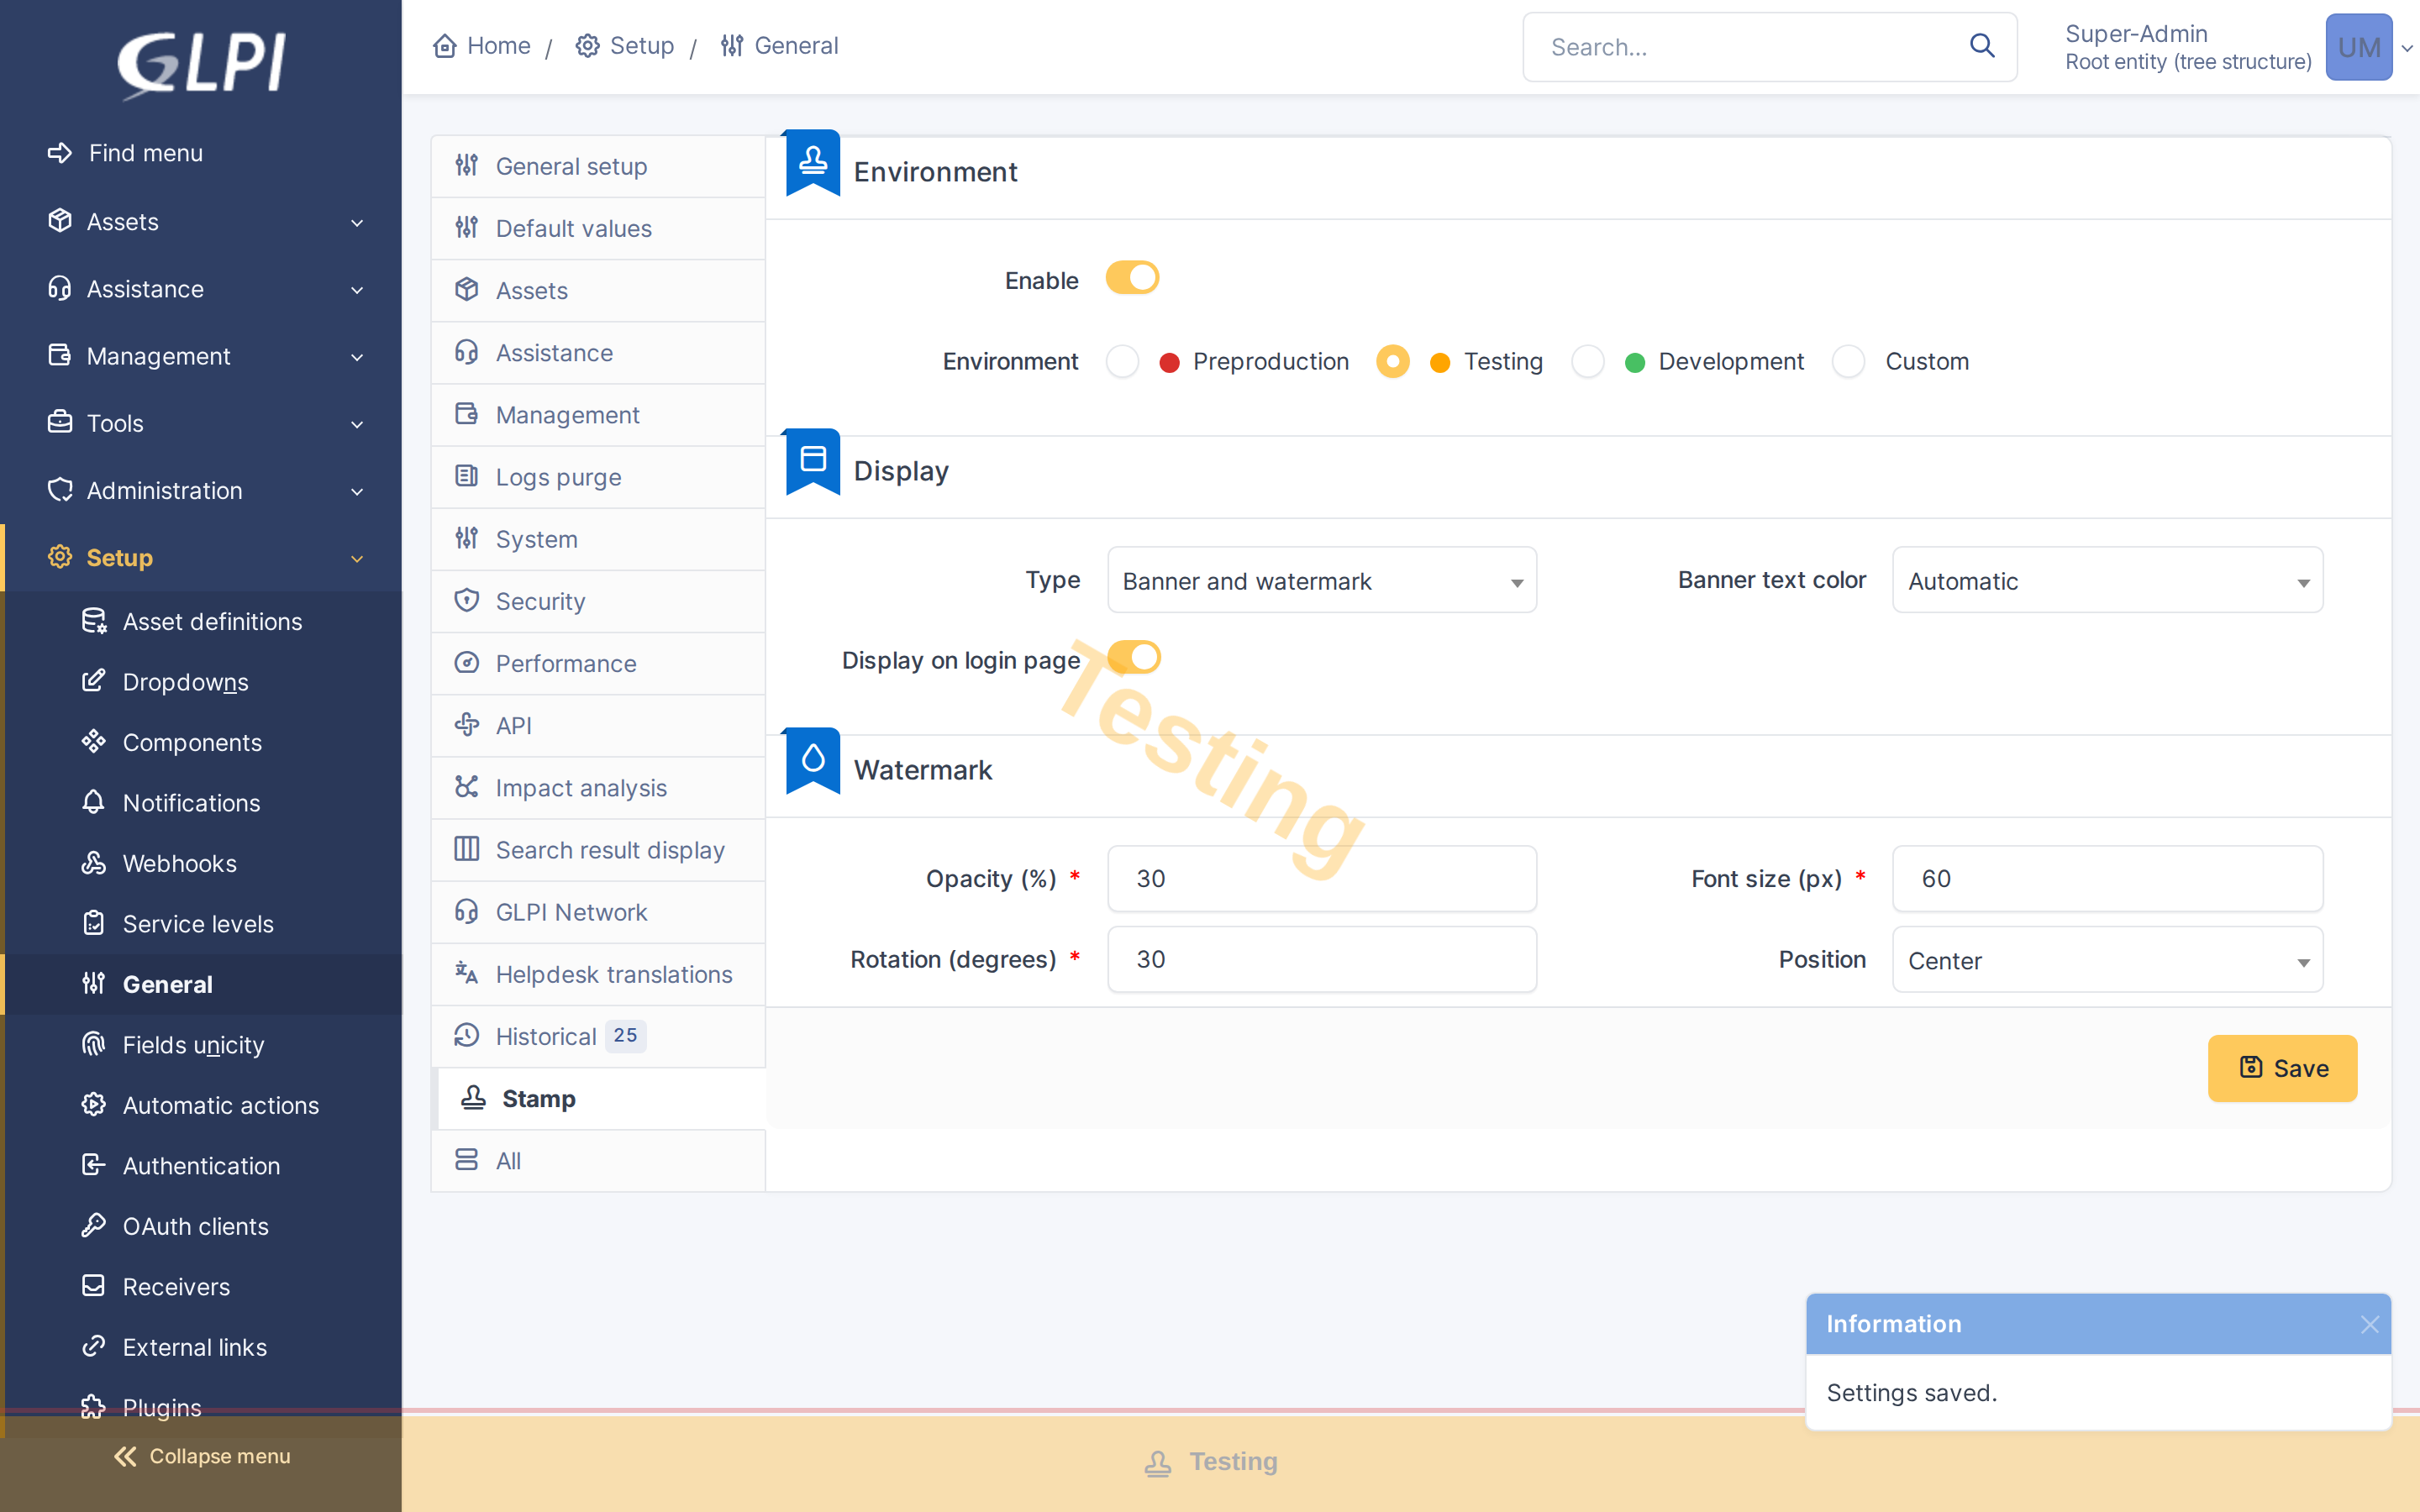
After saving, the banner appears across the bottom of the page
Note: On GLPI 12, GLPI may ask you to confirm your identity before it saves general settings. GLPI 11 does not ask.
Generated for Stamp 1.0.0-beta3 on GLPI 11.0.12 — 2026-11-10.