
5.1 Training Courses


Part of the talent manual — see also 1. Introduction, 2. What's New, 3. Scope, 4. Setup, 5.2 Training Certifications, 5.3 Skills, 6. Troubleshooting.
5.1.1 Configuring document headings
Talent has one general configuration screen: which document heading a Certification's and a Course's uploaded files are filed under.
5.1.1.1 Open the Talent configuration screen
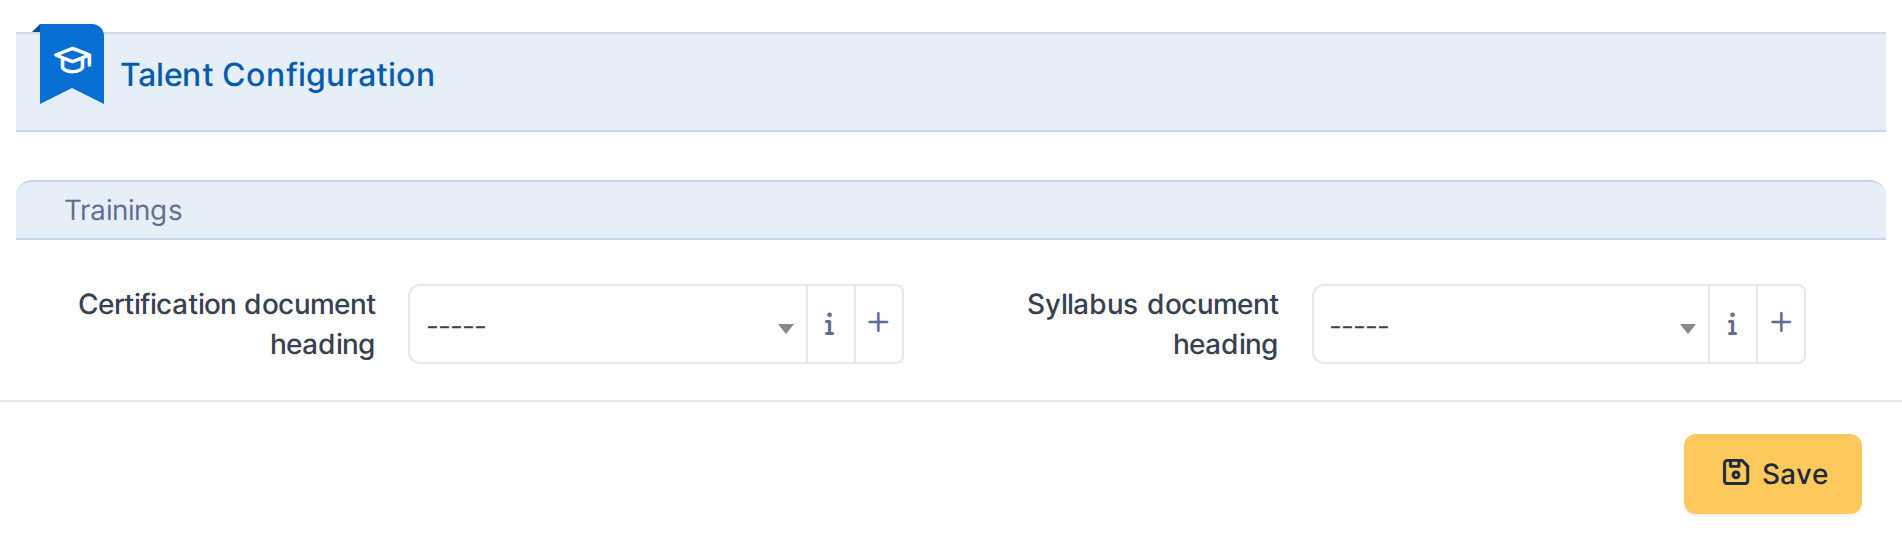
The Talent configuration screen, showing the document headings uploads are filed under.
Note: - Certification document heading — the document category a new User Certification's uploaded file is filed under.
- Syllabus document heading — the same, for a Course's uploaded syllabus. Both are optional; leaving one empty files uploads without a heading rather than blocking the upload.
5.1.2 Enabling effectiveness on a course
Effectiveness evaluation (see 5.1.4) is not a global setting — it is switched on per course, the same place a course's name and supplier are set.
5.1.2.1 Create a course with effectiveness enabled
On a course's form, tick Enable effectiveness evaluation to reveal three extra fields:
- Evaluation responsible — who is expected to carry out the effectiveness evaluation for editions of this course. Optional; left empty, any user with the right can still evaluate.
- Evaluation method — Questionnaire or Direct observation, recorded for reference only; it does not change how the evaluation form behaves.
- Evaluation delay (months) — how many months after an edition ends its evaluation window stays open, from 1 to 12. Required once effectiveness is enabled: a course with effectiveness on but no delay would have no evaluation window at all, so nothing could ever be evaluated — GLPI rejects saving that combination.


In this example: effectiveness is enabled with a 3-month evaluation window, using direct observation, with Jane Smith as the evaluation responsible.
5.1.2.2 Save the course
Click Add to create the course. From now on, every edition scheduled under it opens an Effectiveness evaluations tab once completed.
5.1.3 Granting Talent permissions
Talent rights are granted per profile, one row per itemtype, alongside every other plugin's rights on the same Profile form.
5.1.3.1 Open a profile's Talent rights
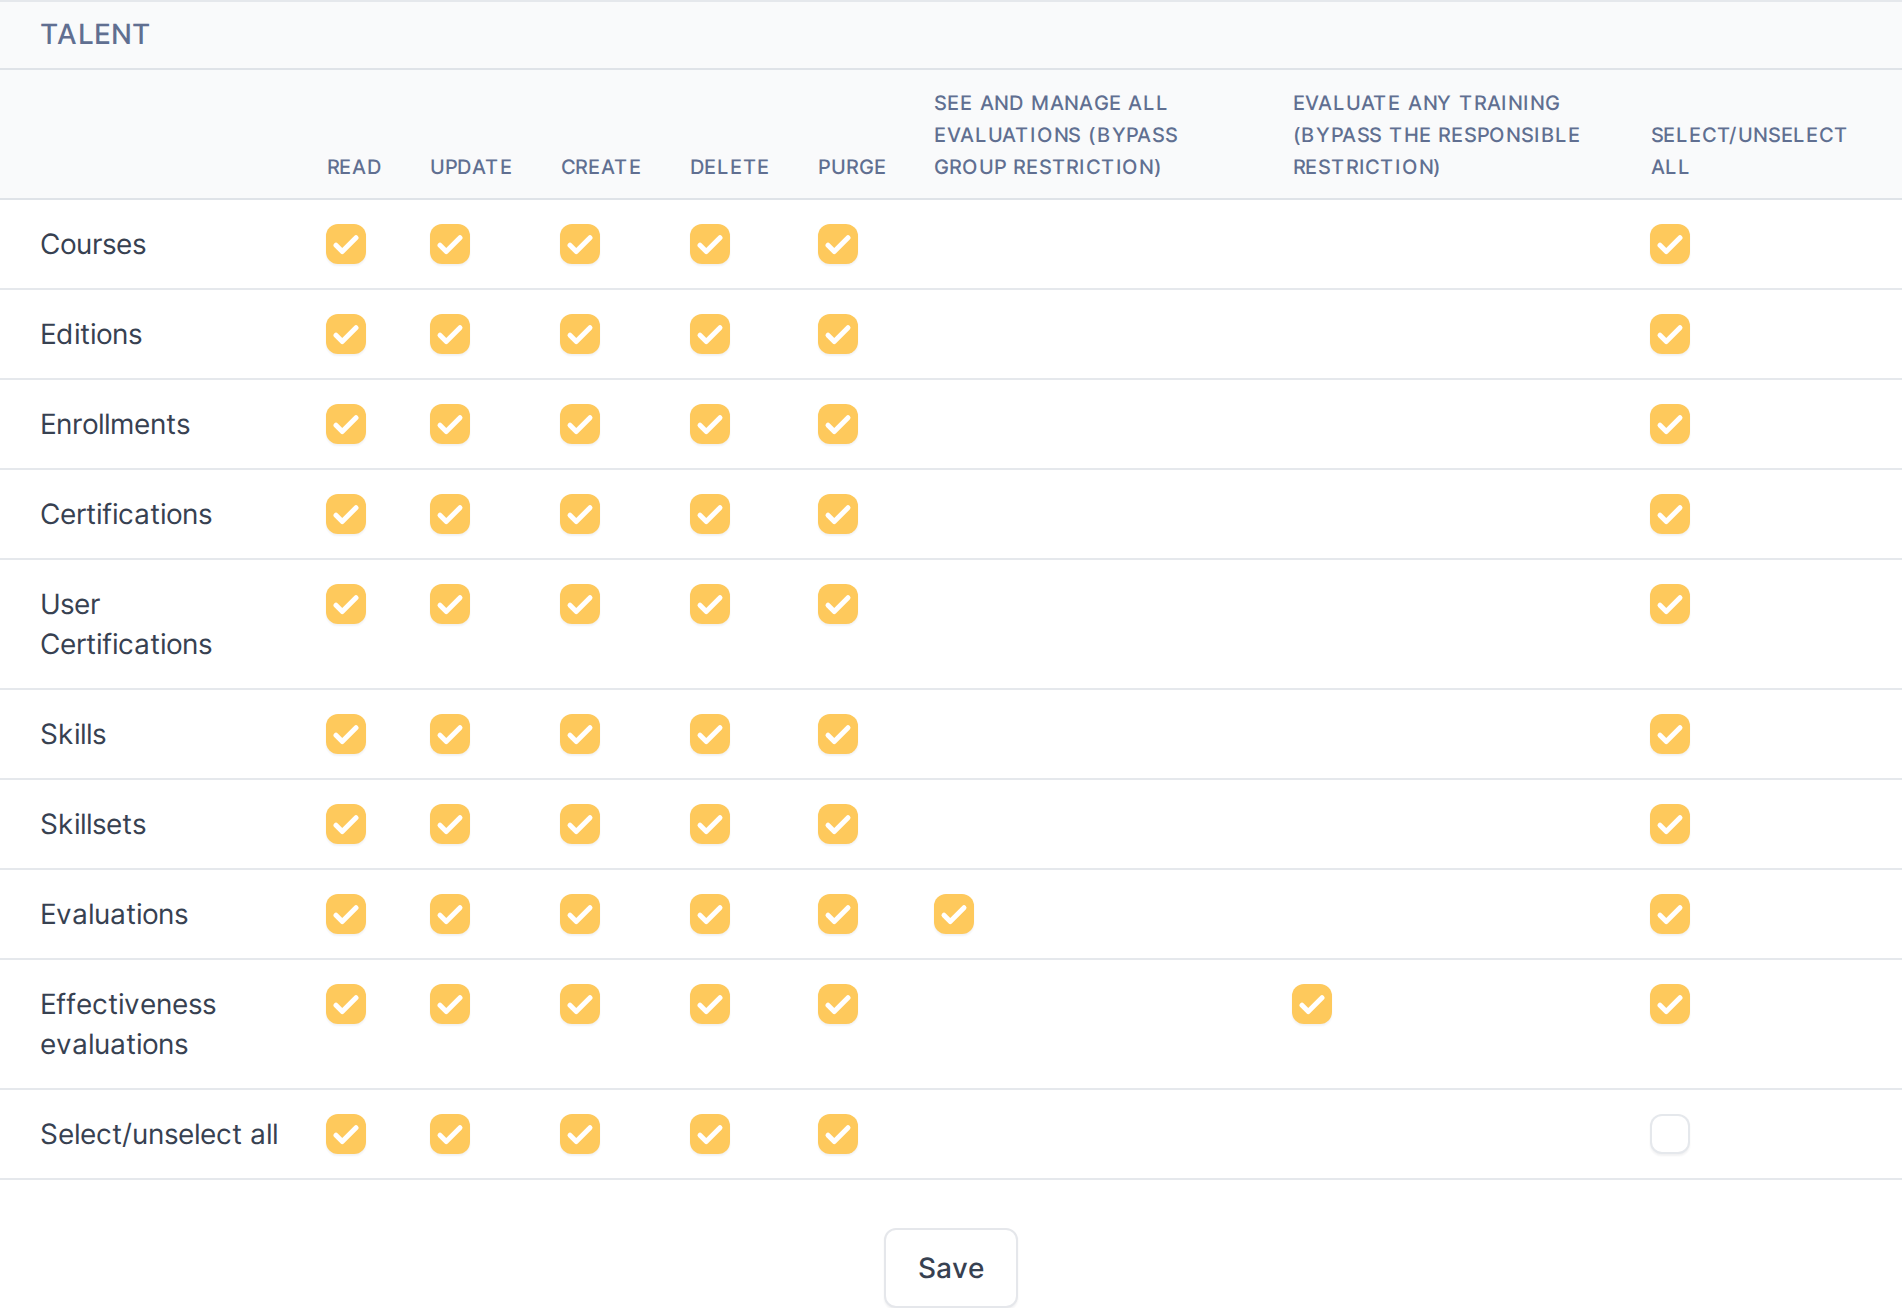
The Talent rights matrix: one row per itemtype, with the standard Read/Update/Create/Delete/Purge columns.
Note: A profile only sees the Talent menu, and only the itemtypes it has at least Read on. Evaluations and Effectiveness evaluations carry one extra option beyond the standard rights — see 5.1.4 and 5.3.3 — letting a profile holding it evaluate any user, not just the members of a group it manages.
5.1.4 Creating a course
A course is the reusable template for a training subject — its name, supplier, reference code and default duration. Courses do not have dates or attendees of their own; those live on the editions scheduled under a course.
5.1.4.1 Open the course list


The course list, scoped to the current entity.
5.1.4.2 Start a new course
Click Add to open a blank course form.
5.1.4.3 Fill in the course details
- Name and Reference code — the course's title and a short internal identifier you choose, used to tell similar courses apart in lists and reports. Both required.
- Supplier — the organization or trainer delivering it. Required.
- Course type — a category you define (e.g. "Professional Licenses", "Compliance"). Required.
- Duration (hours) — the course's expected length. Informational only; it does not block edition scheduling.
- Scope — optionally restricts which GLPI groups the course is intended for. Leaving it empty means it applies to everyone.
- Active — controls whether the course can be selected when scheduling a new edition. An inactive course stays visible in lists and reports but drops out of the edition-creation dropdown.
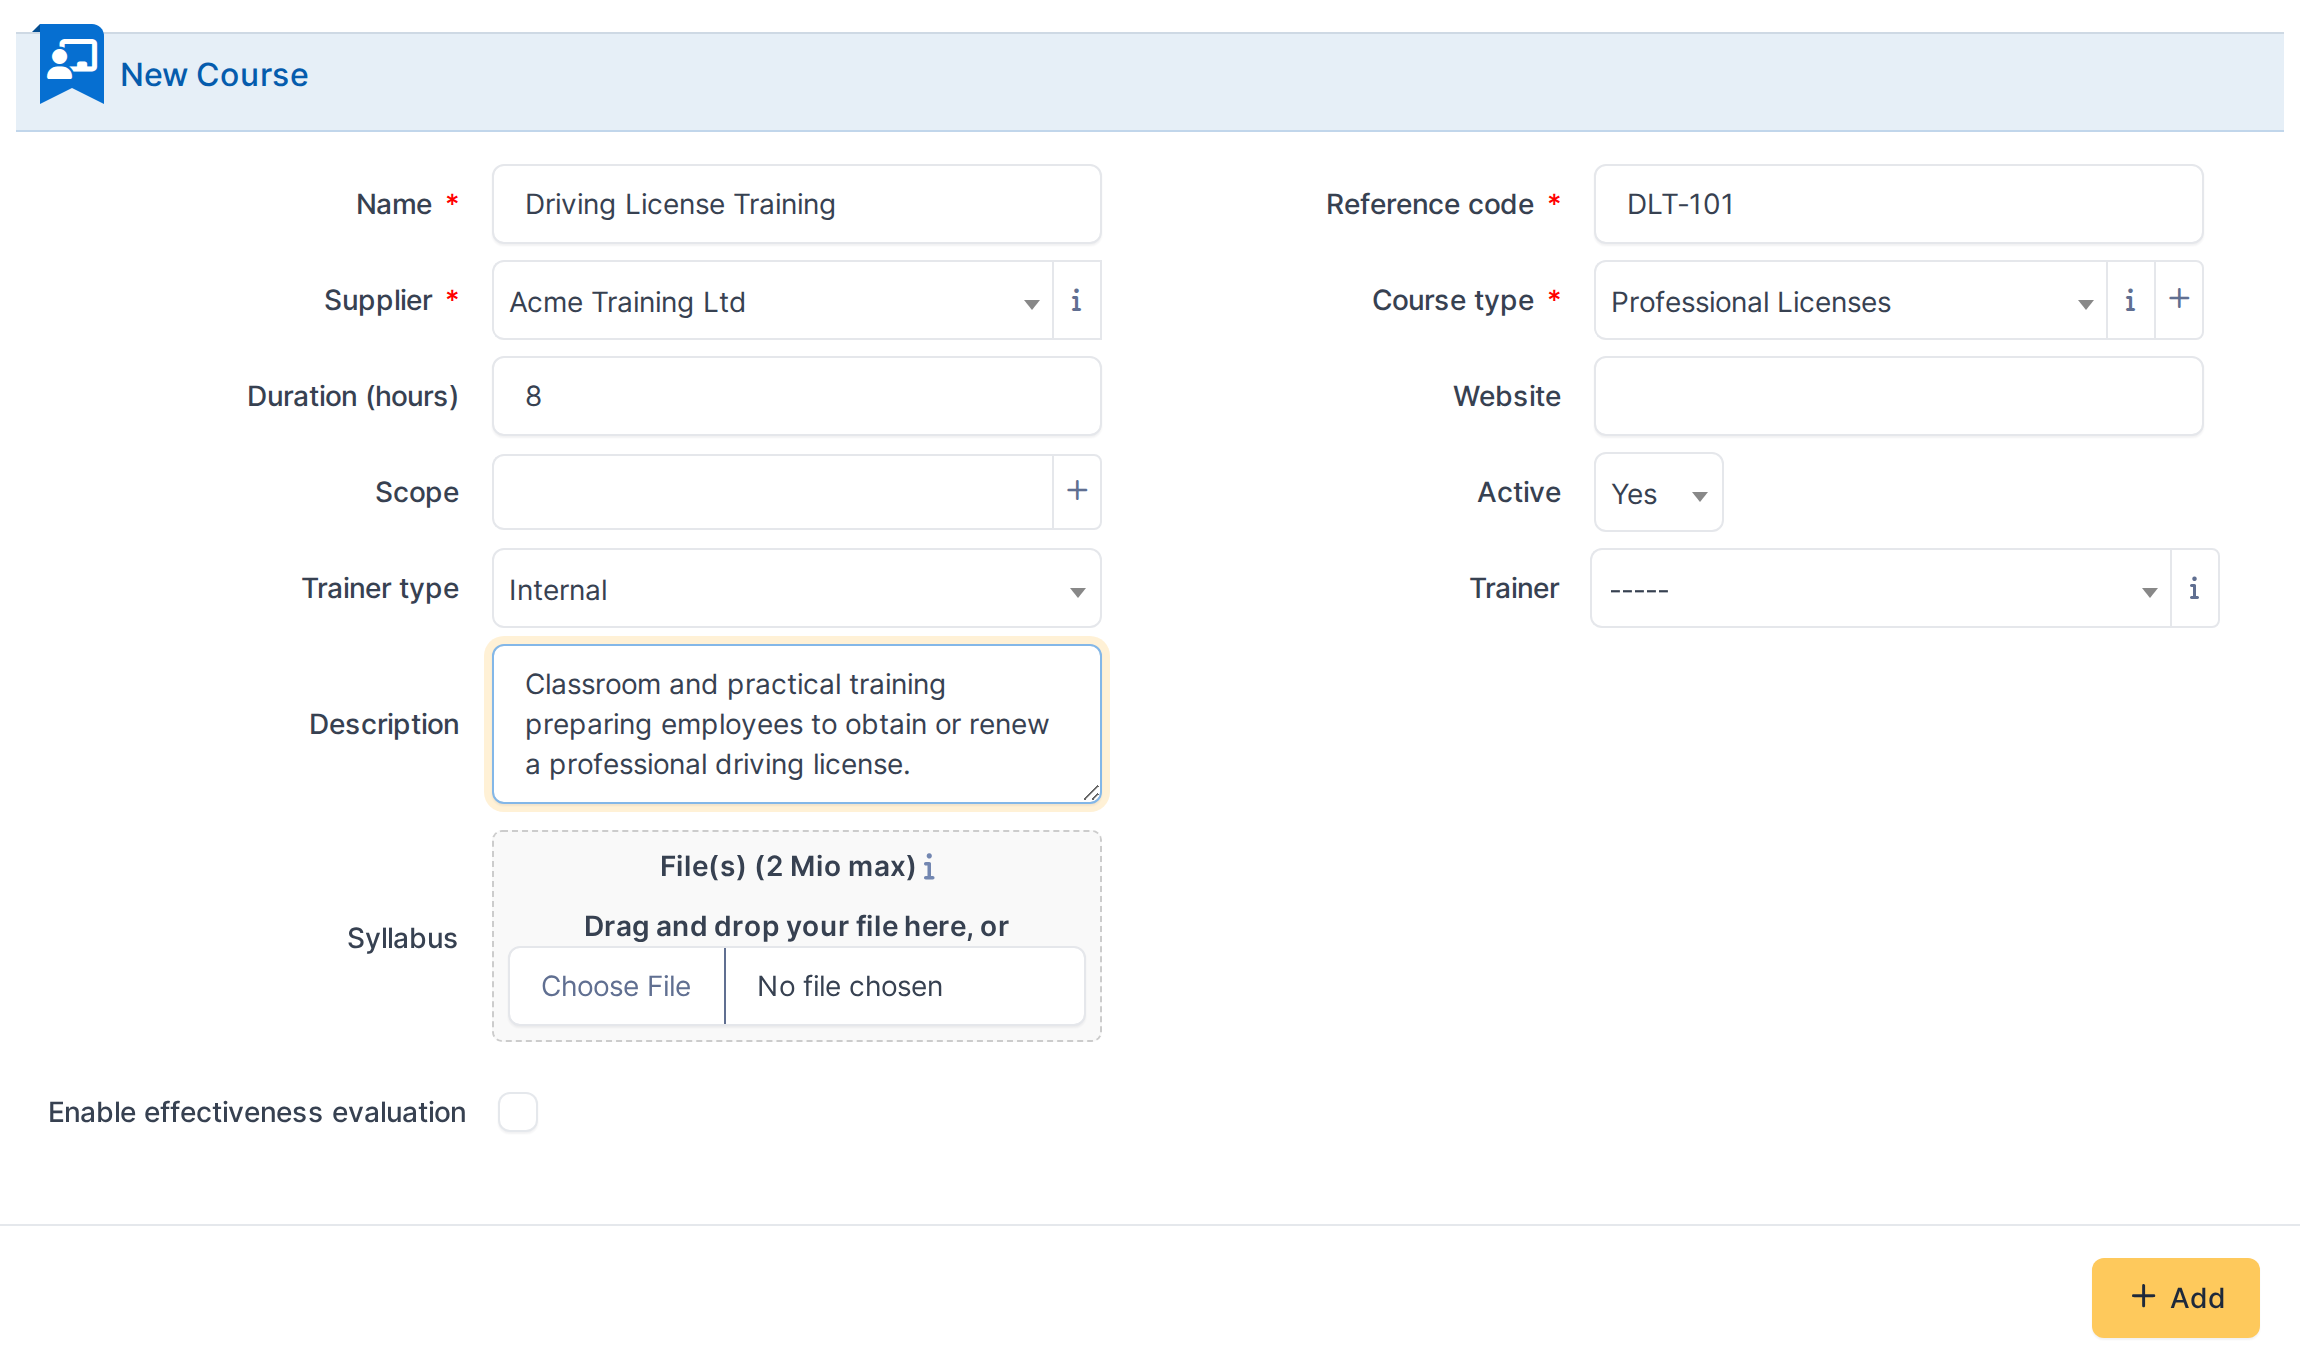
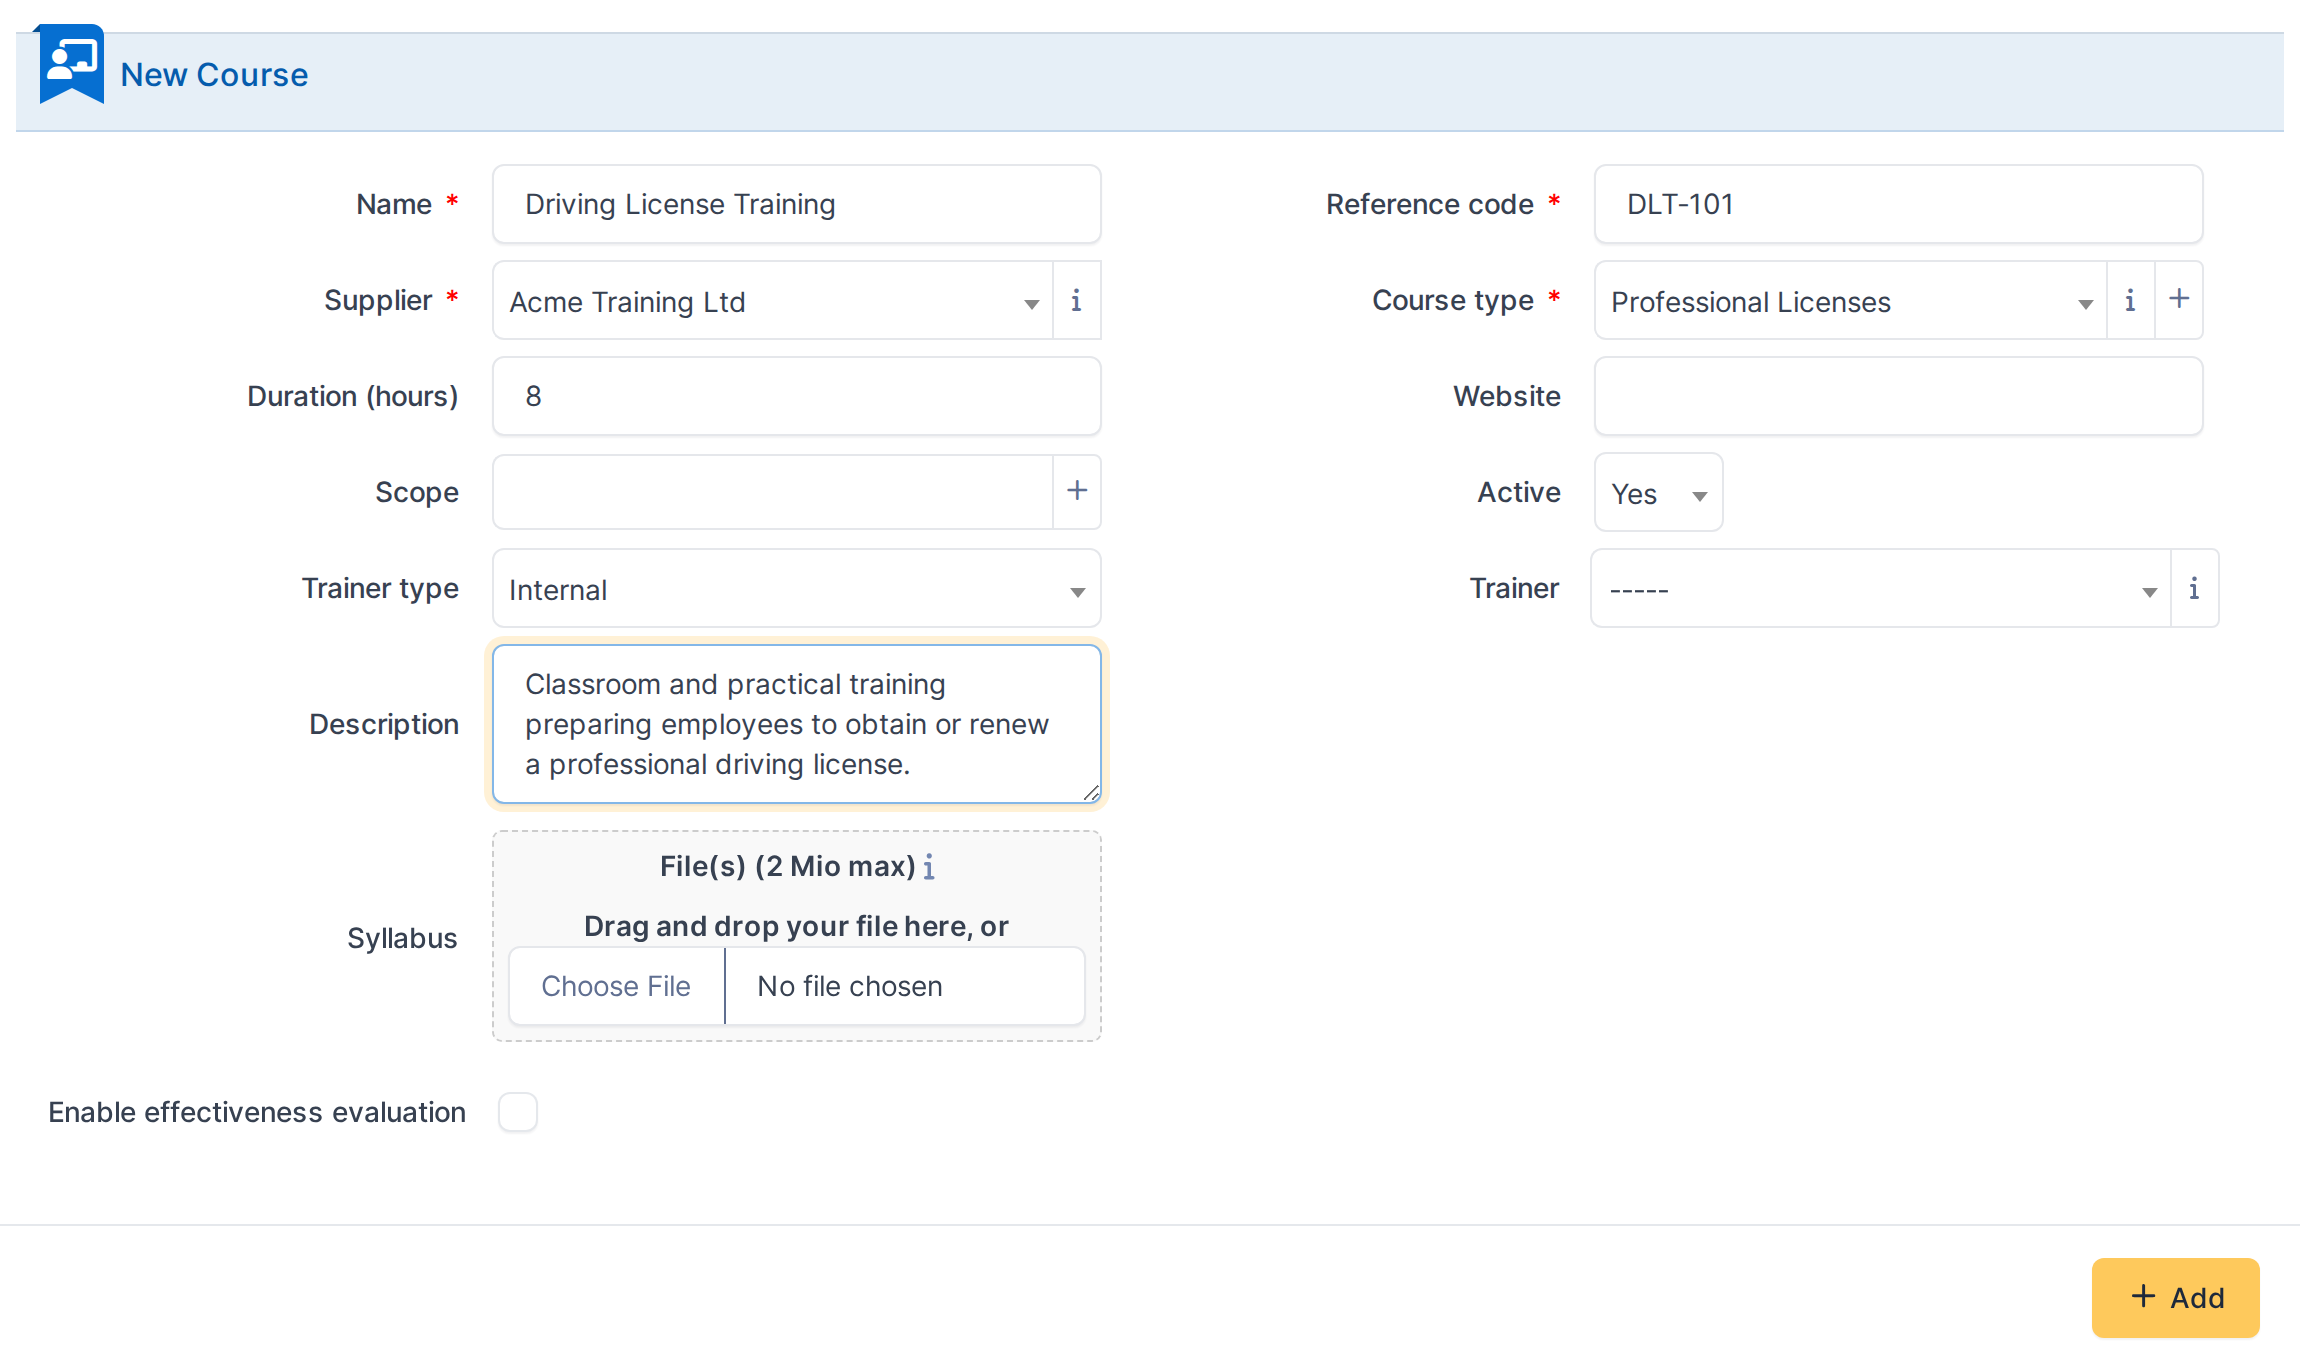
In this example: a supplier-delivered, active course, 8 hours, filed under the "Professional Licenses" course type.
5.1.4.4 Save the course
Click Add to create the course. GLPI returns to the course list, and the new entry appears there.
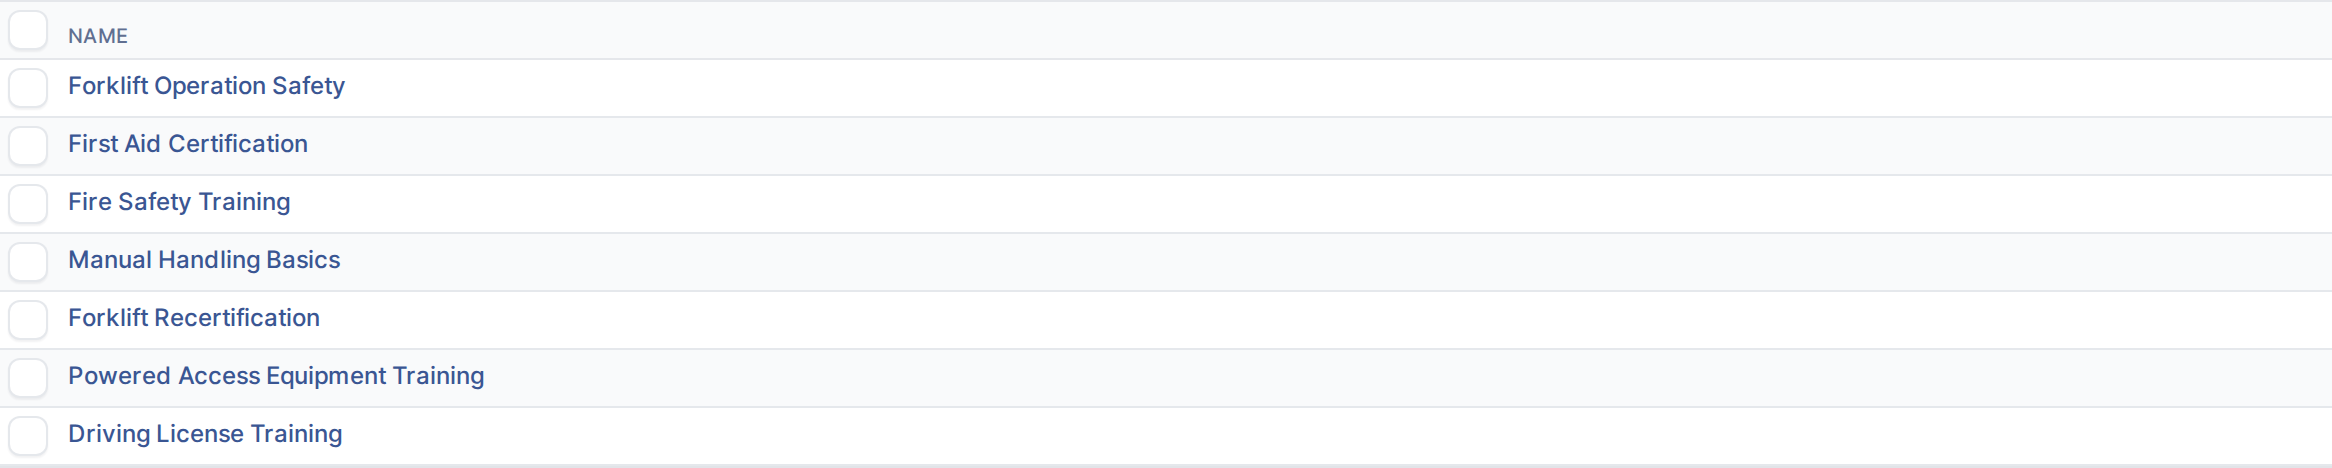
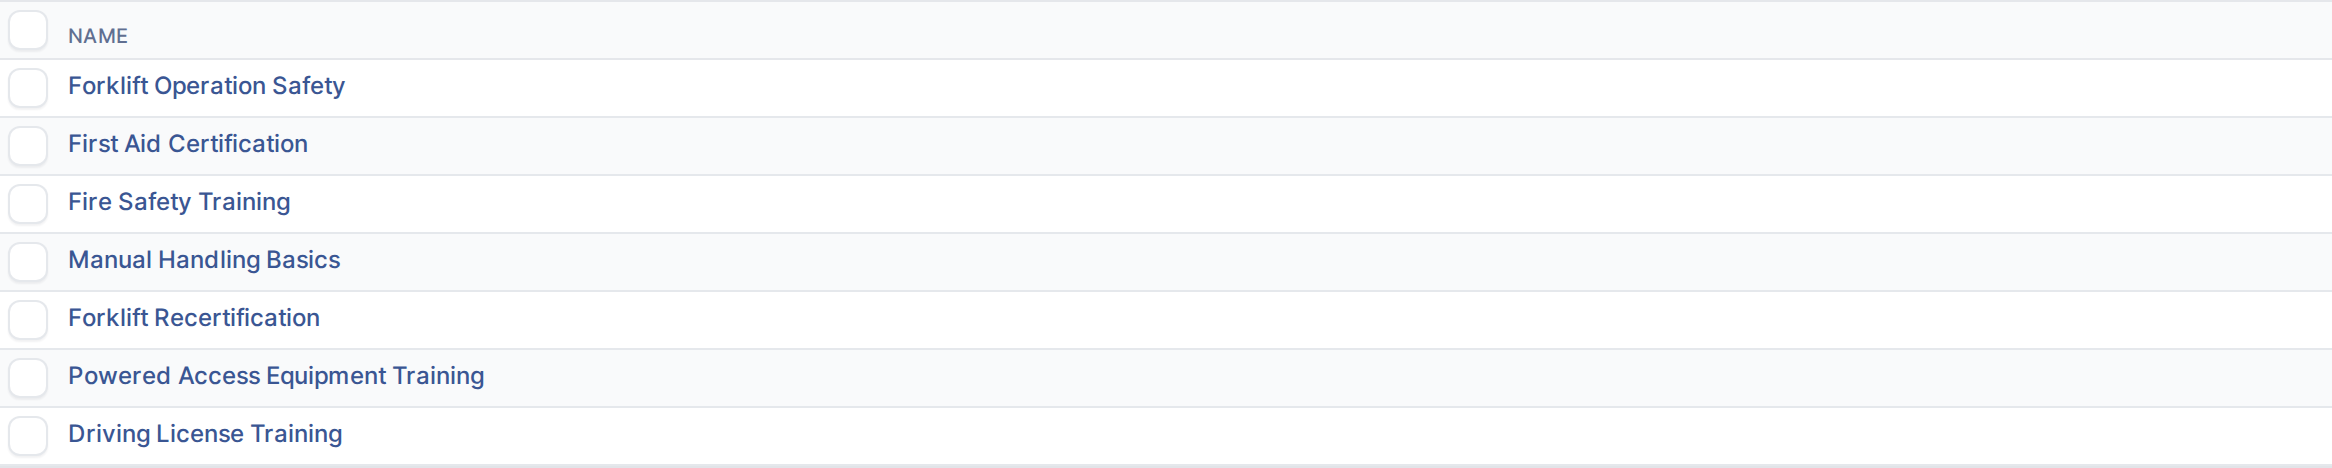
The new course appears in the list.
Note: A course's Editions, User Certifications and Tickets tabs appear once the course is saved — see the Editions chapter for scheduling a session under this course.
5.1.5 Scheduling an edition
An edition is one scheduled session of a course — its dates, delivery format and status. A course can have any number of editions over time; enrollments and attendance are always recorded against a specific edition, never against the course itself.
5.1.5.1 Open the edition list


The edition list, scoped to the current entity.
5.1.5.2 Start a new edition
Click Add to open a blank edition form.
5.1.5.3 Fill in the edition details
- Name — a title for this session (e.g. including a date or cohort). Required.
- Course — the course this edition schedules a session of. Required; only active courses appear here.
- Start date / End date — the session's dates. Required.
- Status — Planned (the default, open for enrollment), Not Delivered (cancelled — requires a reason, see the warning below), or Completed (marks every enrolled attendee as Attended automatically).
- Format — how the session is delivered (e.g. in person, online).
- Website — an optional link, e.g. to a video-call room or a supplier's registration page.
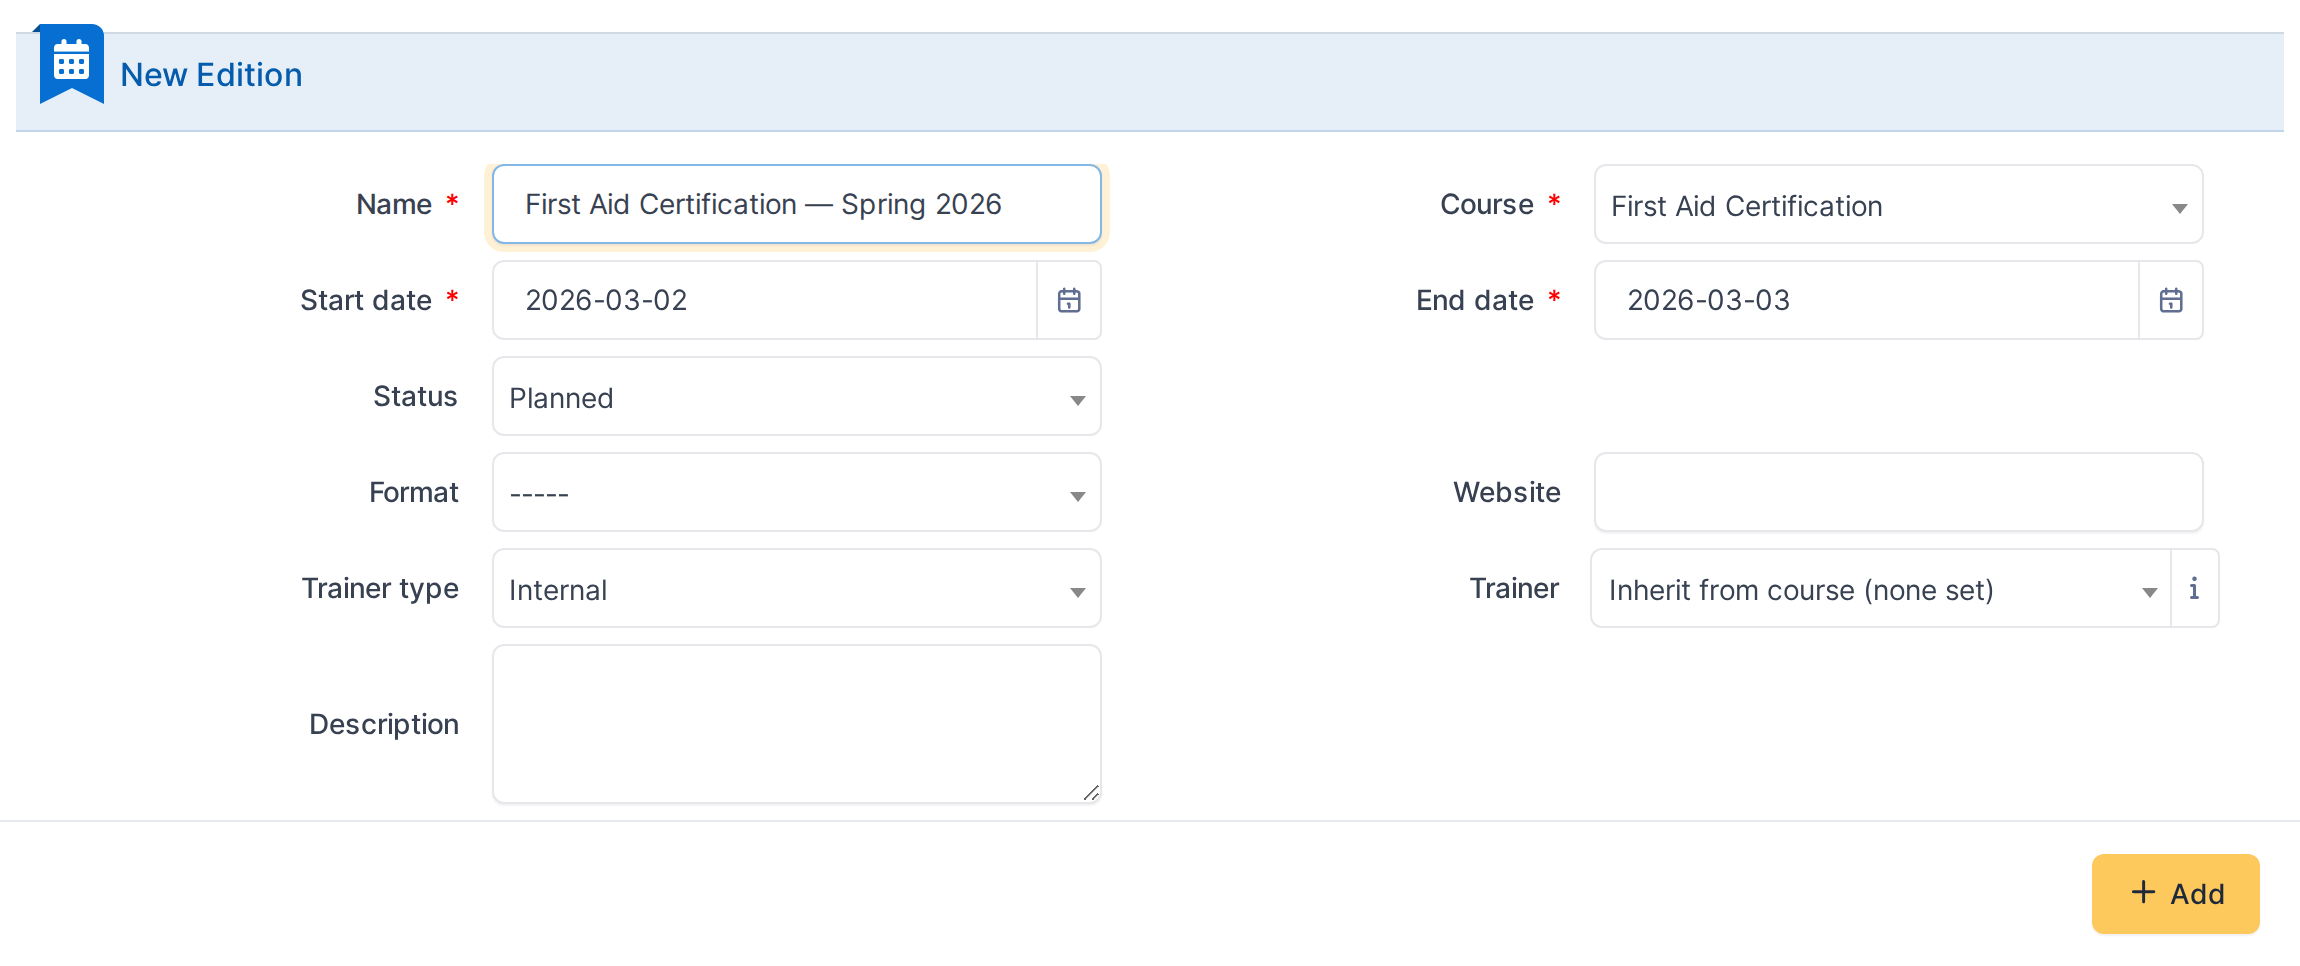
In this example: a session of "First Aid Certification", planned and running for two days.
⚠️ Warning: Setting Status to Not Delivered requires a reason and cannot be undone from the form alone — GLPI offers a Clone button on a not-delivered edition to reschedule it as a new one instead of trying to reuse the cancelled record.
5.1.5.4 Save the edition
Click Add to create the edition. GLPI returns to the edition list, and the new entry appears there.


The new edition appears in the list.
Note: An edition's Enrollments tab appears once it is saved — see the Enrollments chapter for enrolling users into a session.
5.1.6 Enrolling a user into an edition
An enrollment links one user to one edition, and is where attendance and outcome are recorded once the session has taken place. A user cannot be enrolled twice into the same edition.
5.1.6.1 Open the enrollment list


The enrollment list, scoped to the current entity.
5.1.6.2 Start a new enrollment
Click Add to open a blank enrollment form.
5.1.6.3 Fill in the enrollment details
- Course — pick the course first; it filters the Edition dropdown below to that course's own sessions.
- User — the person being enrolled. Required.
- Edition — the specific session the user is enrolled into. Required; only editions still in Planned status can accept new enrollments.
- Attendance — left at its default until the session takes place, then updated to record whether the user actually attended.
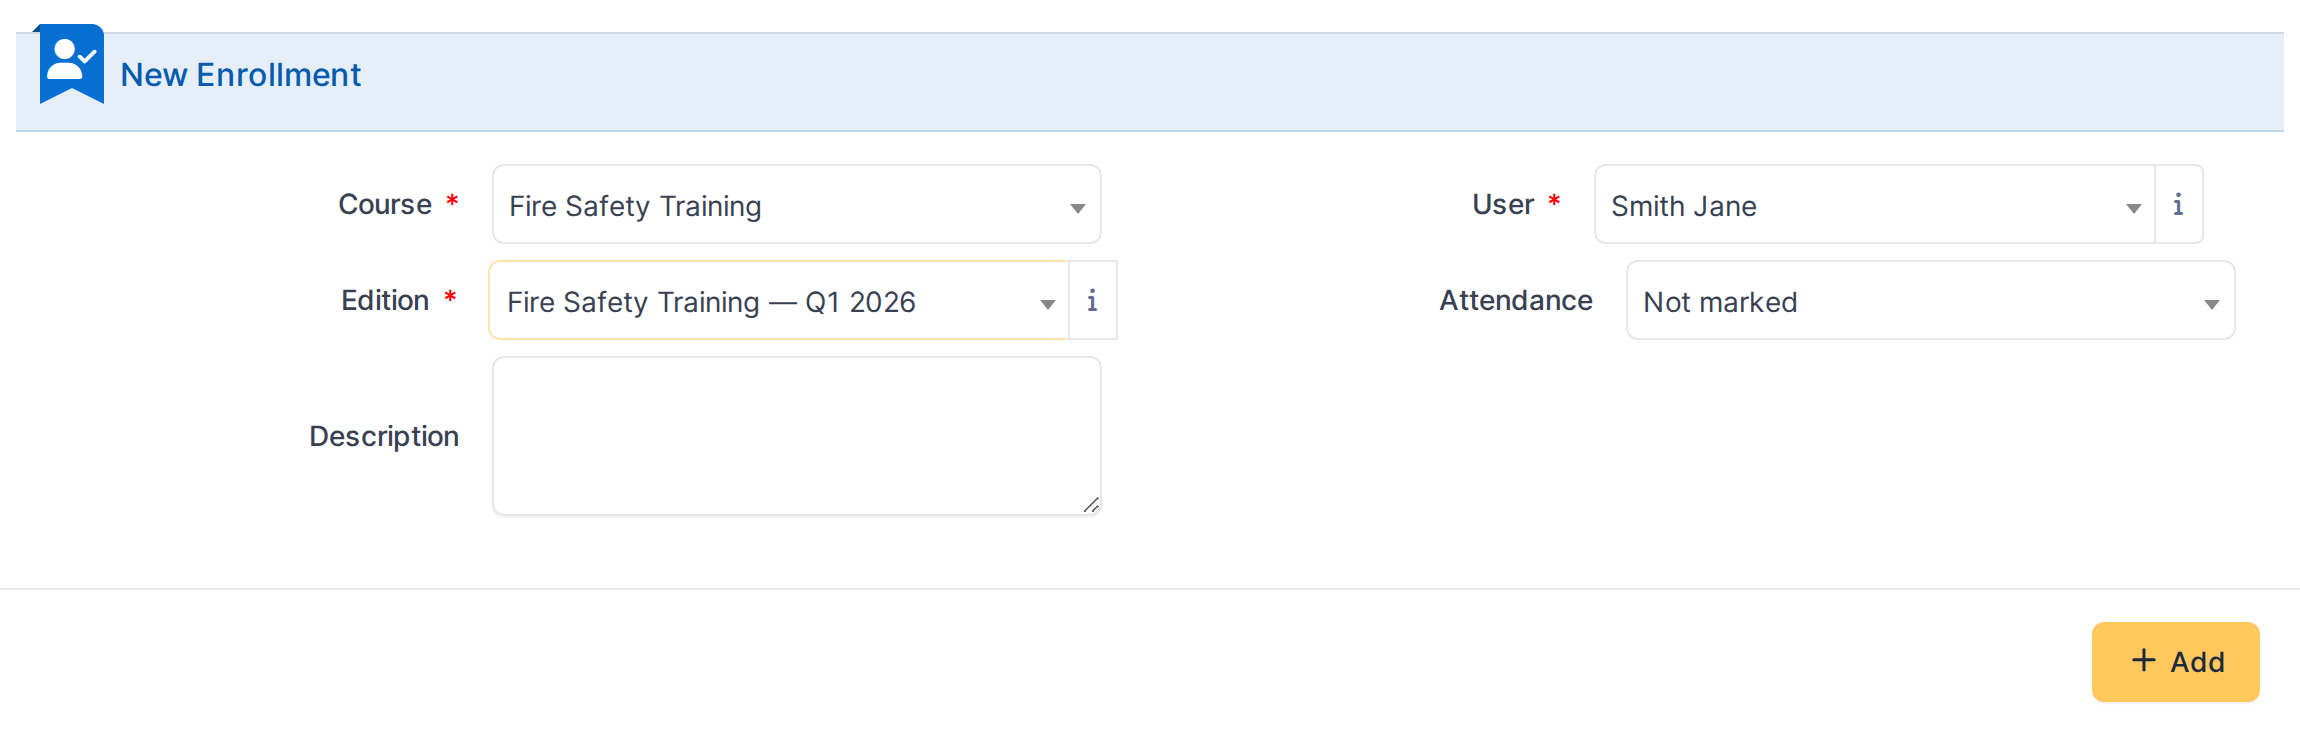
In this example: enrolling a user into "Fire Safety Training — Q1 2026".
5.1.6.4 Save the enrollment
Click Add to create the enrollment. GLPI returns to the enrollment list, and the new entry appears there.


The new enrollment appears in the list.
5.1.6.5 Enrolling several users at once
Repeating the single-enrollment form for a whole group is slow — Mass Enrollment enrolls any number of users into one edition in a single submission. Open it from the + icon next to the Talent menu title, or navigate to it directly.
5.1.6.6 Pick the users and the edition
- User — a multi-select; add as many users as needed, one at a time.
- Course then Edition — same as the single-enrollment form: pick the course first to filter the Edition dropdown to its sessions.
- Description — optional, but applies identically to every enrollment this creates, not just one.
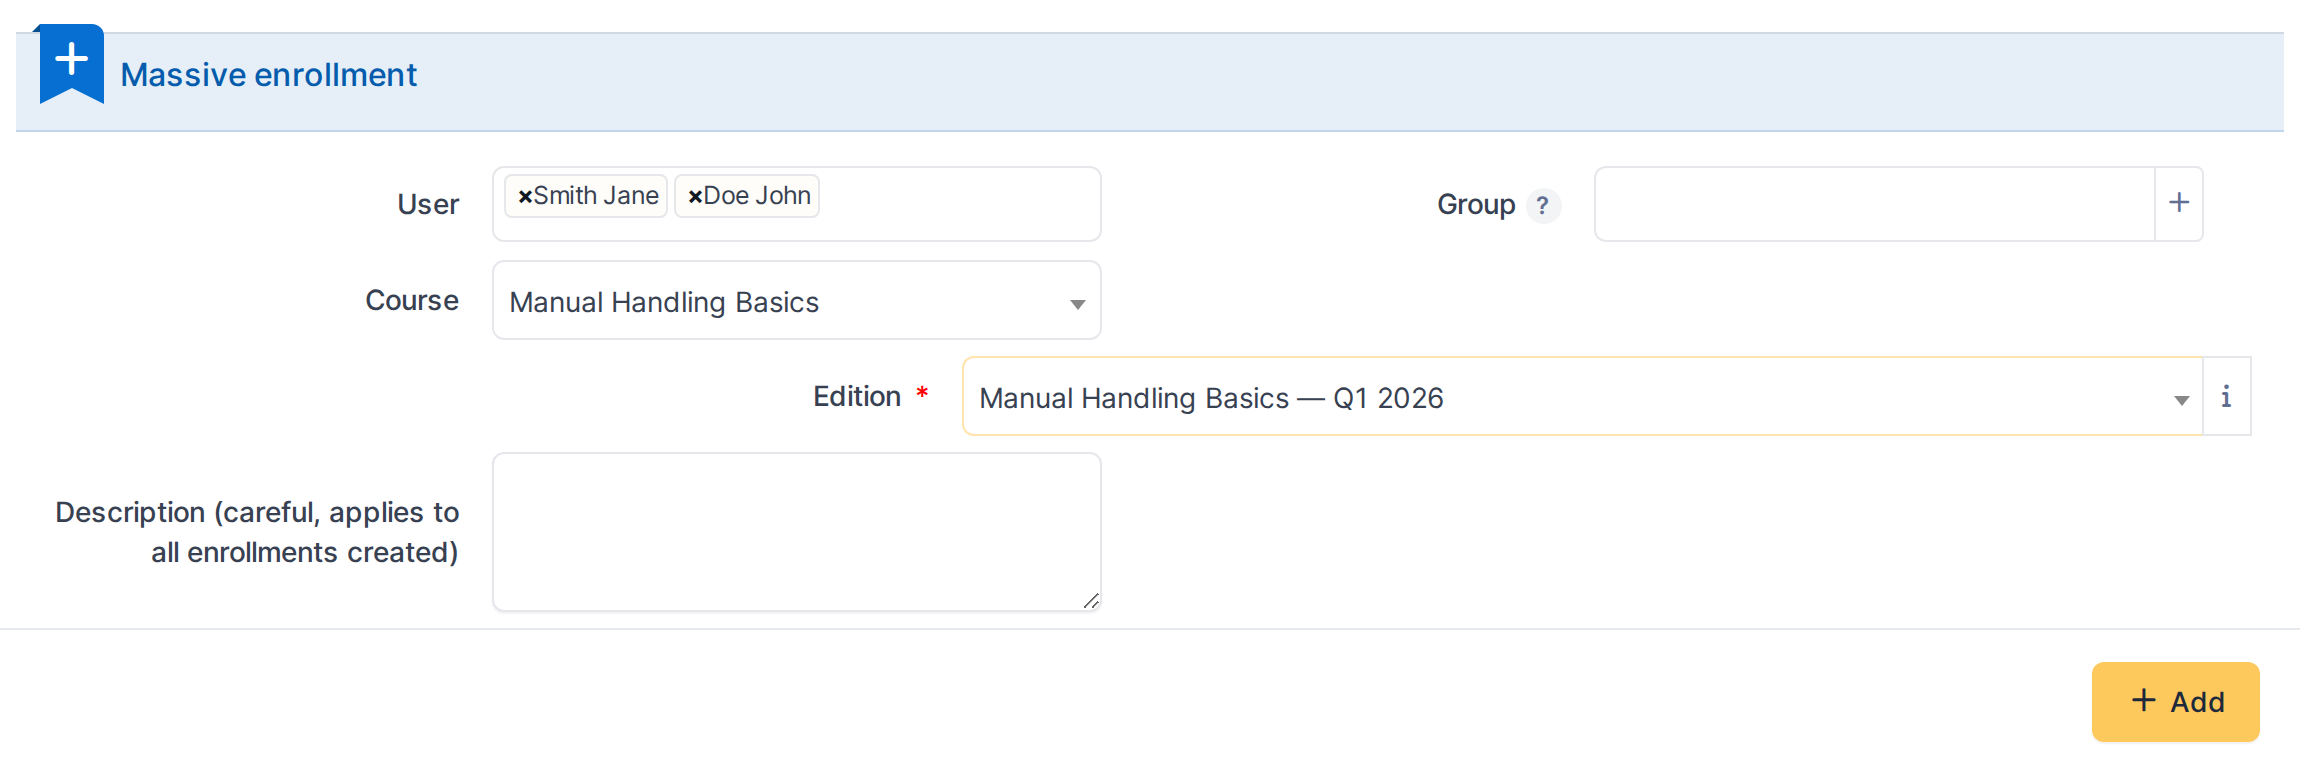
In this example: enrolling two users into "Manual Handling Basics — Q1 2026" in one submission.
5.1.6.7 Save the mass enrollment
Click Add to create one enrollment per selected user, all against the same edition.


Both enrollments appear in the list, one per user.
5.1.7 Recording training effectiveness
Effectiveness measures whether a training actually changed on-the-job behavior, separately from whether the attendee simply completed the session. It is recorded per attendee, once the edition is completed, against evidence you attach yourself — never inferred automatically from attendance alone.
5.1.7.1 Open the edition's Effectiveness tab
Effectiveness is only available on a course that has it enabled (see Setup), and only once the edition's status is Completed. Open the edition and switch to its Effectiveness evaluations tab.


The Effectiveness evaluations tab lists every attendee, with an Evaluate action for anyone not yet evaluated.
5.1.7.2 Evaluate an attendee
Click Evaluate next to an attendee's row to open a blank effectiveness form for their enrollment.
5.1.7.3 Fill in the result and its evidence
- Result — Effective (the training produced the intended change), Partially effective (some improvement, but short of the goal), or Not effective (no observable change). There is no automatic threshold; this is a judgment call made against the evidence below.
- Evidence — a GLPI ticket documenting what was observed (an incident that did or didn't recur, a follow-up review, a manager's note). Required: effectiveness is always backed by a concrete record, not a free-text opinion.
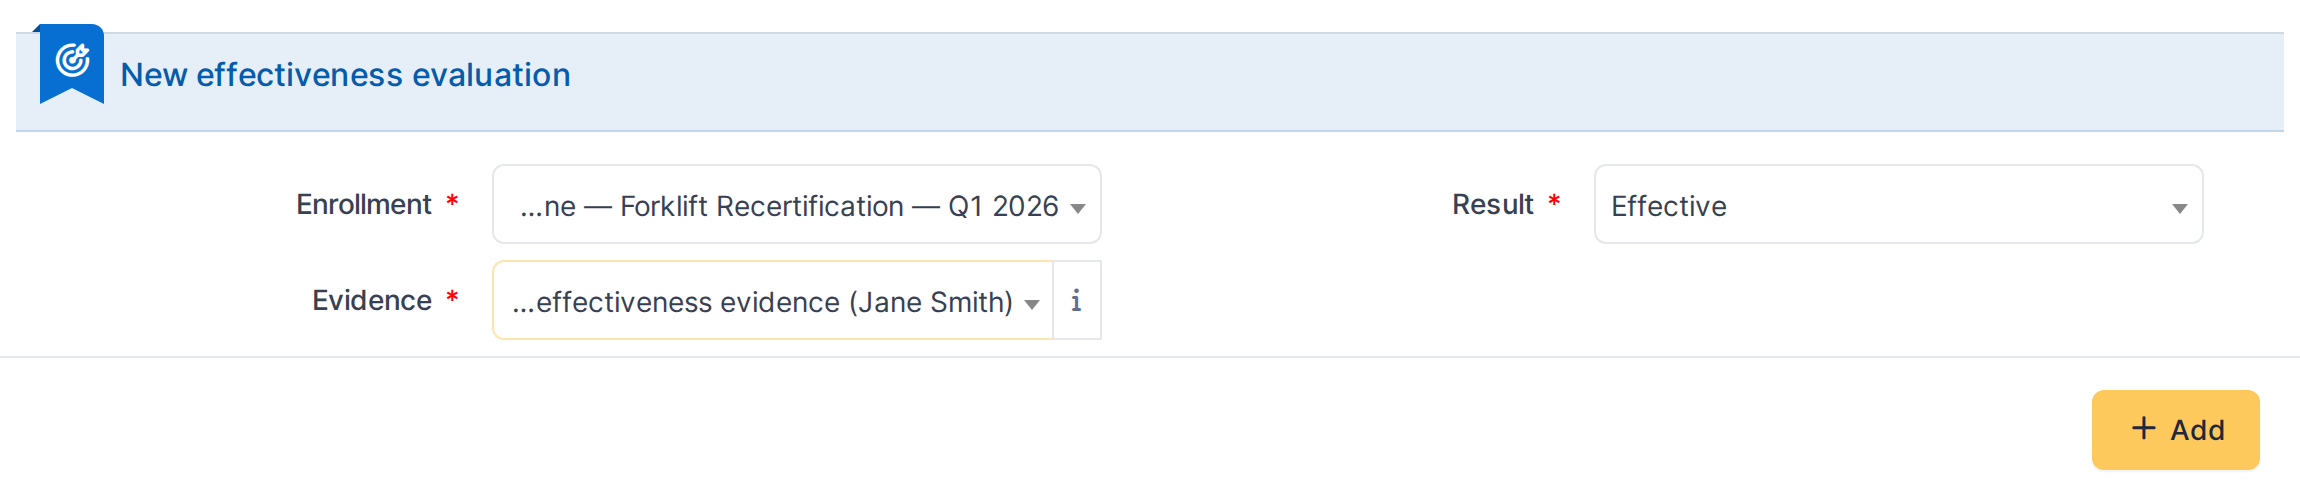
In this example: recording an Effective result for Jane Smith's forklift recertification, backed by a ticket documenting the post-training observation.
5.1.7.4 Save the evaluation
Click Add to record the result. GLPI returns to the edition's Effectiveness evaluations tab, which now shows the result and evaluation date for this attendee.


The result now appears against the attendee, with the evaluation date GLPI recorded automatically.
Note: An attendee can only be evaluated once, and only within the evaluation window a course's Setup configures (a number of months after the edition's end date). Outside that window, or before it, no Evaluate action appears for them.
Generated for talent 1.1.0-beta.3 on GLPI 11.0 — 2026-09-03.