
5.3 Project task cards


Part of the Agile Project Management manual — see also 1. Introduction, 2. What's New, 3. Scope, 4.1 General setup, 4.2 Labels, 4.3 Project task templates and notificationschecklists, 4.4 Notifications, 5.1 The board, 5.2 CardsWorking with cards, 5.4 Ticket cards, 5.5 Labels, 6. Troubleshooting.
5.3.1 FilteringAdding a card
A new card is always a project task — ticket cards appear on the board byonce labelsa
Onticket is linked to the Globalproject, Kanbanthey viewcannot (whenbe viewingcreated alldirectly projectsfrom atthe once), you can filter cards to show only those with specific labels.board.
5.3.1.1 OpenAdd thea labelcard filterto a column
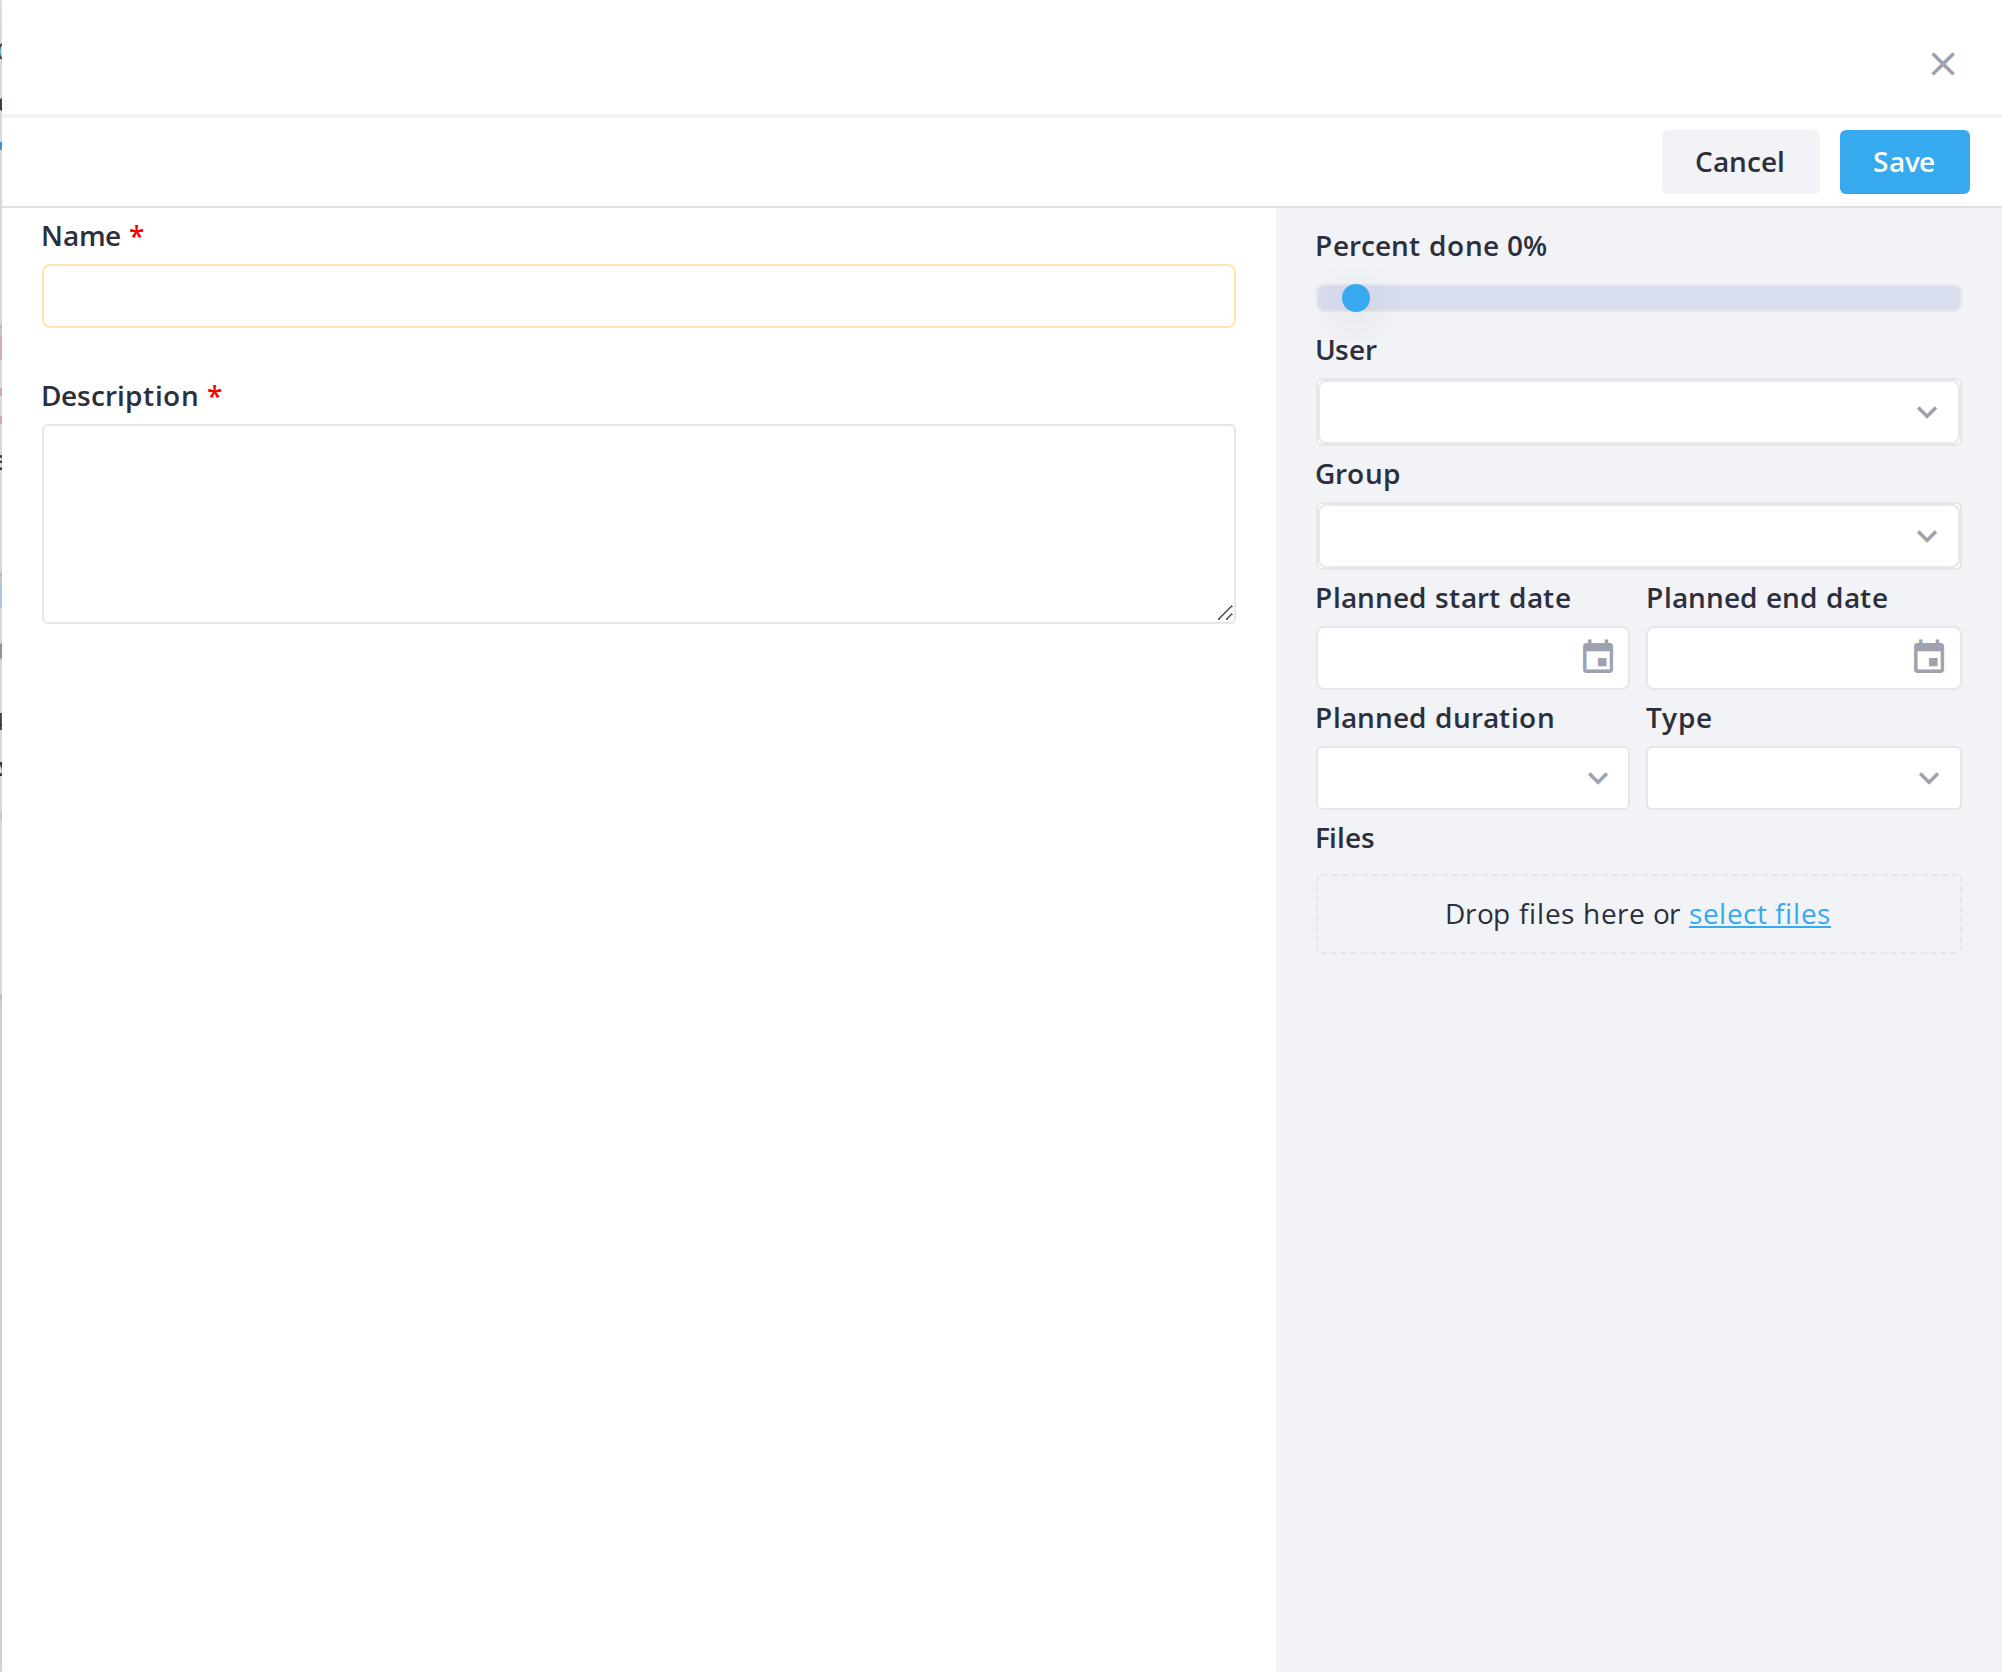
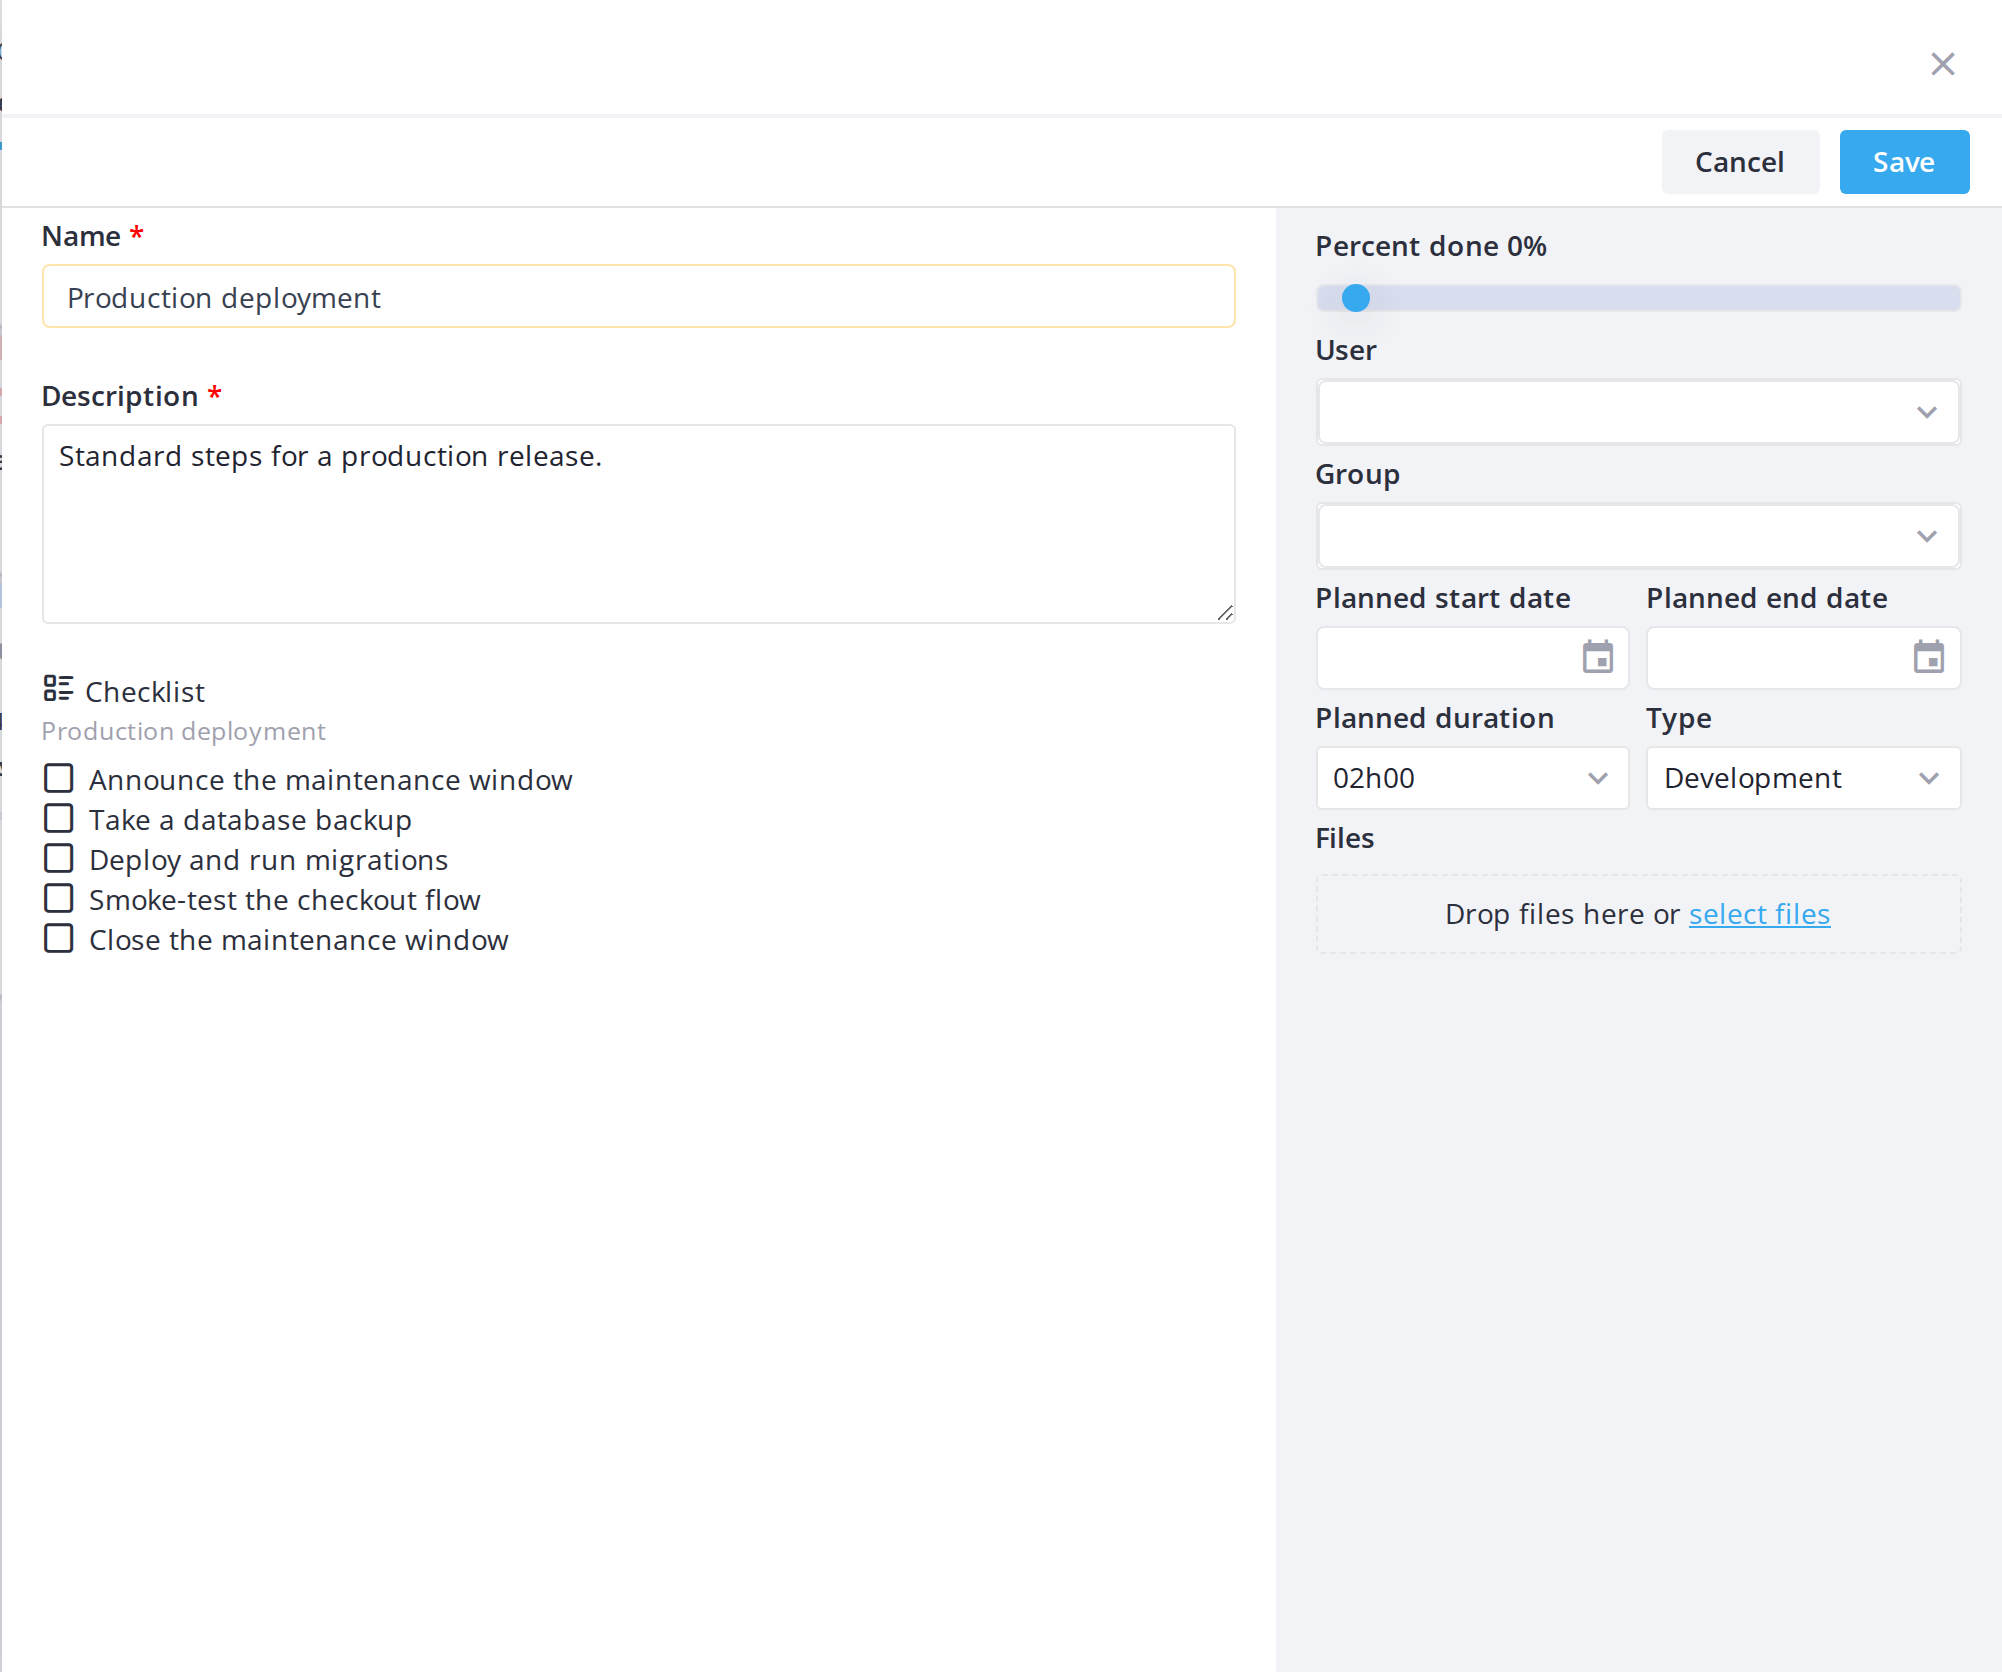
Click Add a card at the tagbottom iconof a column (or hover over the column header and select Add a card from the menu), give it a title, then fill in the toolbardetail abovepanel thethat boardopens: (onlydescription, visibleassigned whenuser(s) viewingor thegroup, Global Kanbanstart and labelsend aredates, configured).planned Aduration, dialogand openstype. showingThe allcard availableis labels.created directly in that column's project state.
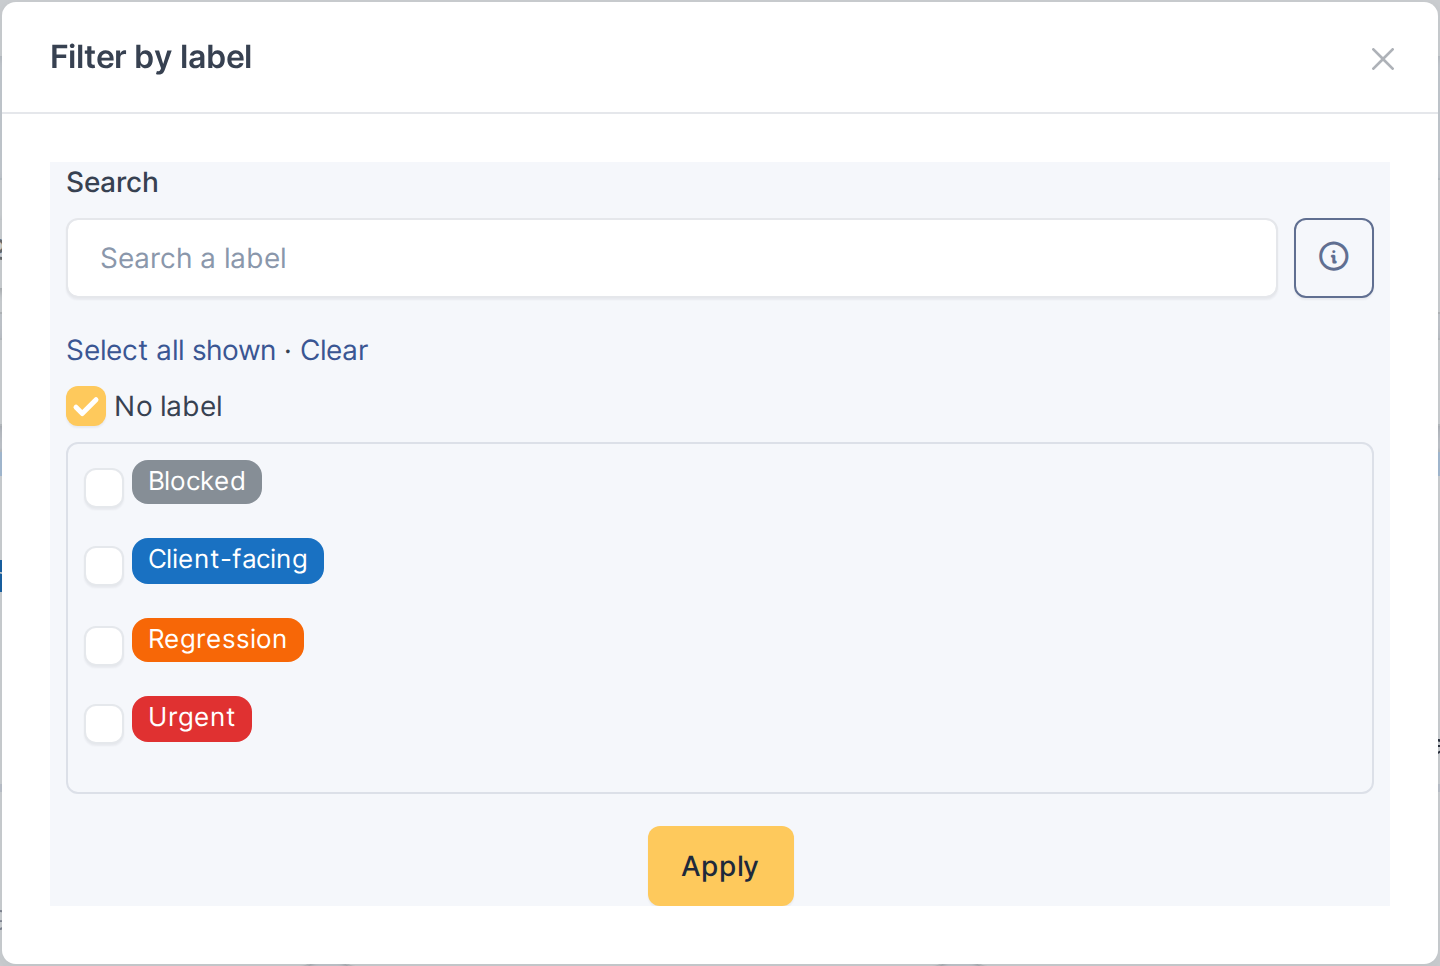
5.3.1.2 FilterAdd bya onecard orfrom morea labelstemplate
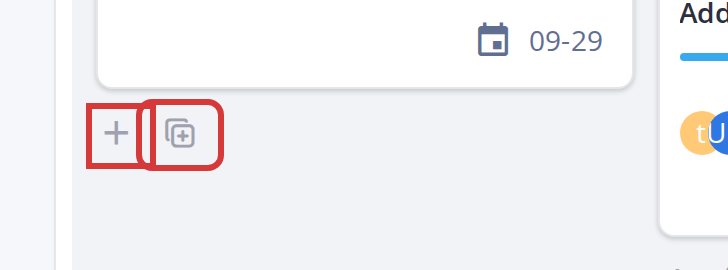
CheckNext to each column's + is a ++ button (Add a card from template). Click it, choose a Project task template and click Add. The number after a template's name is the boxes next to the labels you want to see. The board immediately updates to show only cards with at least onesize of thoseits labels.checklist.
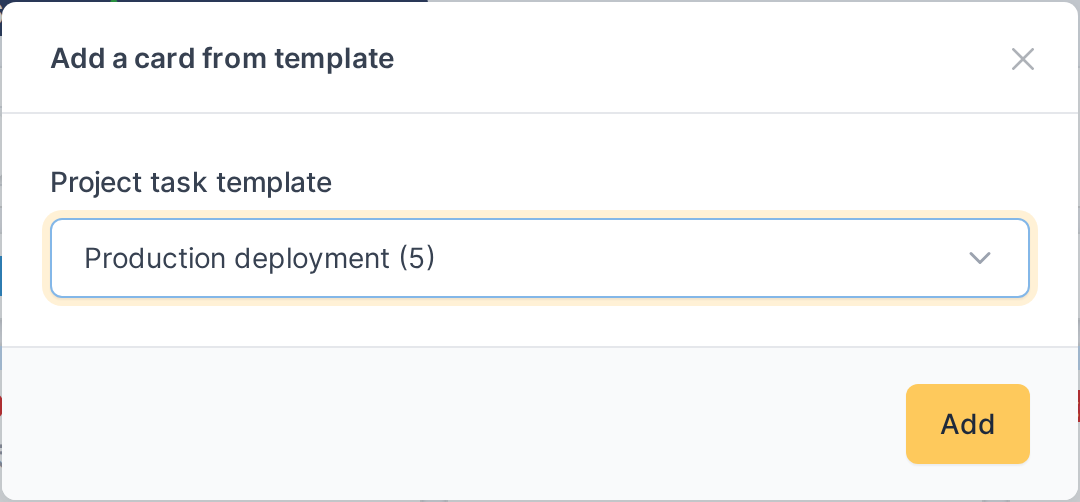
5.3.1.3 ClearReview the labelcard filterfilled from the template
UncheckThe allnew labelscard opens filled in from the template: name, description, type, planned duration, dates and percent done. Everything stays editable. The template's checklist is copied to showthe alltask cardswhen again,you regardlessclick ofSave.
Note:
LabelAddingfilteringa card requires the Add a card right. Neither button isavailable onlyshown intheaGlobalcolumnKanbanforview.aInfinishedsingle-projectstate,Kanban,orlabels are displayed but there iswhen noseparateprojectfiltertaskUItemplate exists (forthem.
Note:++The label filter is saved per user, like other filters (project, user, group, card type)).It is remembered across sessions.
5.3.2 LabelEditing colorsa task card
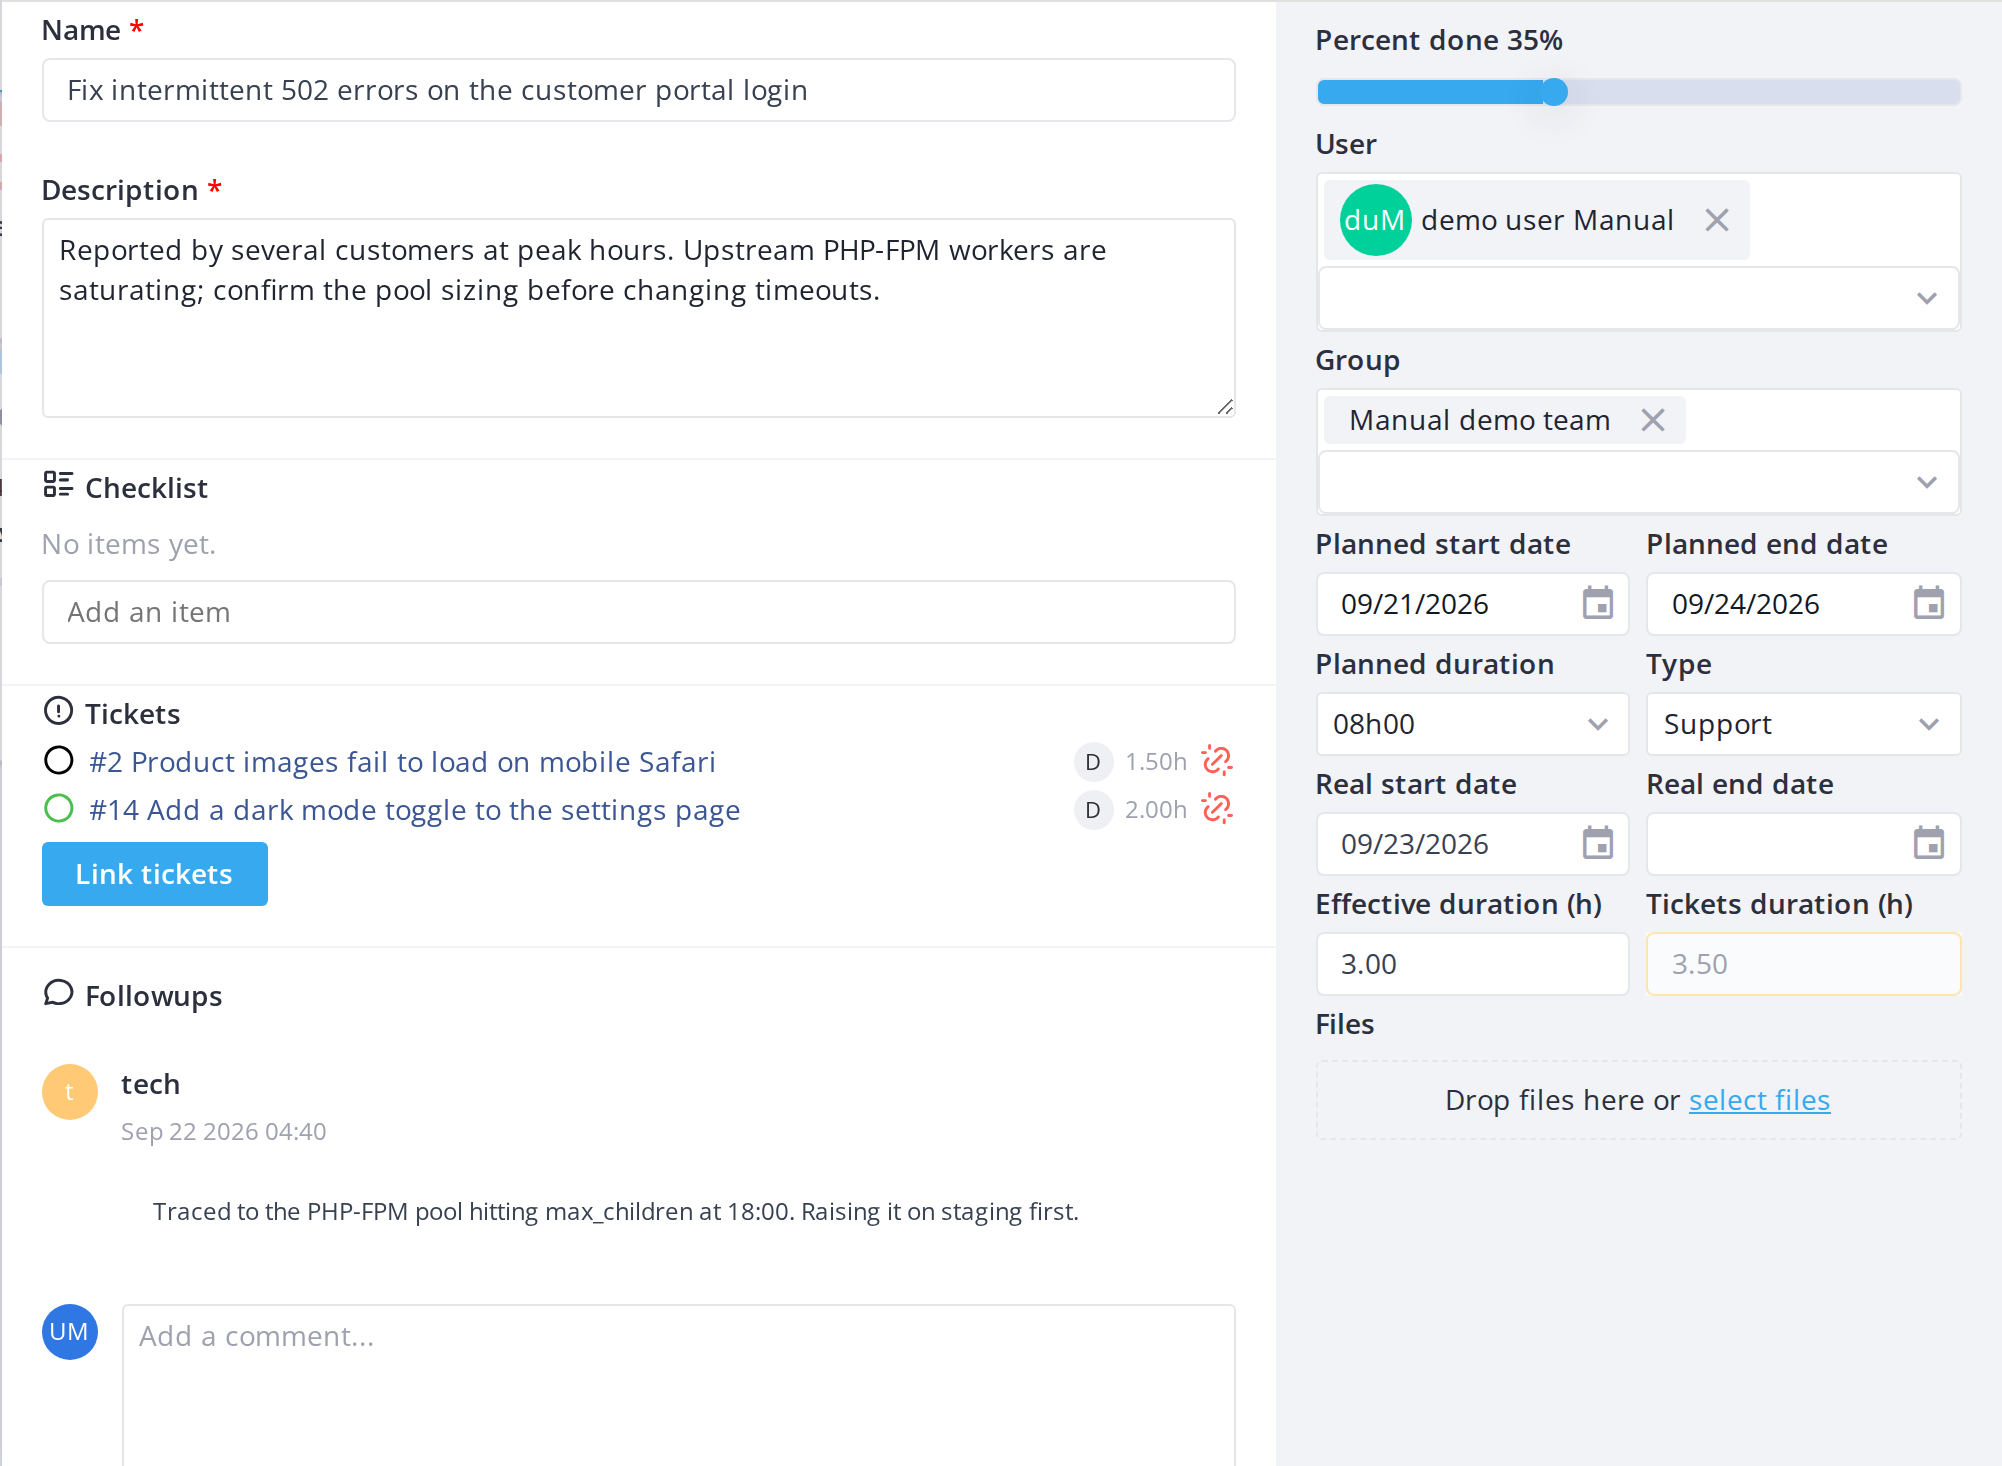
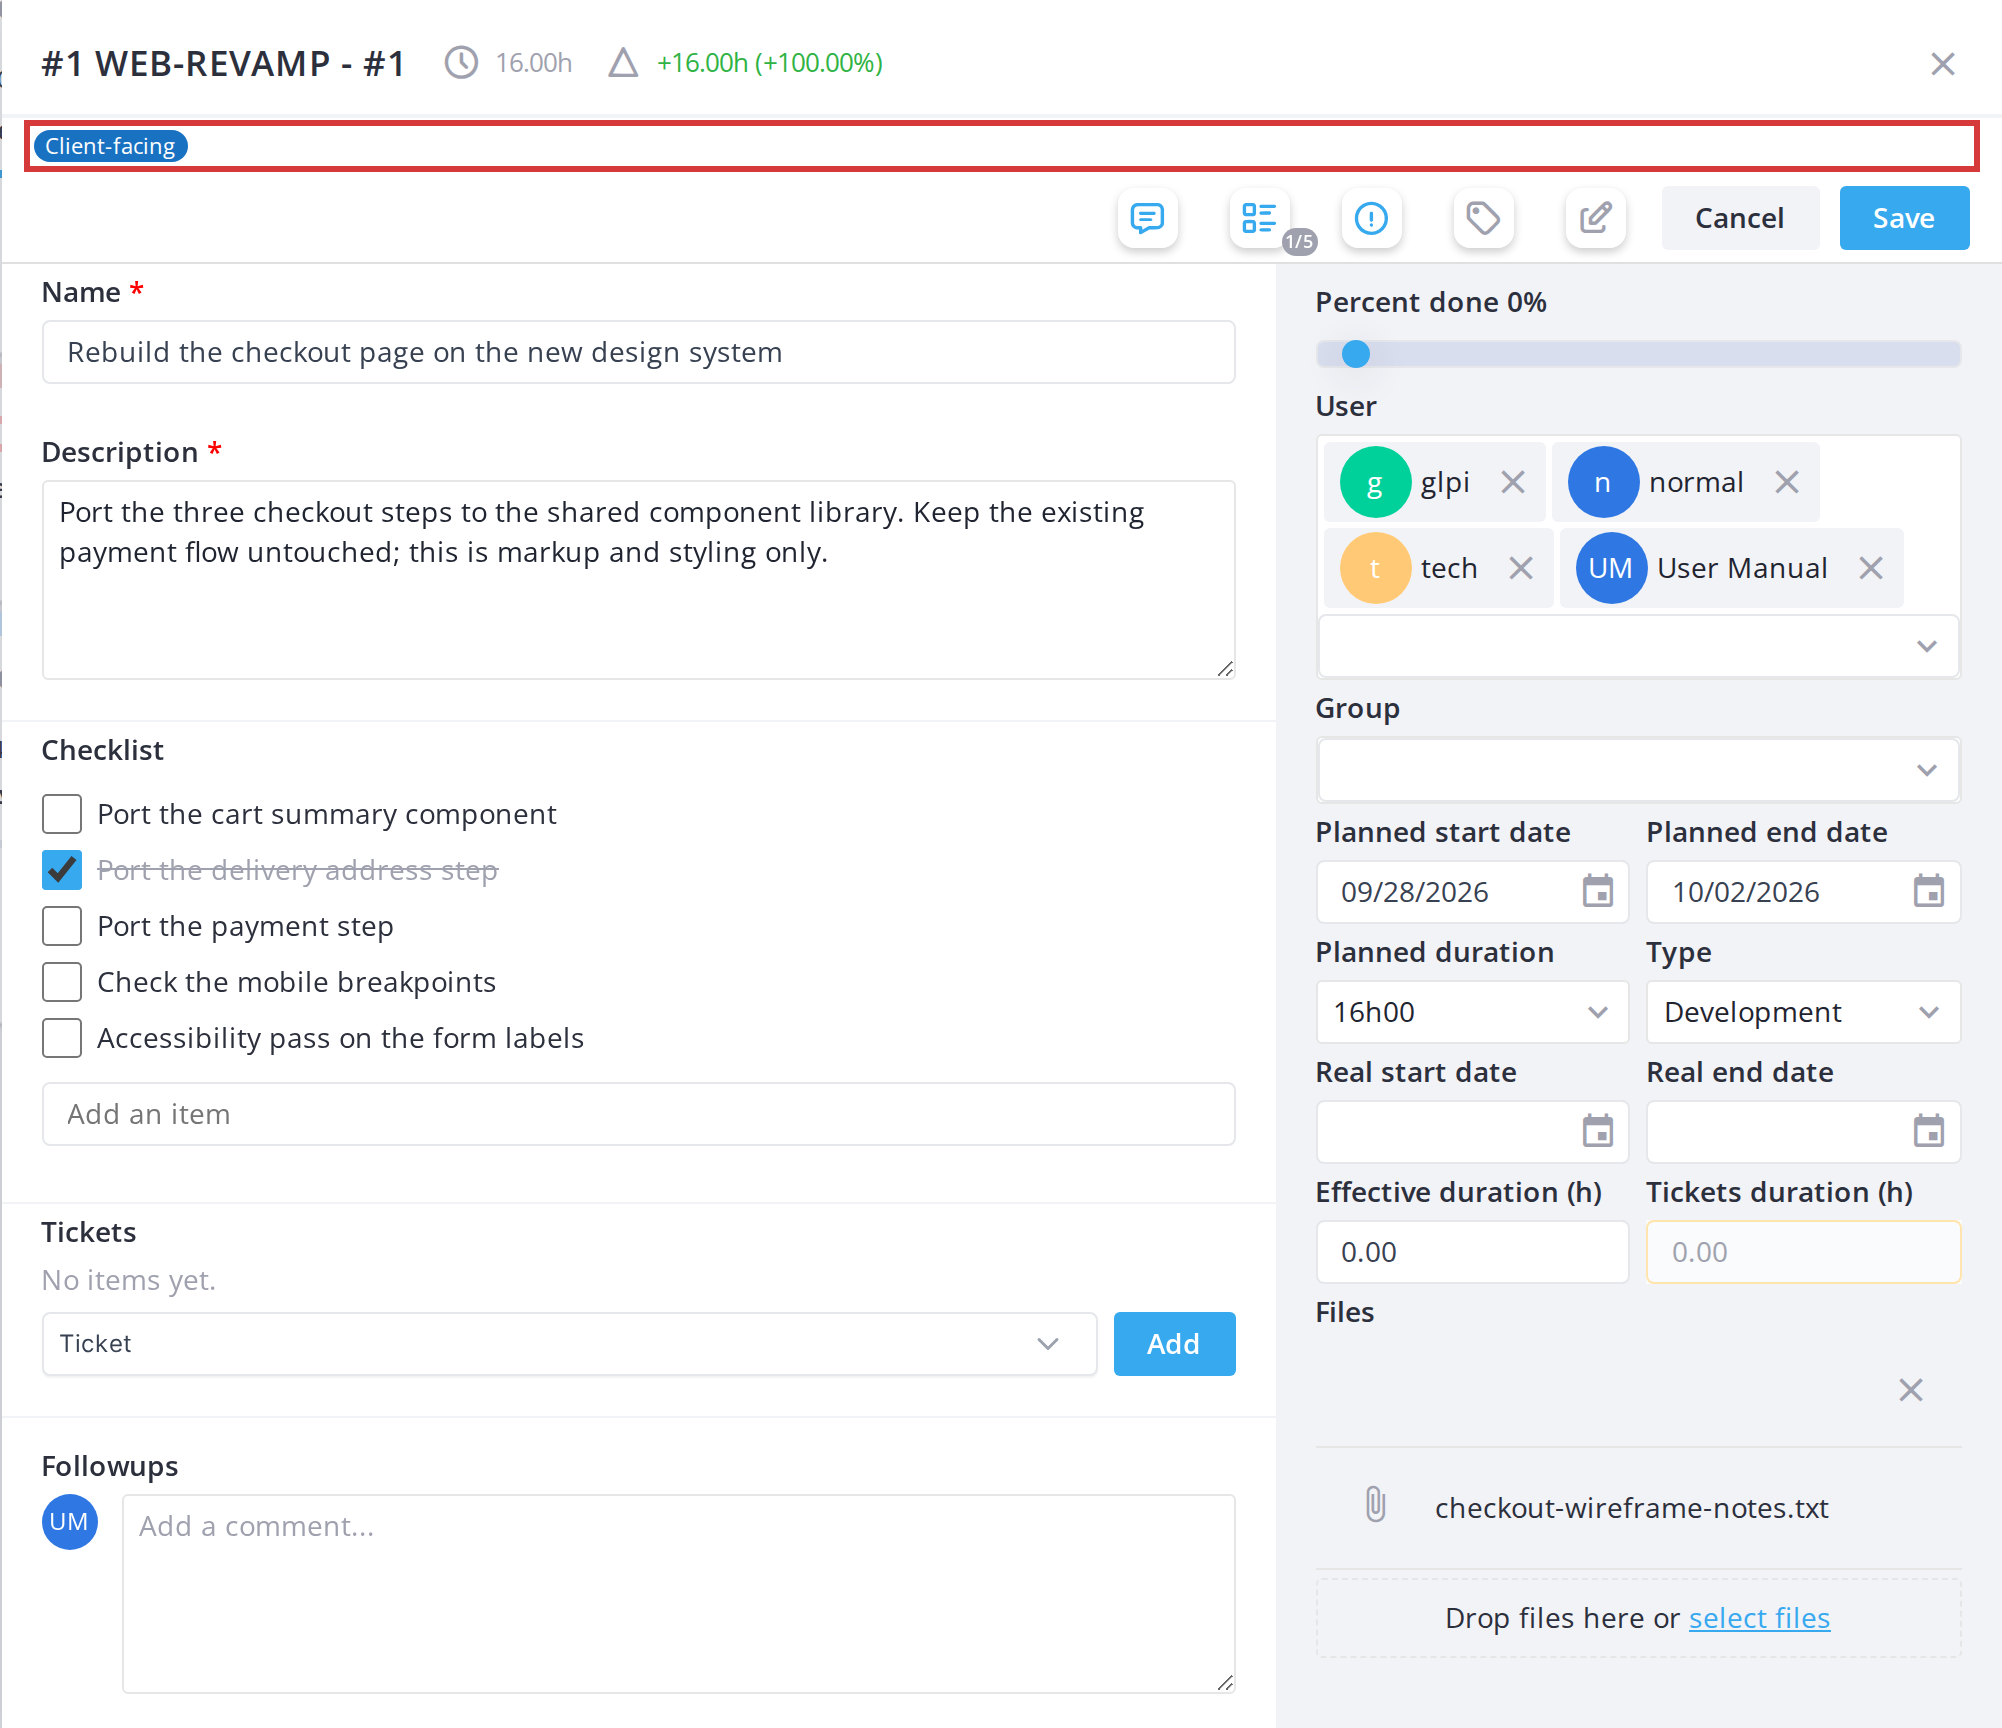
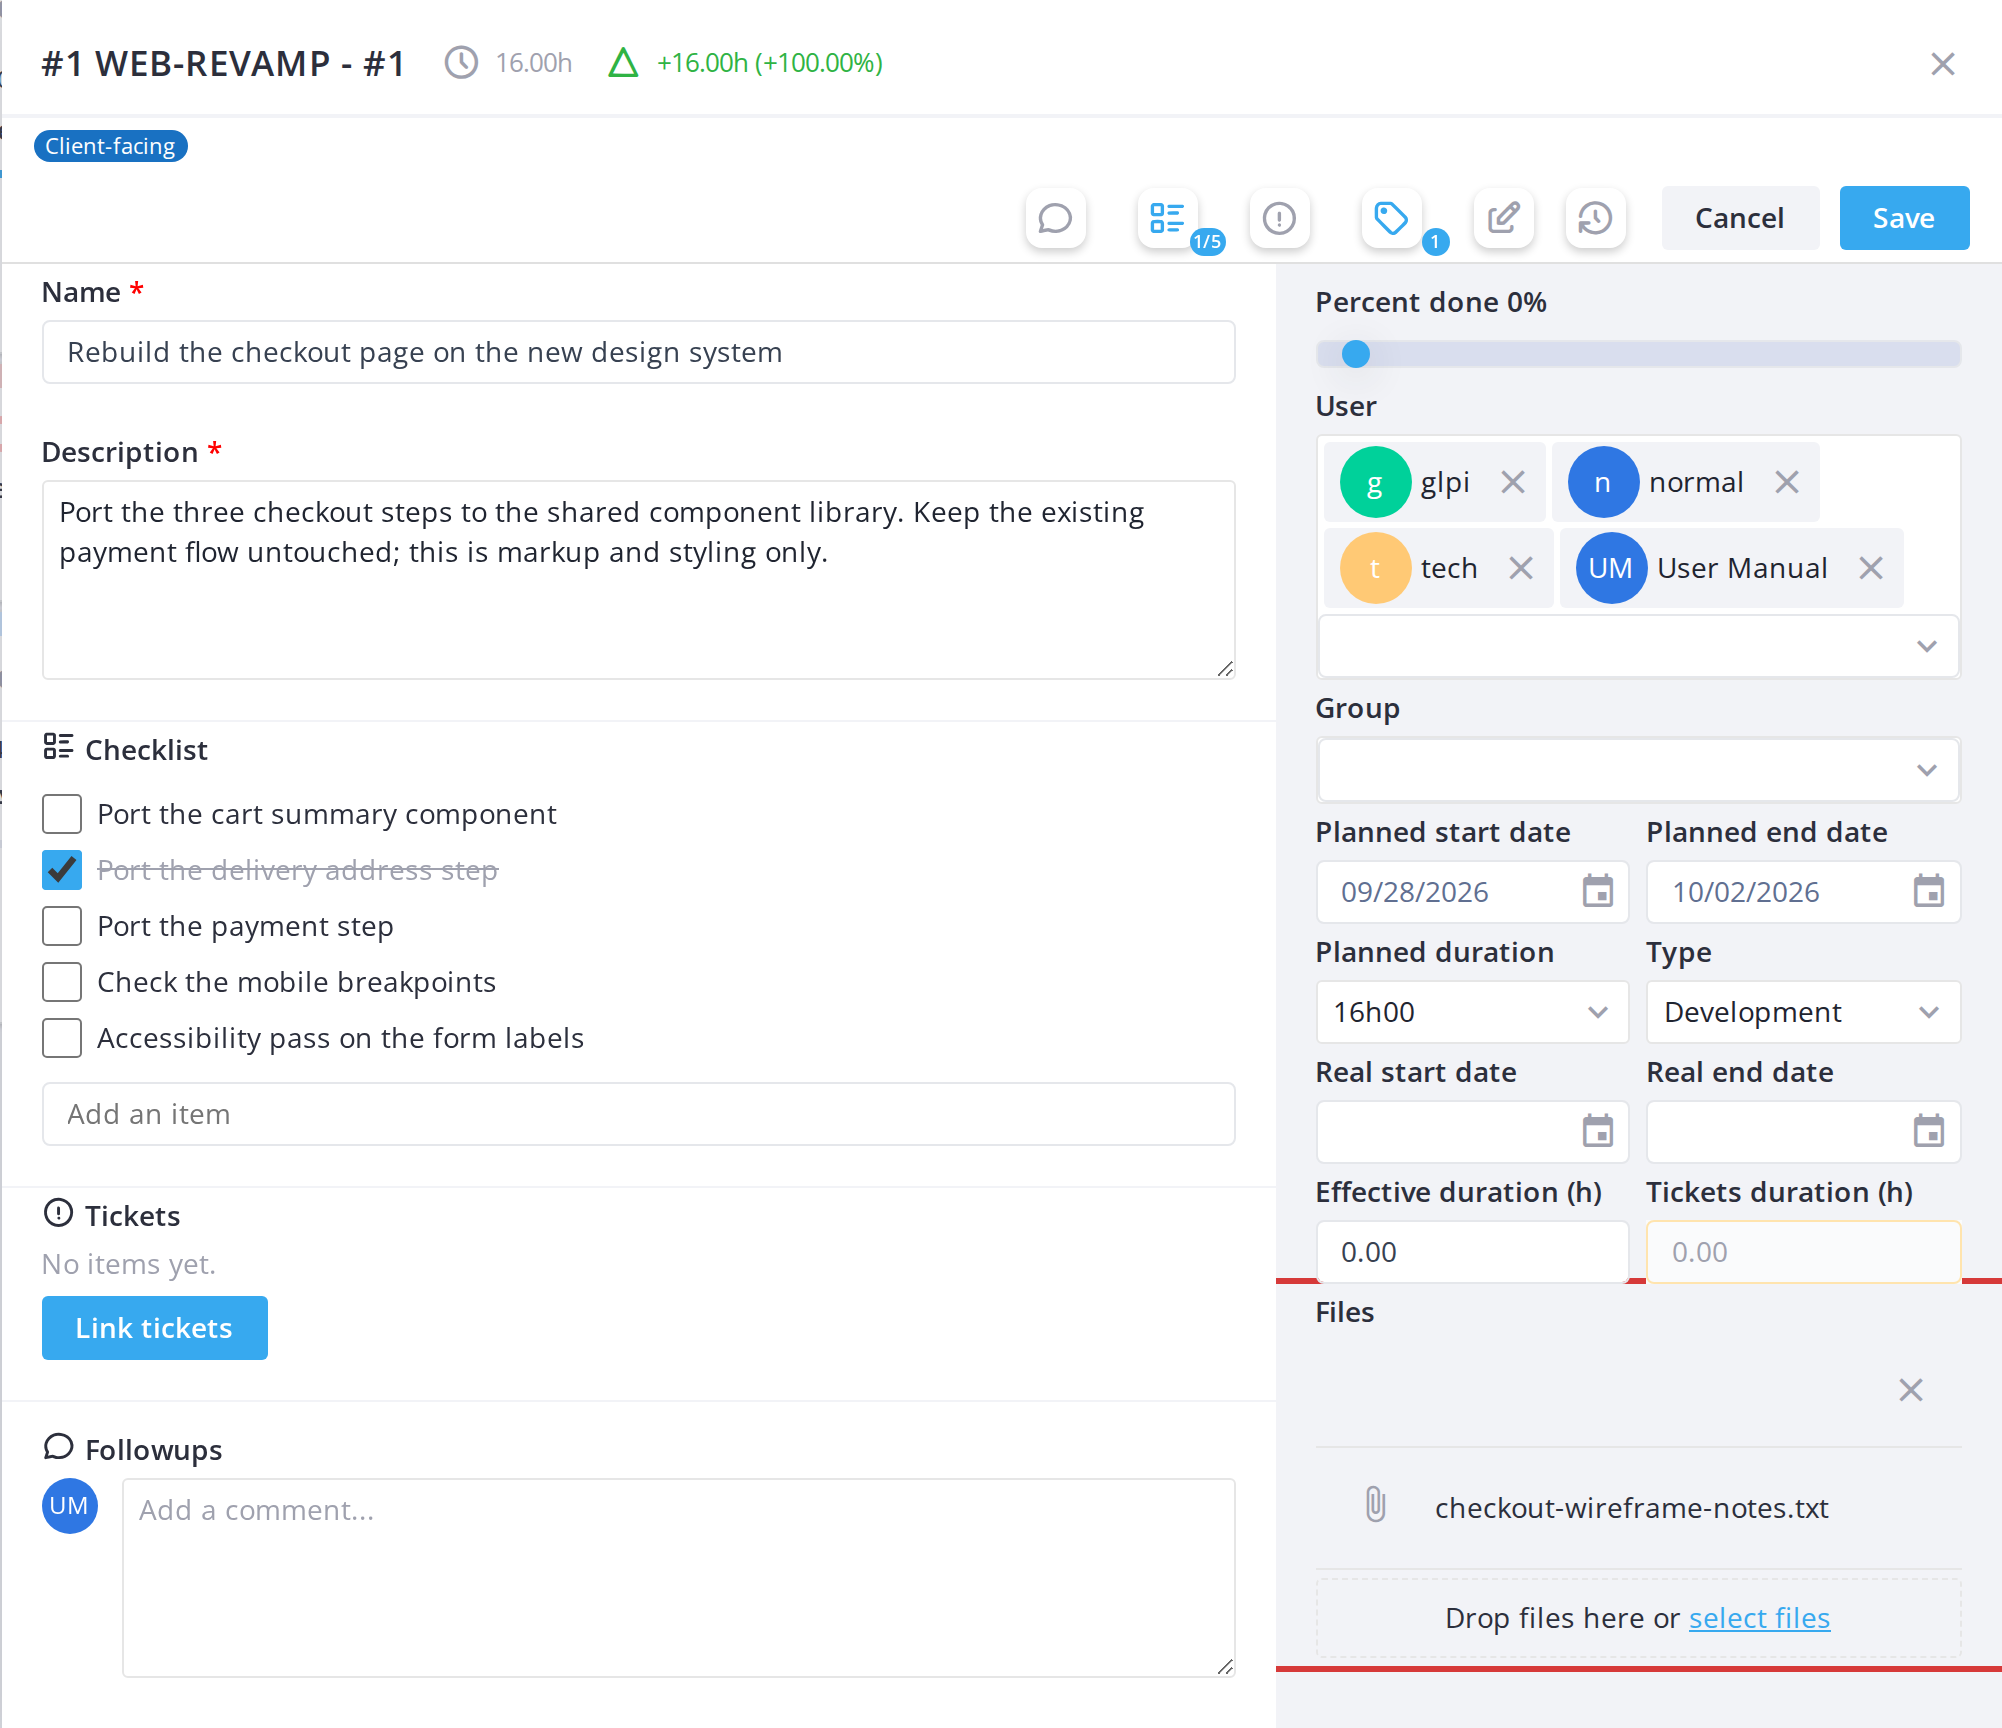
The detail modal for a task card contains several fields for entering and appearanceediting information.
5.3.2.1 LabelOpen colora task card
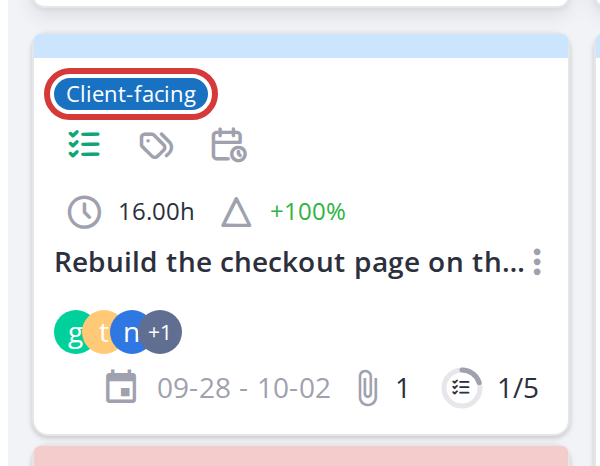
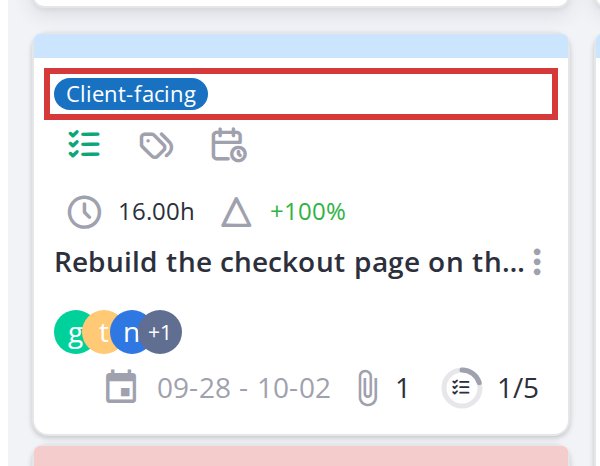
EachTask labelcards hasare afully backgroundeditable color— setyou can change the title, description, assigned users, dates, duration, type and all other fields (depending on your permissions). Edit any field by the administrator. The label name is written in black or white, whichever reads betterclicking on that colour. On the card front, labels are shown as chips; in the modal, they appear in two places: a row at the top of the action bar (capped at a few visible chips, with extras in a "+N" badge),it and againmaking inyour the full-width list in the label assignment dialog.changes.
5.3.2.2 Labels inEdit the dialogs
The Assign labels window and the global board's Filter by label window list each label as a chip in its own colour, the same chip as on the cards, so a label is recognised the same way everywhere.
Note:Label colors are chosen by administrators when creating a label in Setup. Colors are consistent across the board and all views.
5.3.3 Labels on task and ticket cards
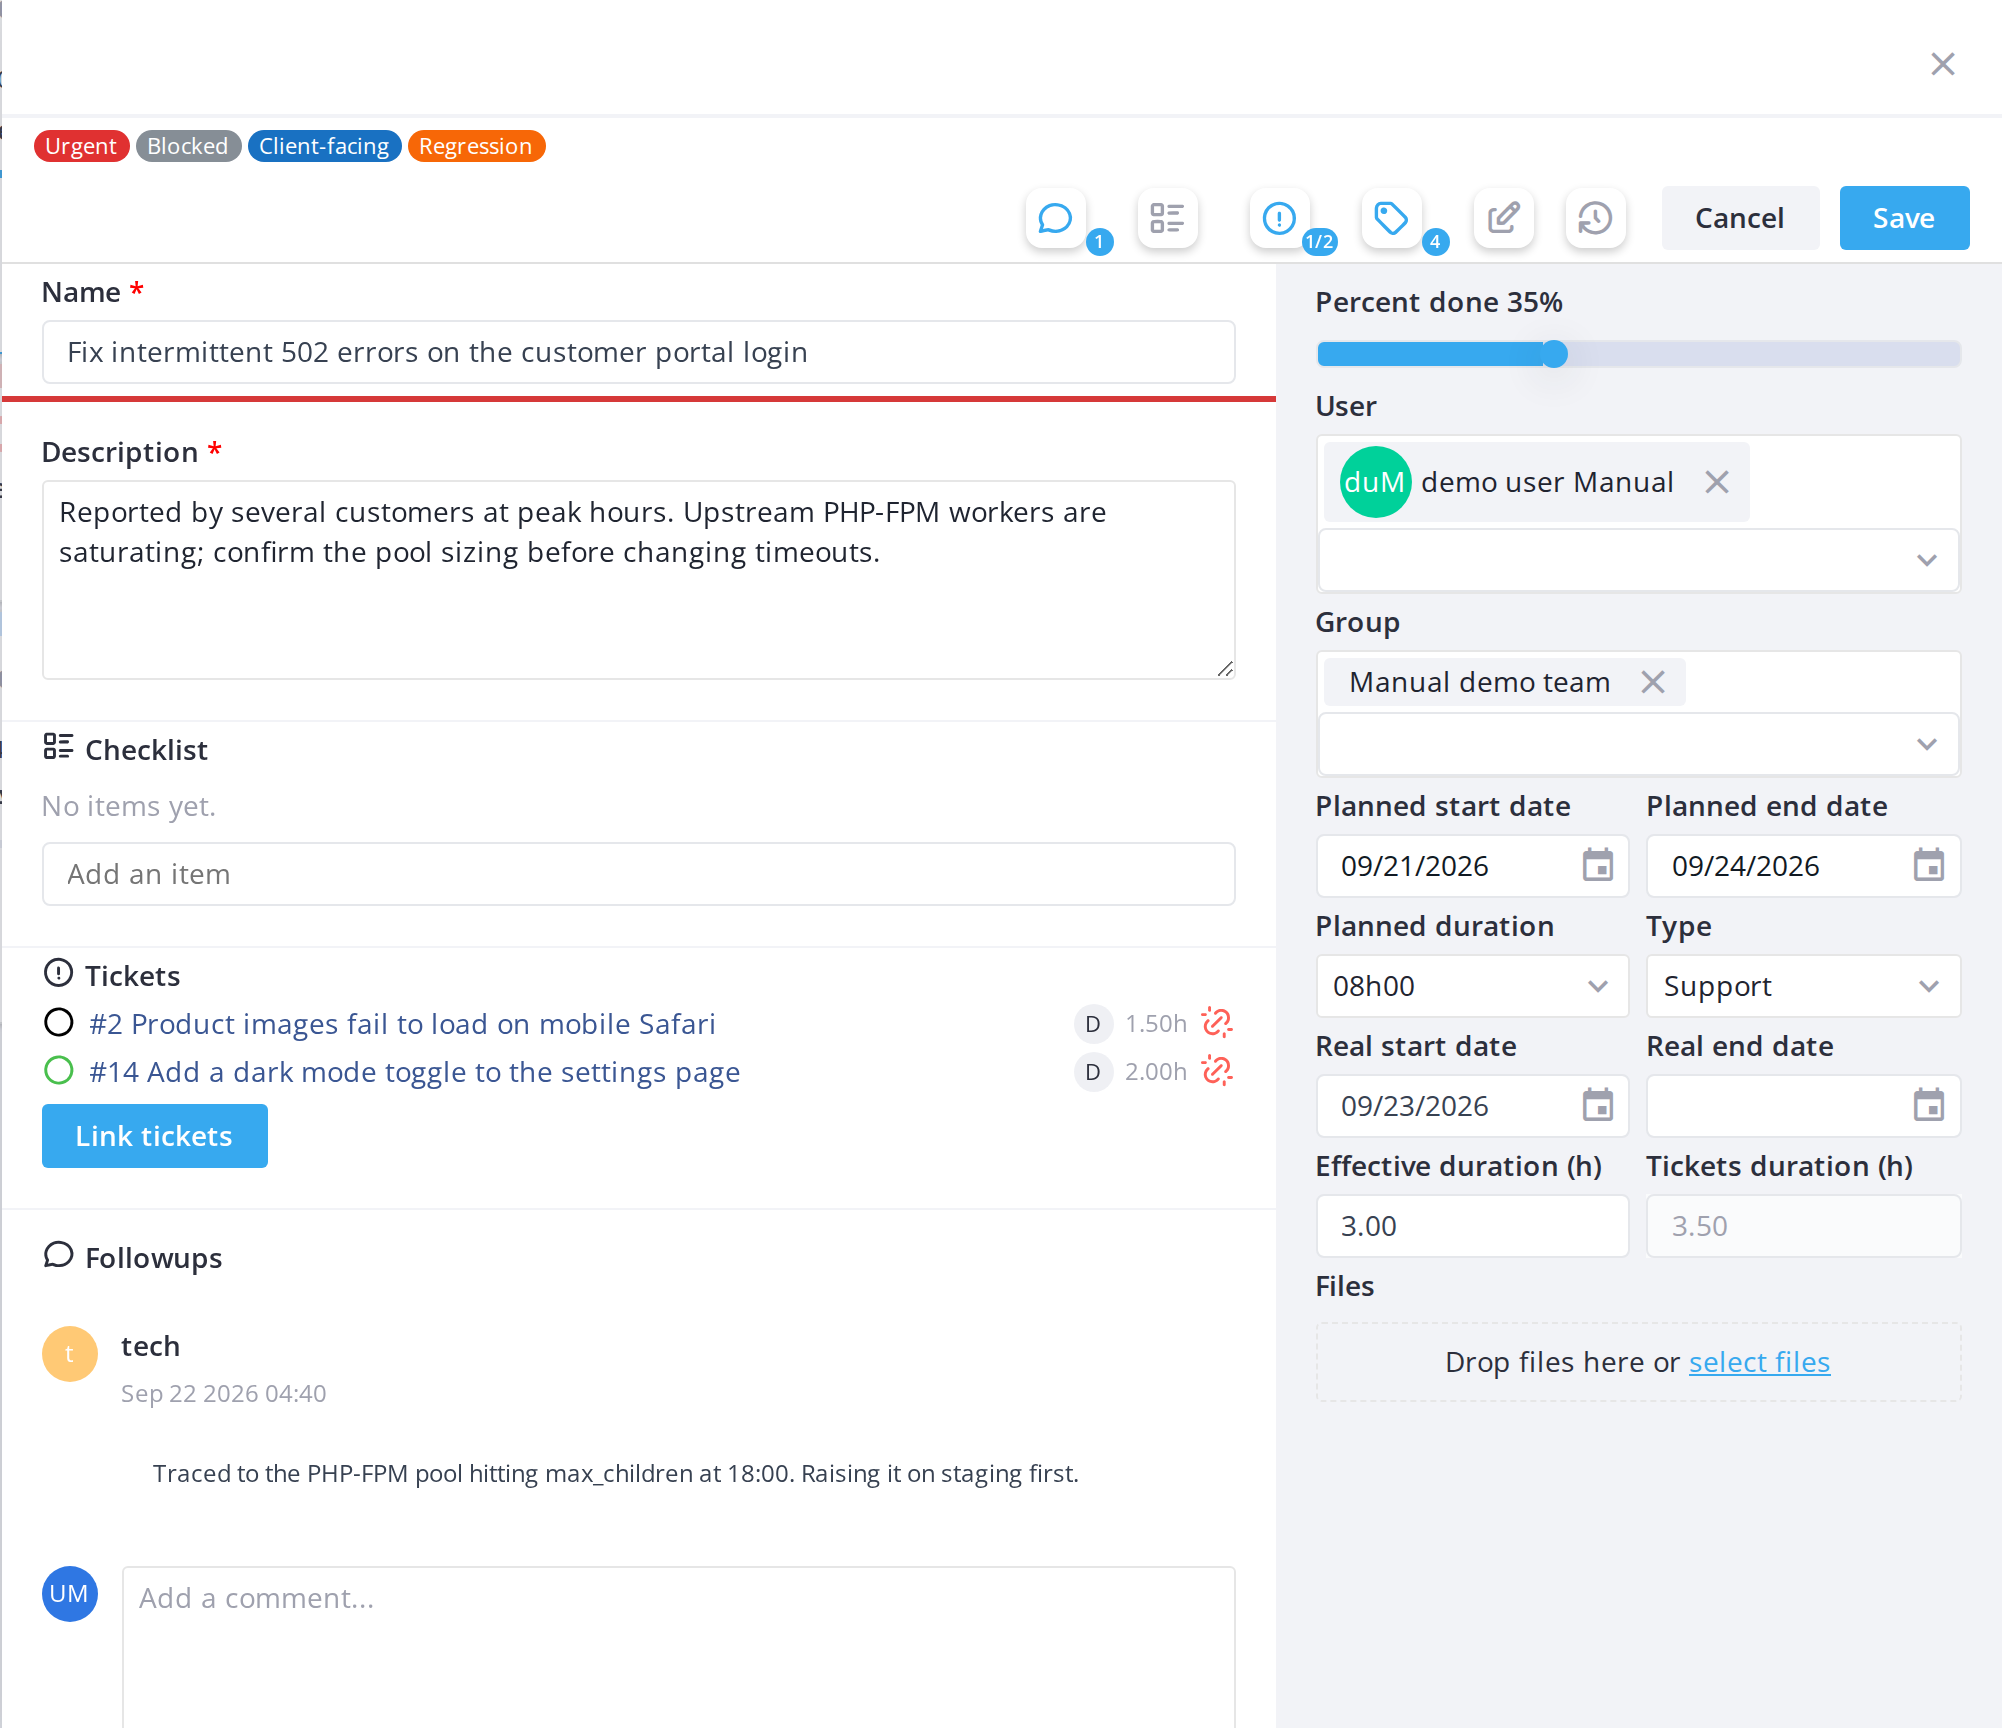
Labels let you tag cards with custom metadata — e.g., "urgent", "in review", "customer feedback". They appear as colored chips on both the card front and in the detail modal.
5.3.3.1 View labels on a card
Open a card. If it has labels, they appear as colored chips in the modal. Each chip shows the label name; if there are many labels, extra ones collapse into a "+N" badge.
5.3.3.2 Assign a label to a cardtitle
Open the card and click on the tagName iconfield to edit it. A red asterisk marks required fields.
5.3.2.3 Edit the description
Click the Description field to edit the card's description. Each is a separate right (Edit title, Edit description), so a profile can allow one without the other.
5.3.2.4 Assign a user
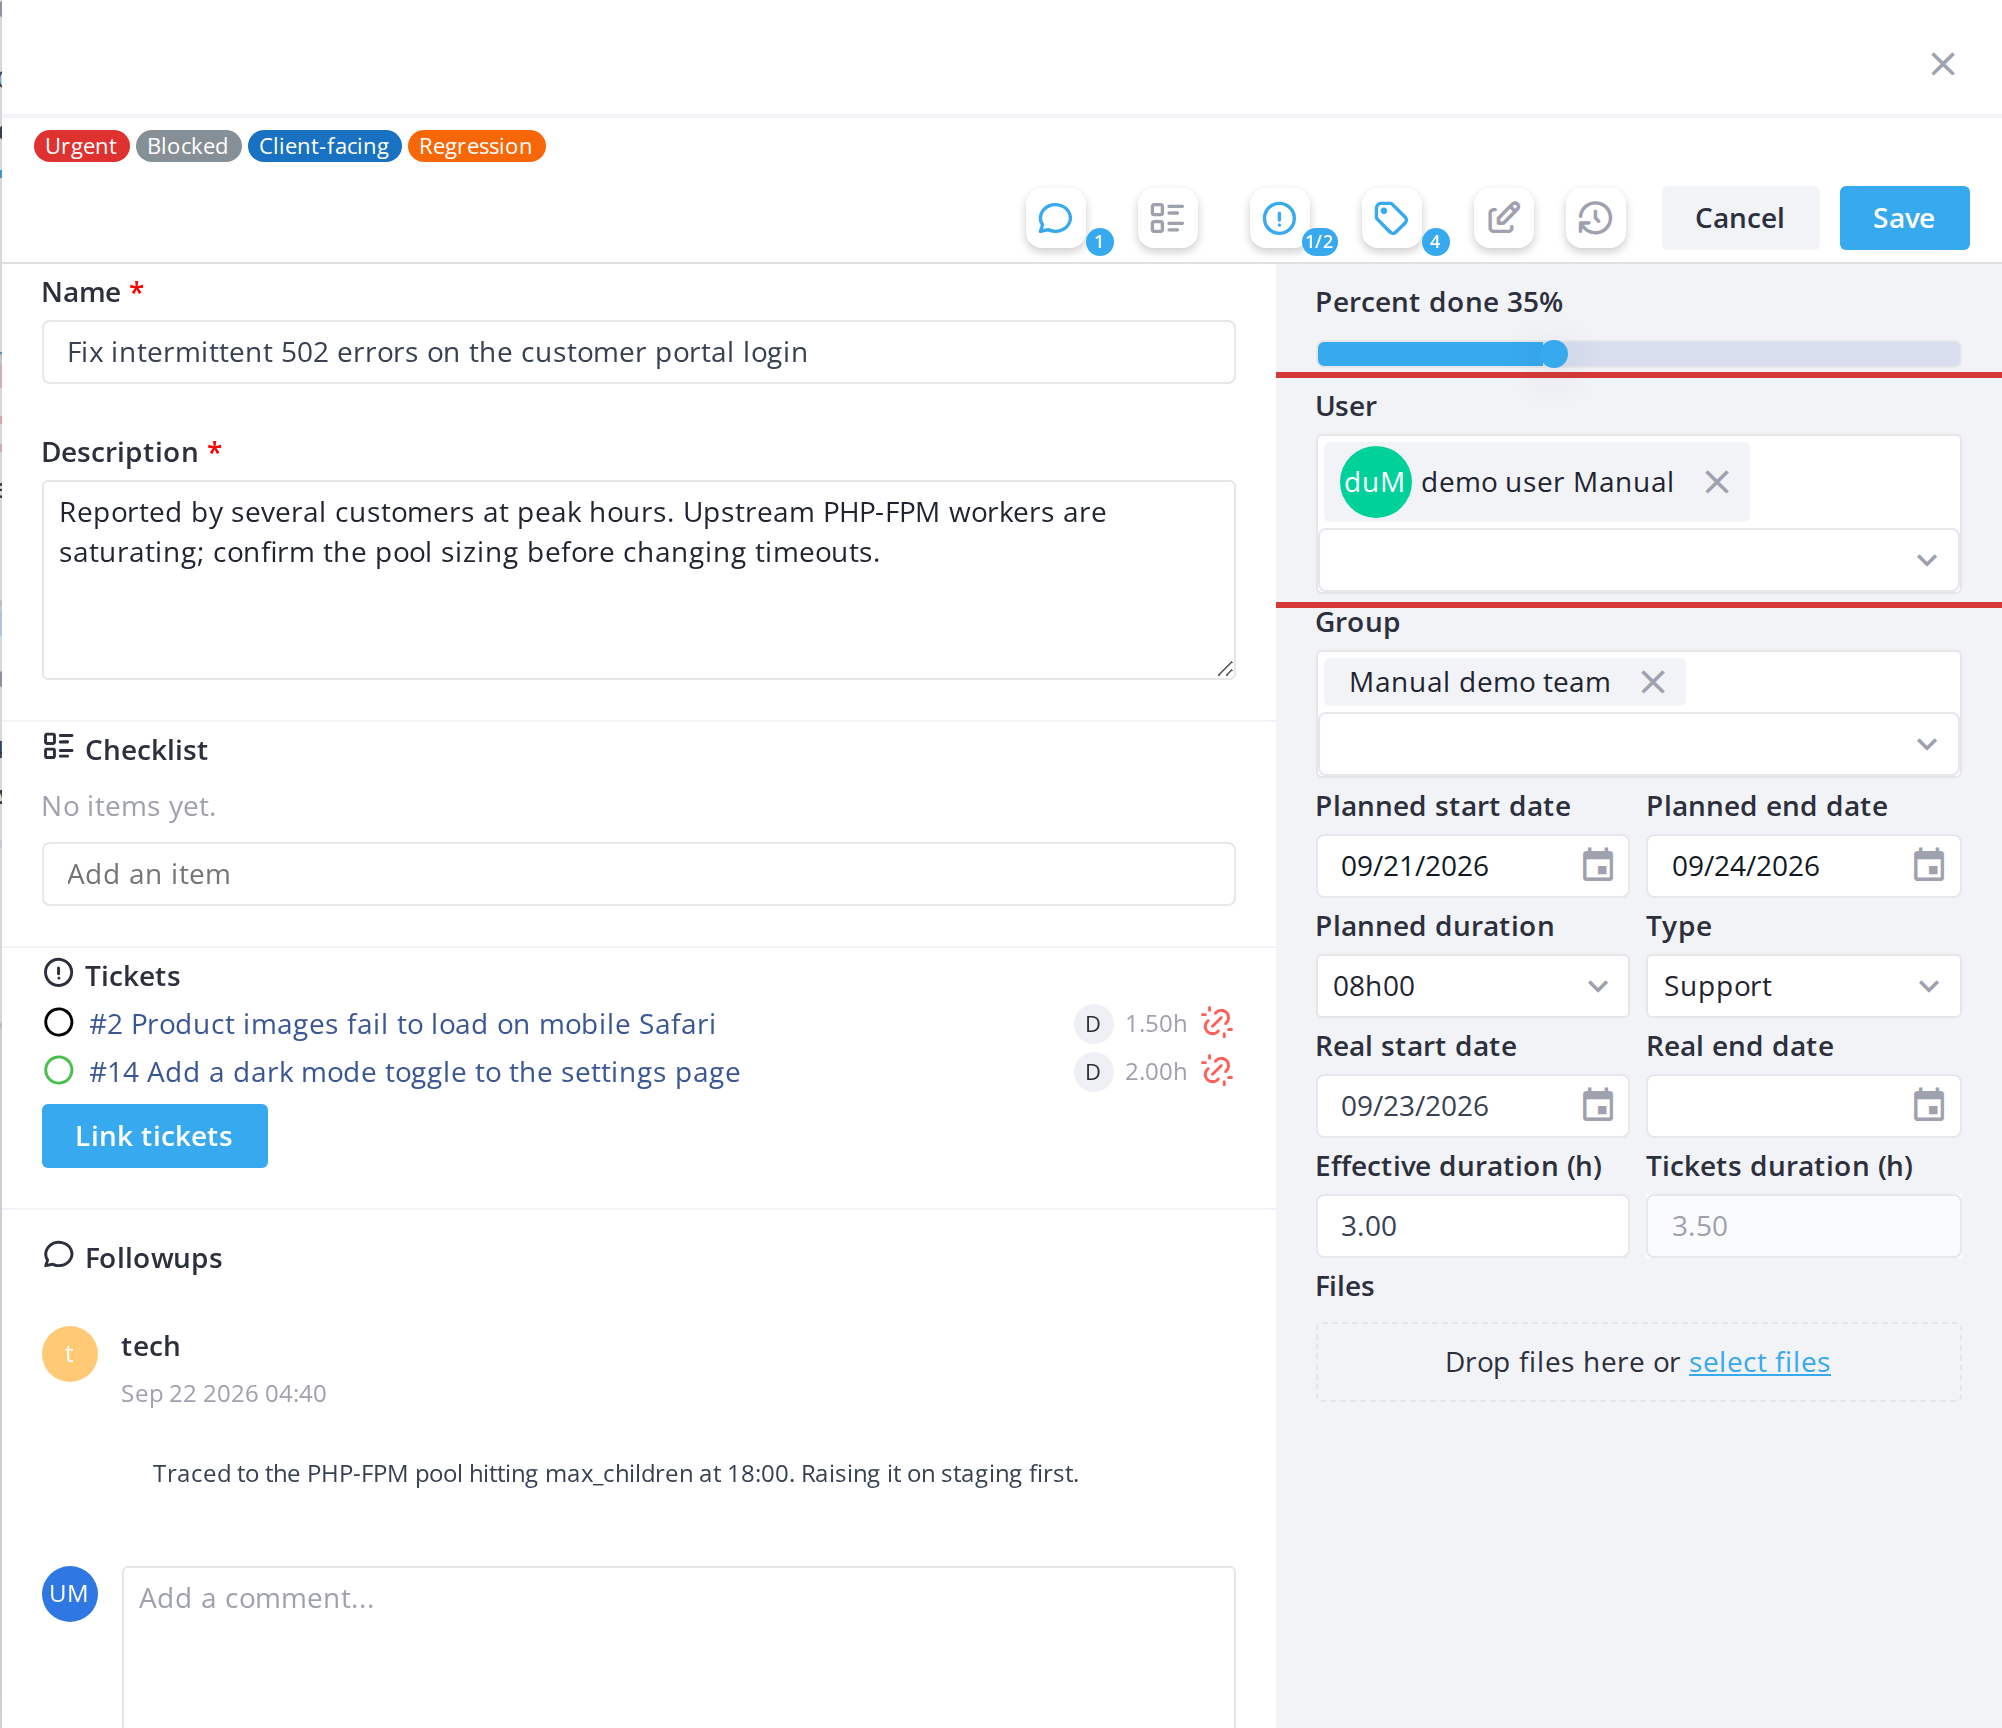
Use the User field in the actioncard bardetail atpanel to add or remove team members. This is gated by the top (if Assign labels permission is granted). A dialog appears with available labels. Check the box nextuser to eacha label to assign it; uncheck to remove. Click Savecard to apply the changes.right.
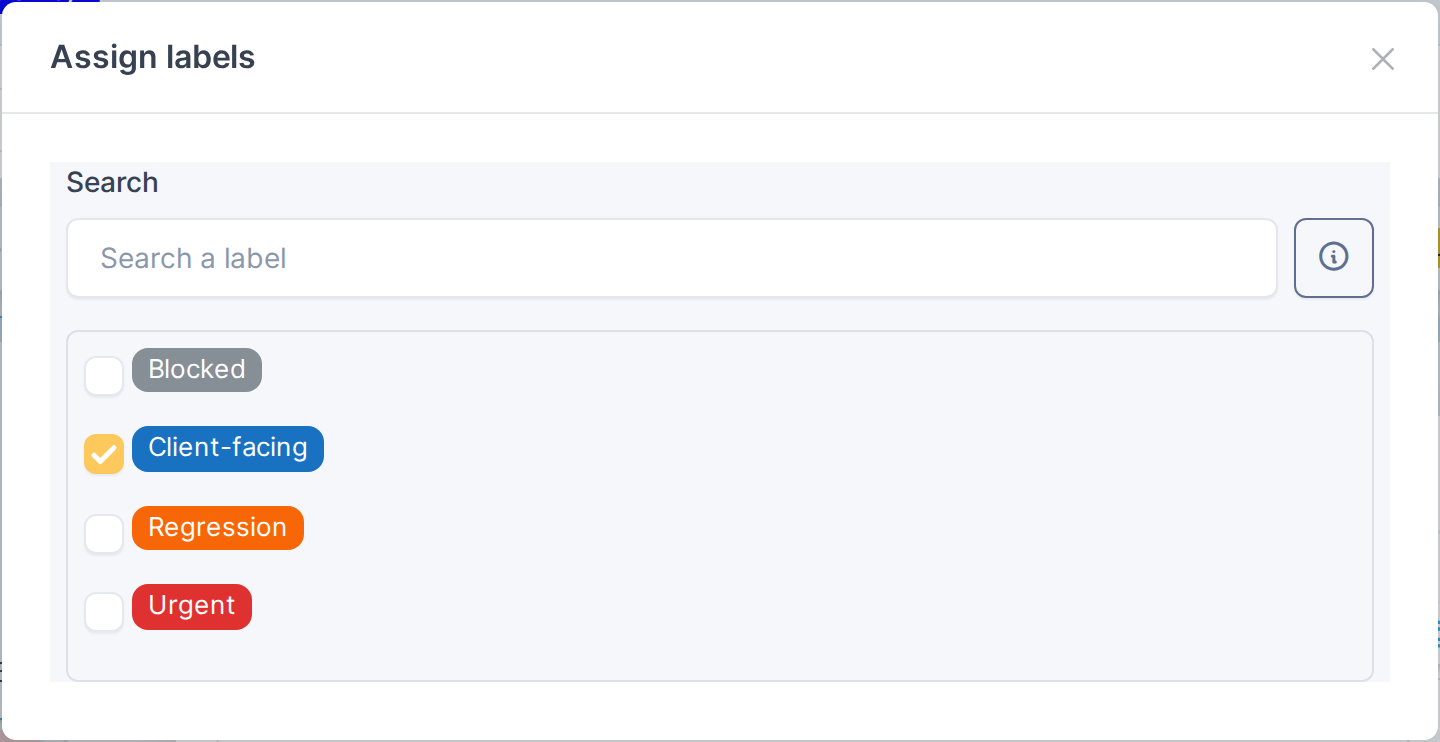
5.3.3.32.5 RemoveSet astart labeland fromend a carddates
OpenUse the Planned start date and Planned end date fields to set the card's timeline. Everyone can see them; changing them needs the Edit planned dates right.
5.3.2.6 Set planned duration
Use the Planned duration dropdown to estimate how long the task will take.
5.3.2.7 Set the card andtype
Use the Type dropdown to categorize the task (e.g., Bug, Feature, Documentation). Available types are configured in Setup.
5.3.2.8 Attach a file
In the Files section of the modal, click the tagupload iconarea or drag and drop a file to openattach it to the labelcard. assignmentFiles dialog. Uncheck the box nextattached to a labelcard trigger the New Attachment notification and become regular GLPI documents linked to removethe it.underlying Clickproject Save.task.
ownNote:
itsLabelsEditing permissions areproject-wide (or global on the Kanban global view). They are not created per cardgranular —youeachcanfieldonlyisassign existing labels. New labels are created in Setupgated byadministrators.
right.
Note:AOnlyread-onlyusers with theAssign labelsright can modify a card's labels. The tag iconfield ishiddengrayedforoutusersandwithoutcannotthisberight.edited.
5.3.3 Reading a task card
A task card shows the task's type, time, dates, progress, checklist and linked tickets at a glance. Hover any icon for a tooltip.
5.3.3.1 Task card layout
A project task card shows:
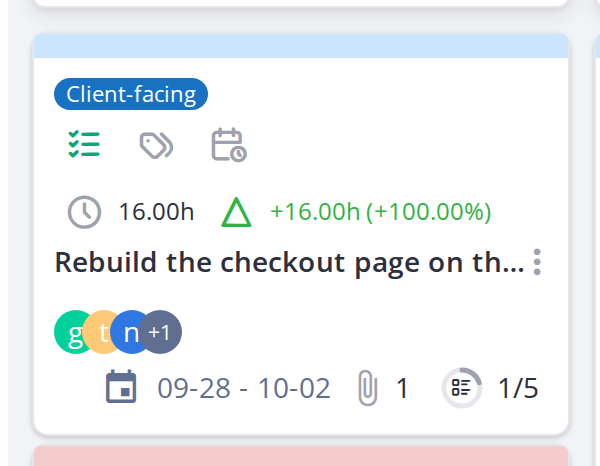
5.3.3.2 Task type icon
A tag icon and label show the task's Type, one of the project task types defined under Setup → Dropdowns → Project task types, and set in the task's Type field. A task with no type shows neither the tag nor the planned duration next to it. Hover the tag to see the full type name when it is shortened. Ticket cards show their ticket type (Incident or Request) as an icon instead. In this example the types are Development, Support, New Feature and Spike.
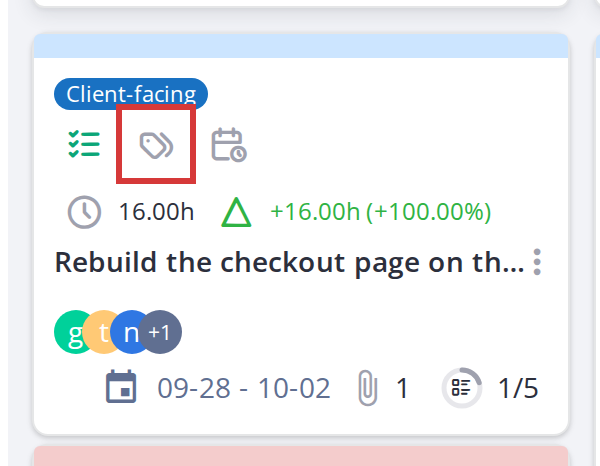
5.3.3.3 Planned duration
A task's planned duration is the first figure of the card's time row, after a clock icon; the hours spent and the variance follow it, in hours and as a percentage, green while there is time left and red once over (see Time on a task). A task with no planned duration shows only the hours spent.
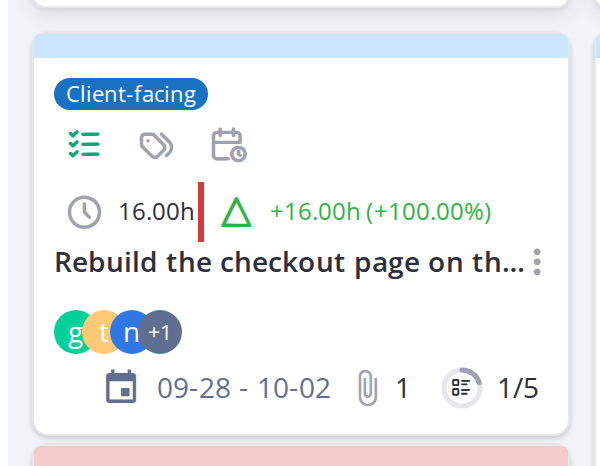
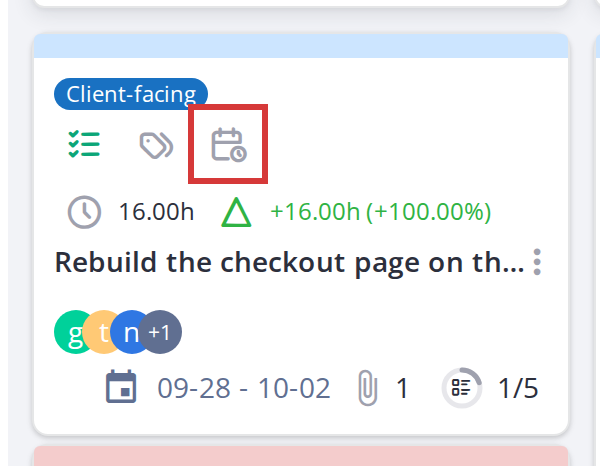
5.3.3.4 Dates and their colour
A calendar icon shows the task's planned dates, in days only; a range within one month shows the month once. Hover it for the full dates. Without planned dates the card shows its creation date.
The date's colour tells how close the task is to its planned end, using the same colours and thresholds as a ticket's Time to resolve:
5.3.3.5 Progress bar
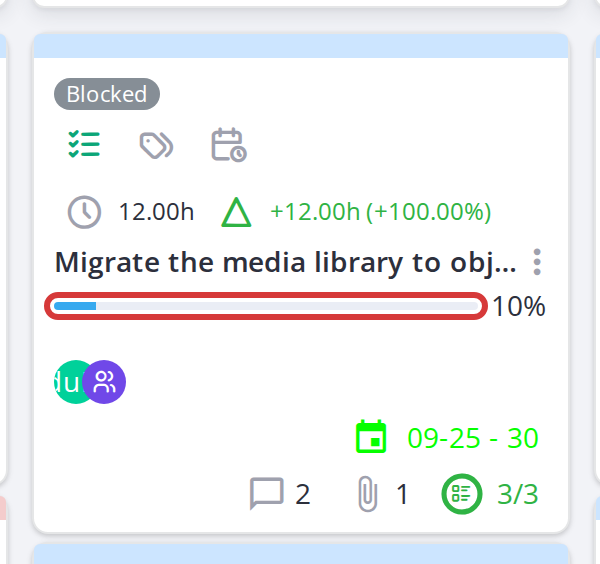
A coloured bar shows how much of the task is complete (percent done, 0–100%). When a task is 100% complete, the bar turns green and the percentage is hidden. Percent done is either typed in the task, or calculated automatically from the task's solved or closed tickets and its done checklist items, when Calculate task progress from tickets and checklist is on (see 4.1.2 Configuration).
5.3.3.6 Attachments icon
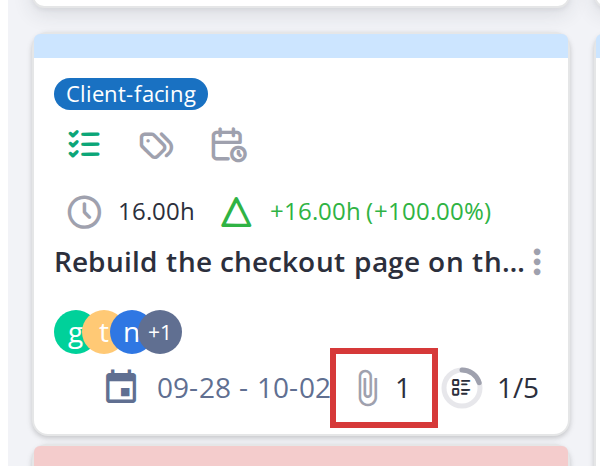
A paperclip icon shows how many files are attached to the card. Click it (if the modal is open) to jump to the attachments section.
5.3.3.7 Checklist icon
A checkmark icon indicates the card has a checklist. Click it (if the modal is open) to show/hide the checklist panel.
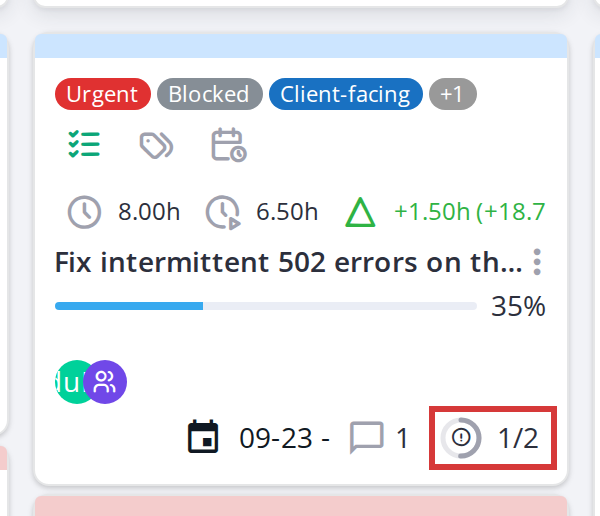
5.3.3.8 Linked tickets ring
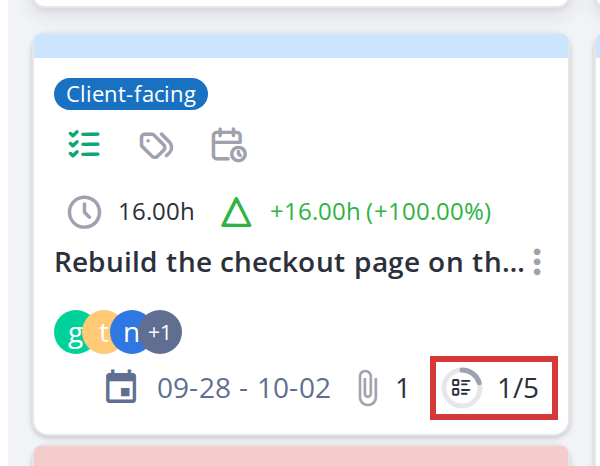
A task card with tickets linked to it shows a ring with a ticket icon and a count such as 1/3: tickets solved or closed, out of all the tickets linked to the task. The ring fills as tickets are solved and turns green when all are. Until then it takes the worst Time to resolve colour of its tickets, so a late ticket shows on the task too. Hover it for the details; the tickets themselves are listed in the task's card window (see Tickets linked to a task).
5.3.4 Time on a task: hours, real dates and late tasks
Each task card compares the time planned for the task with the time actually spent on it, and the board records when work on the task really started and ended. Both are kept up to date from the board itself, so the team does not have to fill them in.
5.3.4.1 Read the hours on a card
A task card with a planned duration shows three figures in its time row:
A task with no planned duration shows only the hours spent.
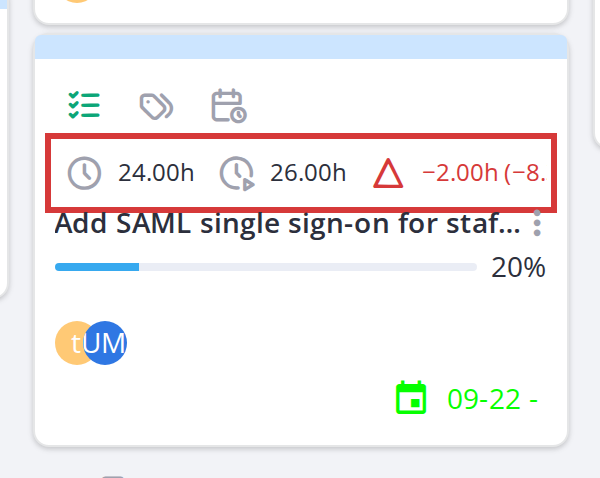
A task over its plan: 24 h planned, 26 h spent, 8 % over
5.3.4.2 Hours and real dates in the card window
The card window repeats the planned and spent hours next to the task number, with the time left or over in hours and percent, and shows the time fields in its side panel:
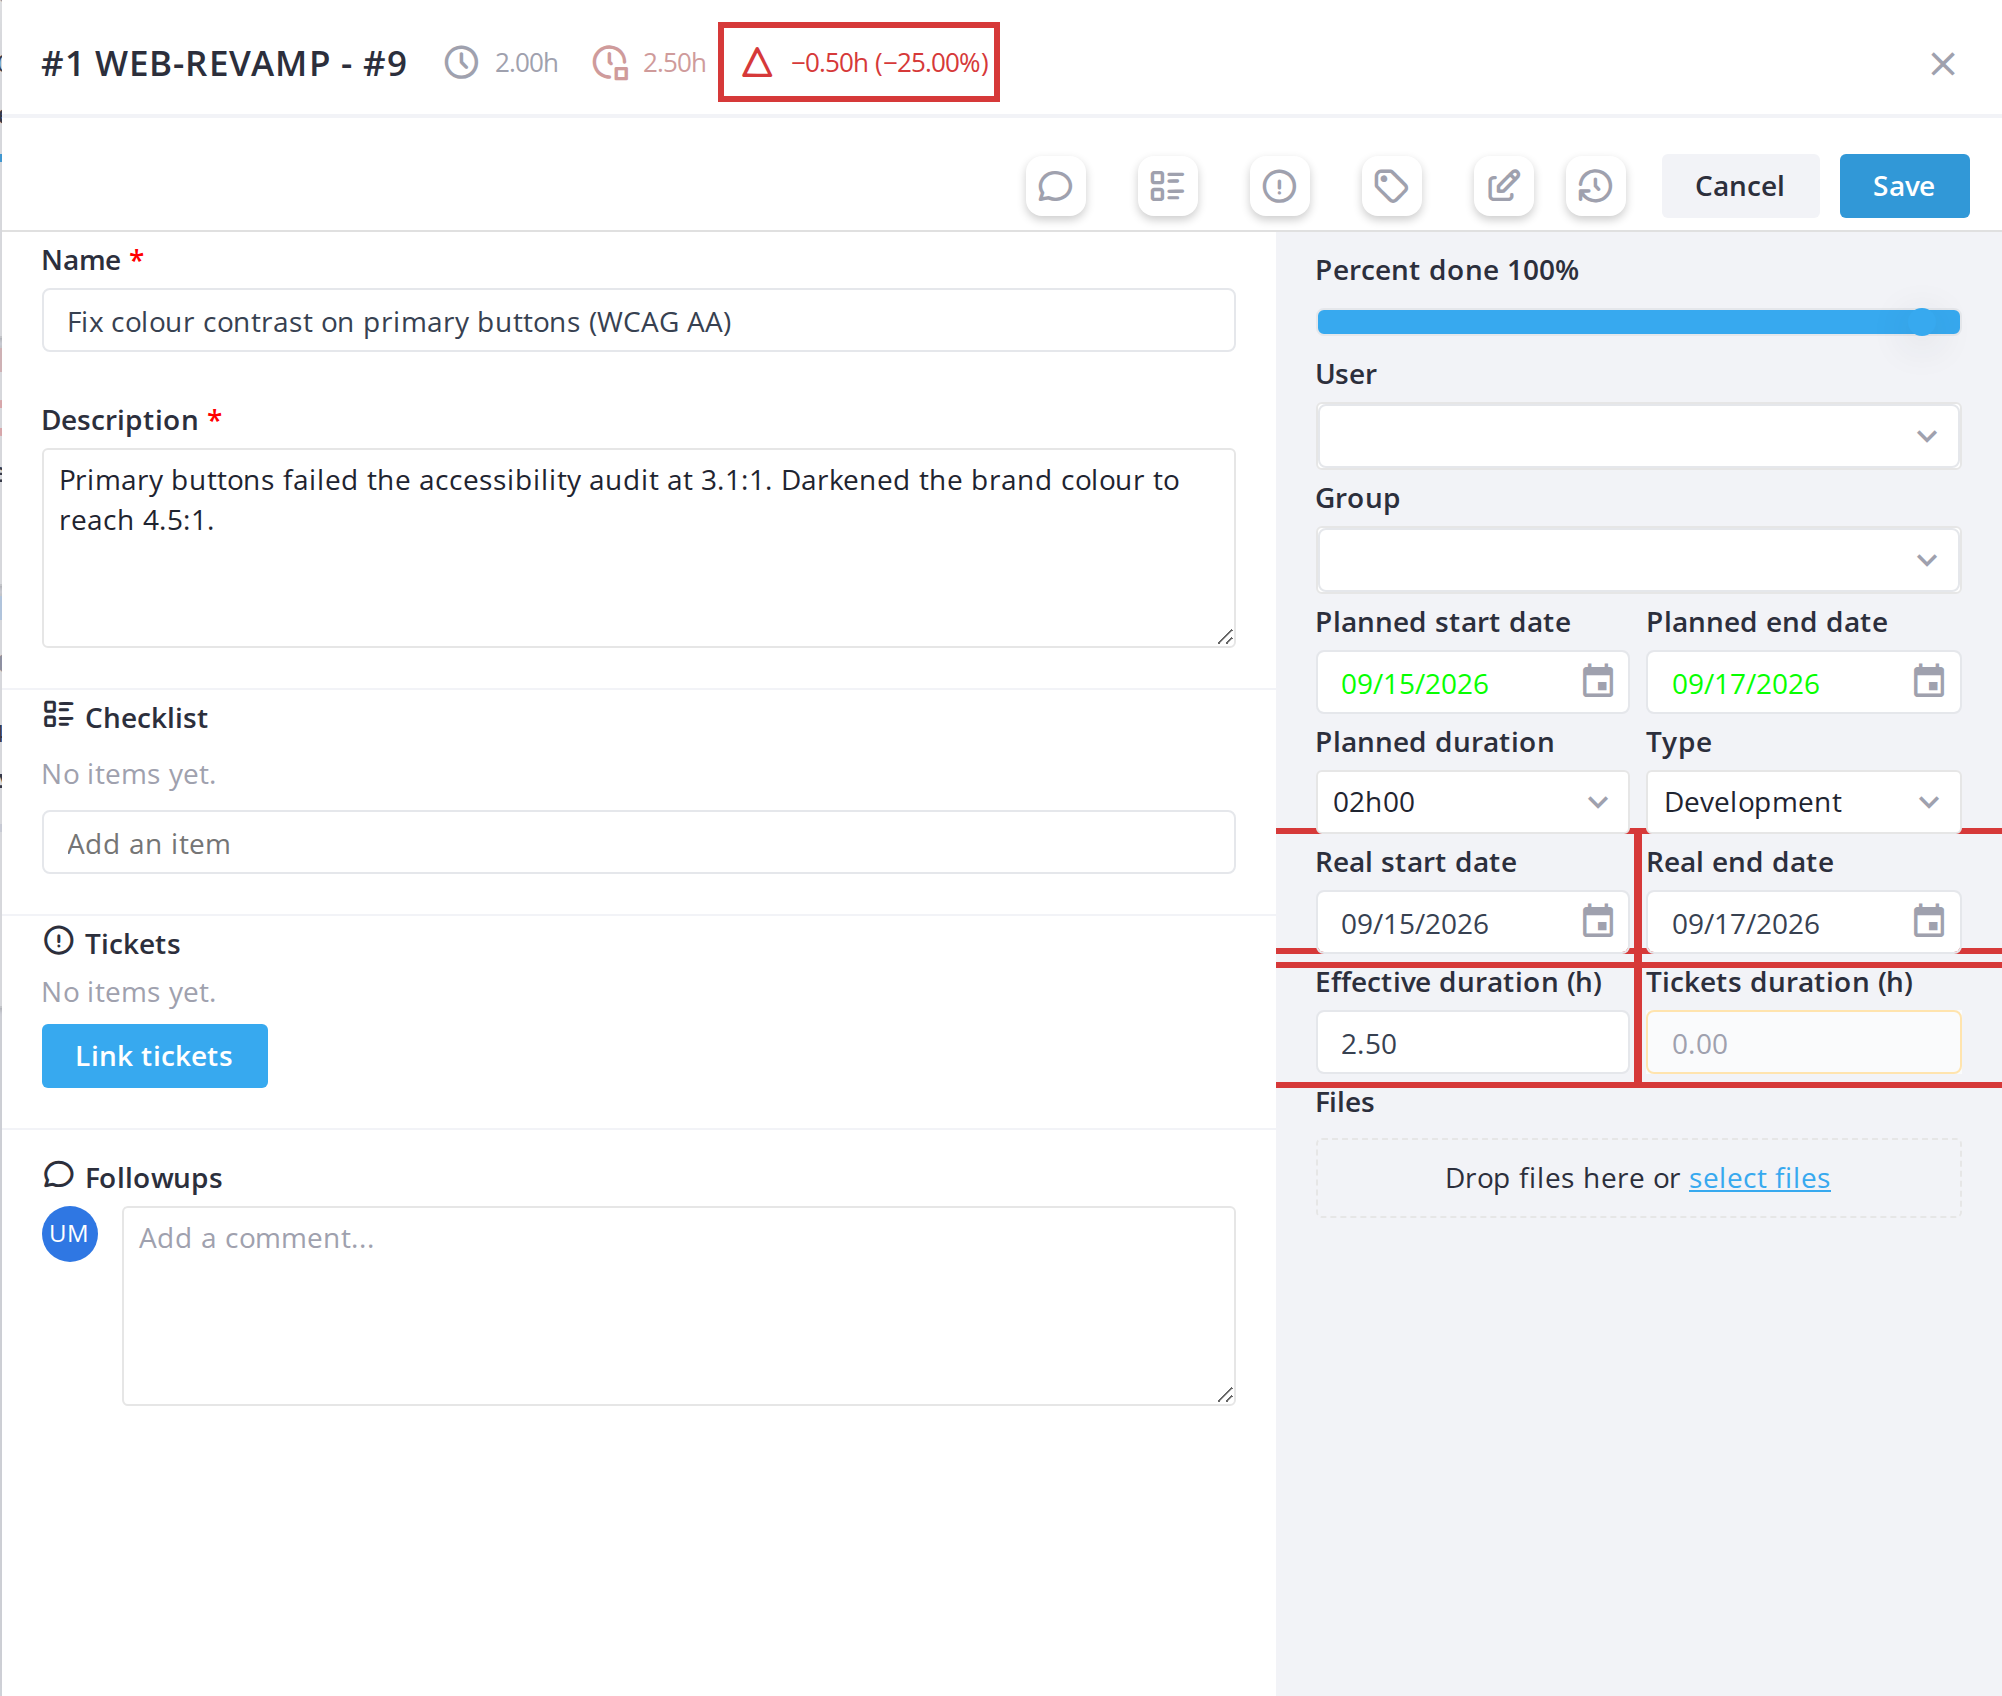
5.3.4.3 How the board fills in the real dates
Moving a task on the board fills in its real dates:
A user with the Edit real dates right can correct either date by hand in the card window; for everyone else the two fields are read-only.
5.3.4.4 Show only late tasks
Click the Late icon (a clock with an exclamation mark) in the toolbar to keep only the tasks whose time spent is over their planned duration. Click it again to show every card.
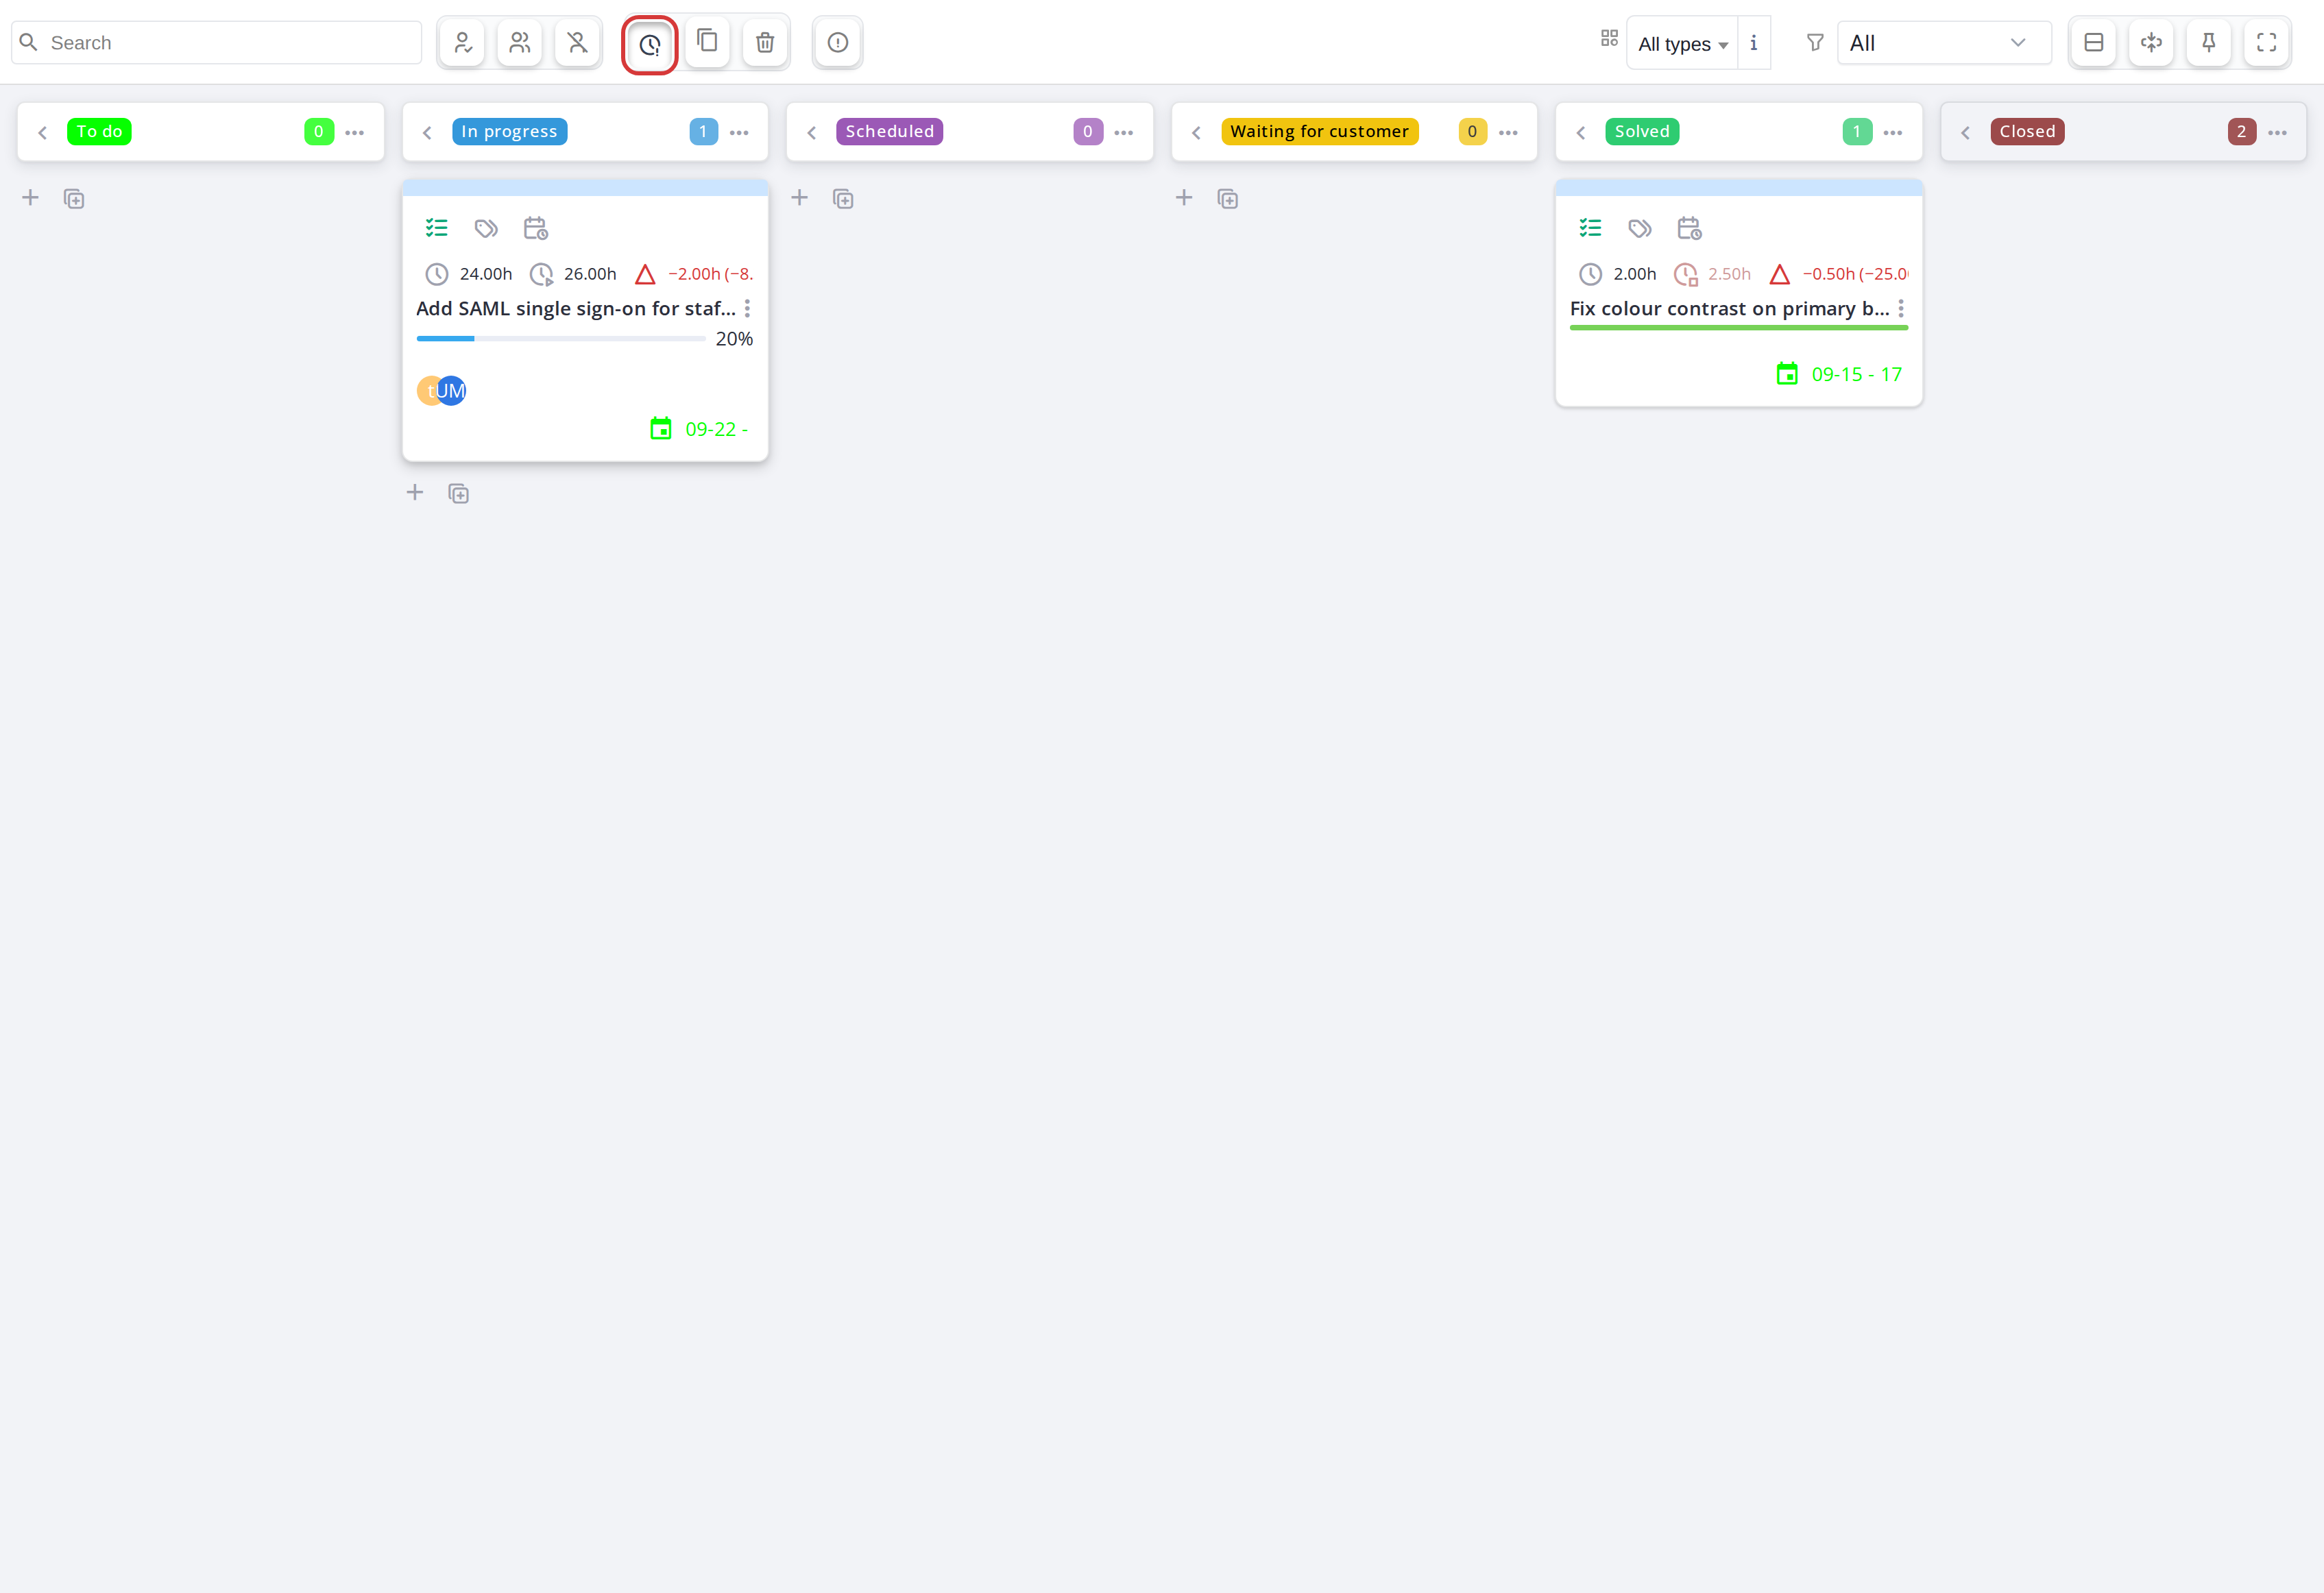
With Late on, only the two tasks over their planned hours remain
5.3.5 Checklists on task cards
Project task cards can have a checklist — a list of subtasks that you can check off as you complete them. Checklists are task-specific: ticket cards do not have one.
5.3.4.5.1 Show/hide the checklist
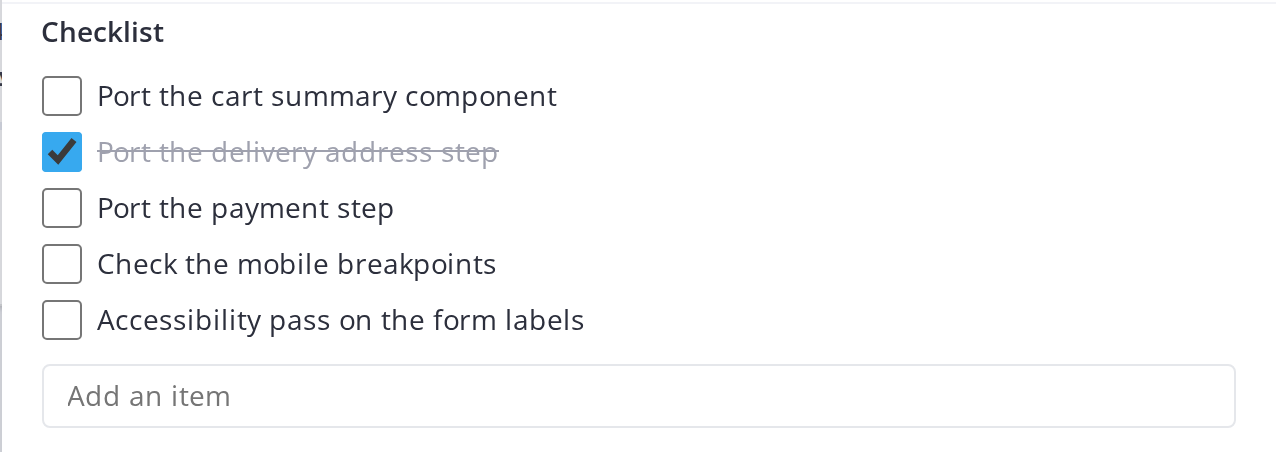
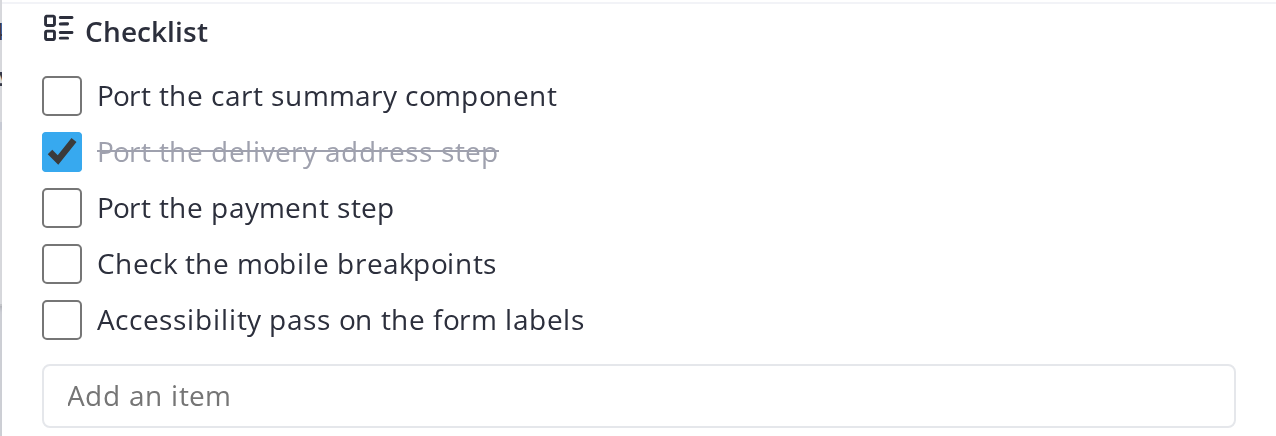
Open a task card. If it has a checklist, a checkmark icon appears in the action bar at the top. Click it to toggle the checklist panel visible/hidden. The checklist appears below the description in the modal.
5.3.4.5.2 Check off a checklist item
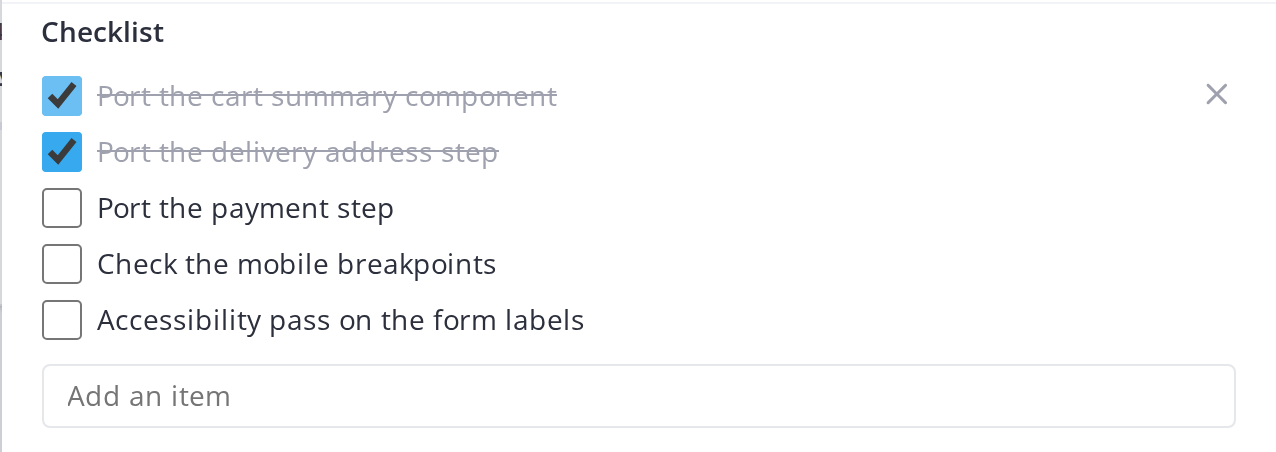
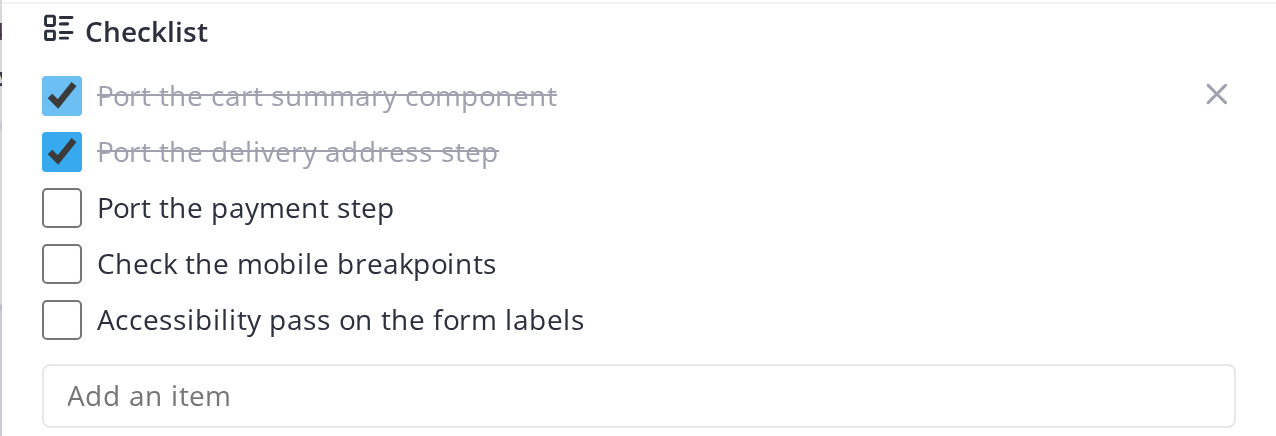
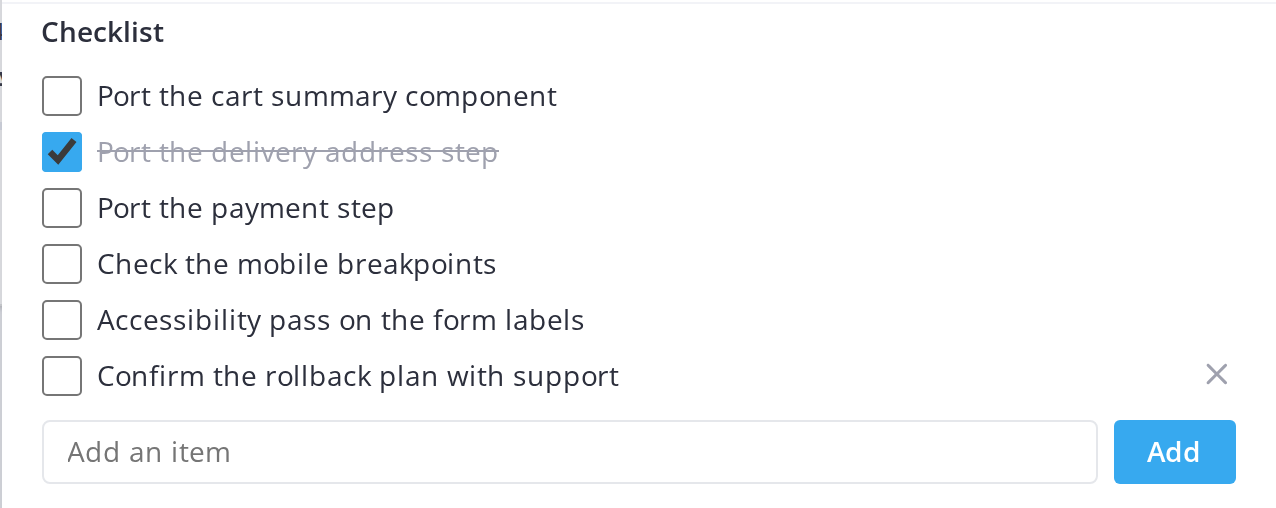
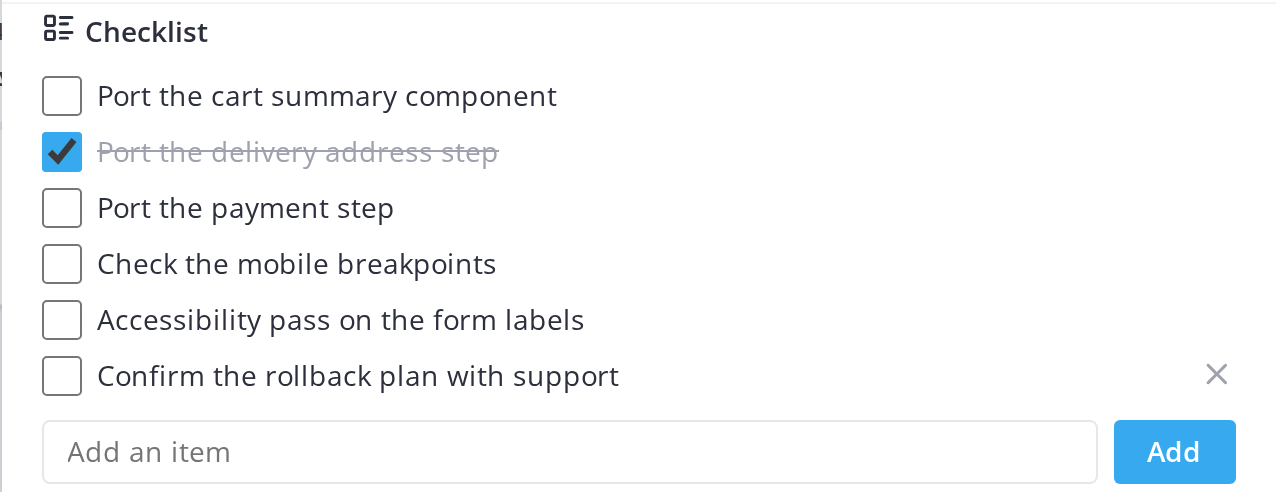
In the checklist panel, click the checkbox next to an item to mark it complete. Completed items get a strikethrough and are slightly grayed out.
5.3.4.5.3 Add a checklist item
At the bottom of the checklist, type a new item name in the Add an item text box and click Add, or press Enter. The new item appears in the list, unchecked.
5.3.4.5.4 Edit a checklist item
Hover over a checklist item and click its text to edit it in place, then press Enter to save the change.
5.3.4.5.5 Delete a checklist item
Hover over a checklist item and an X icon appears on the right. Click it to remove the item from the checklist.
Note: Checklist permissions follow the card edit permissions — if you can edit the task, you can edit its checklist.
Note: A checklist progress ring appears on the card front (in the footer) showing the percentage of items checked. The ring fills as you complete items.
5.3.6 Tickets linked to a task
A task can have tickets linked to it, for example the incidents a fix is meant to solve. The task's card window lists them and lets you link or unlink tickets without leaving the board. Time logged on these tickets counts in the task's hours spent.
5.3.6.1 See the tickets of a task
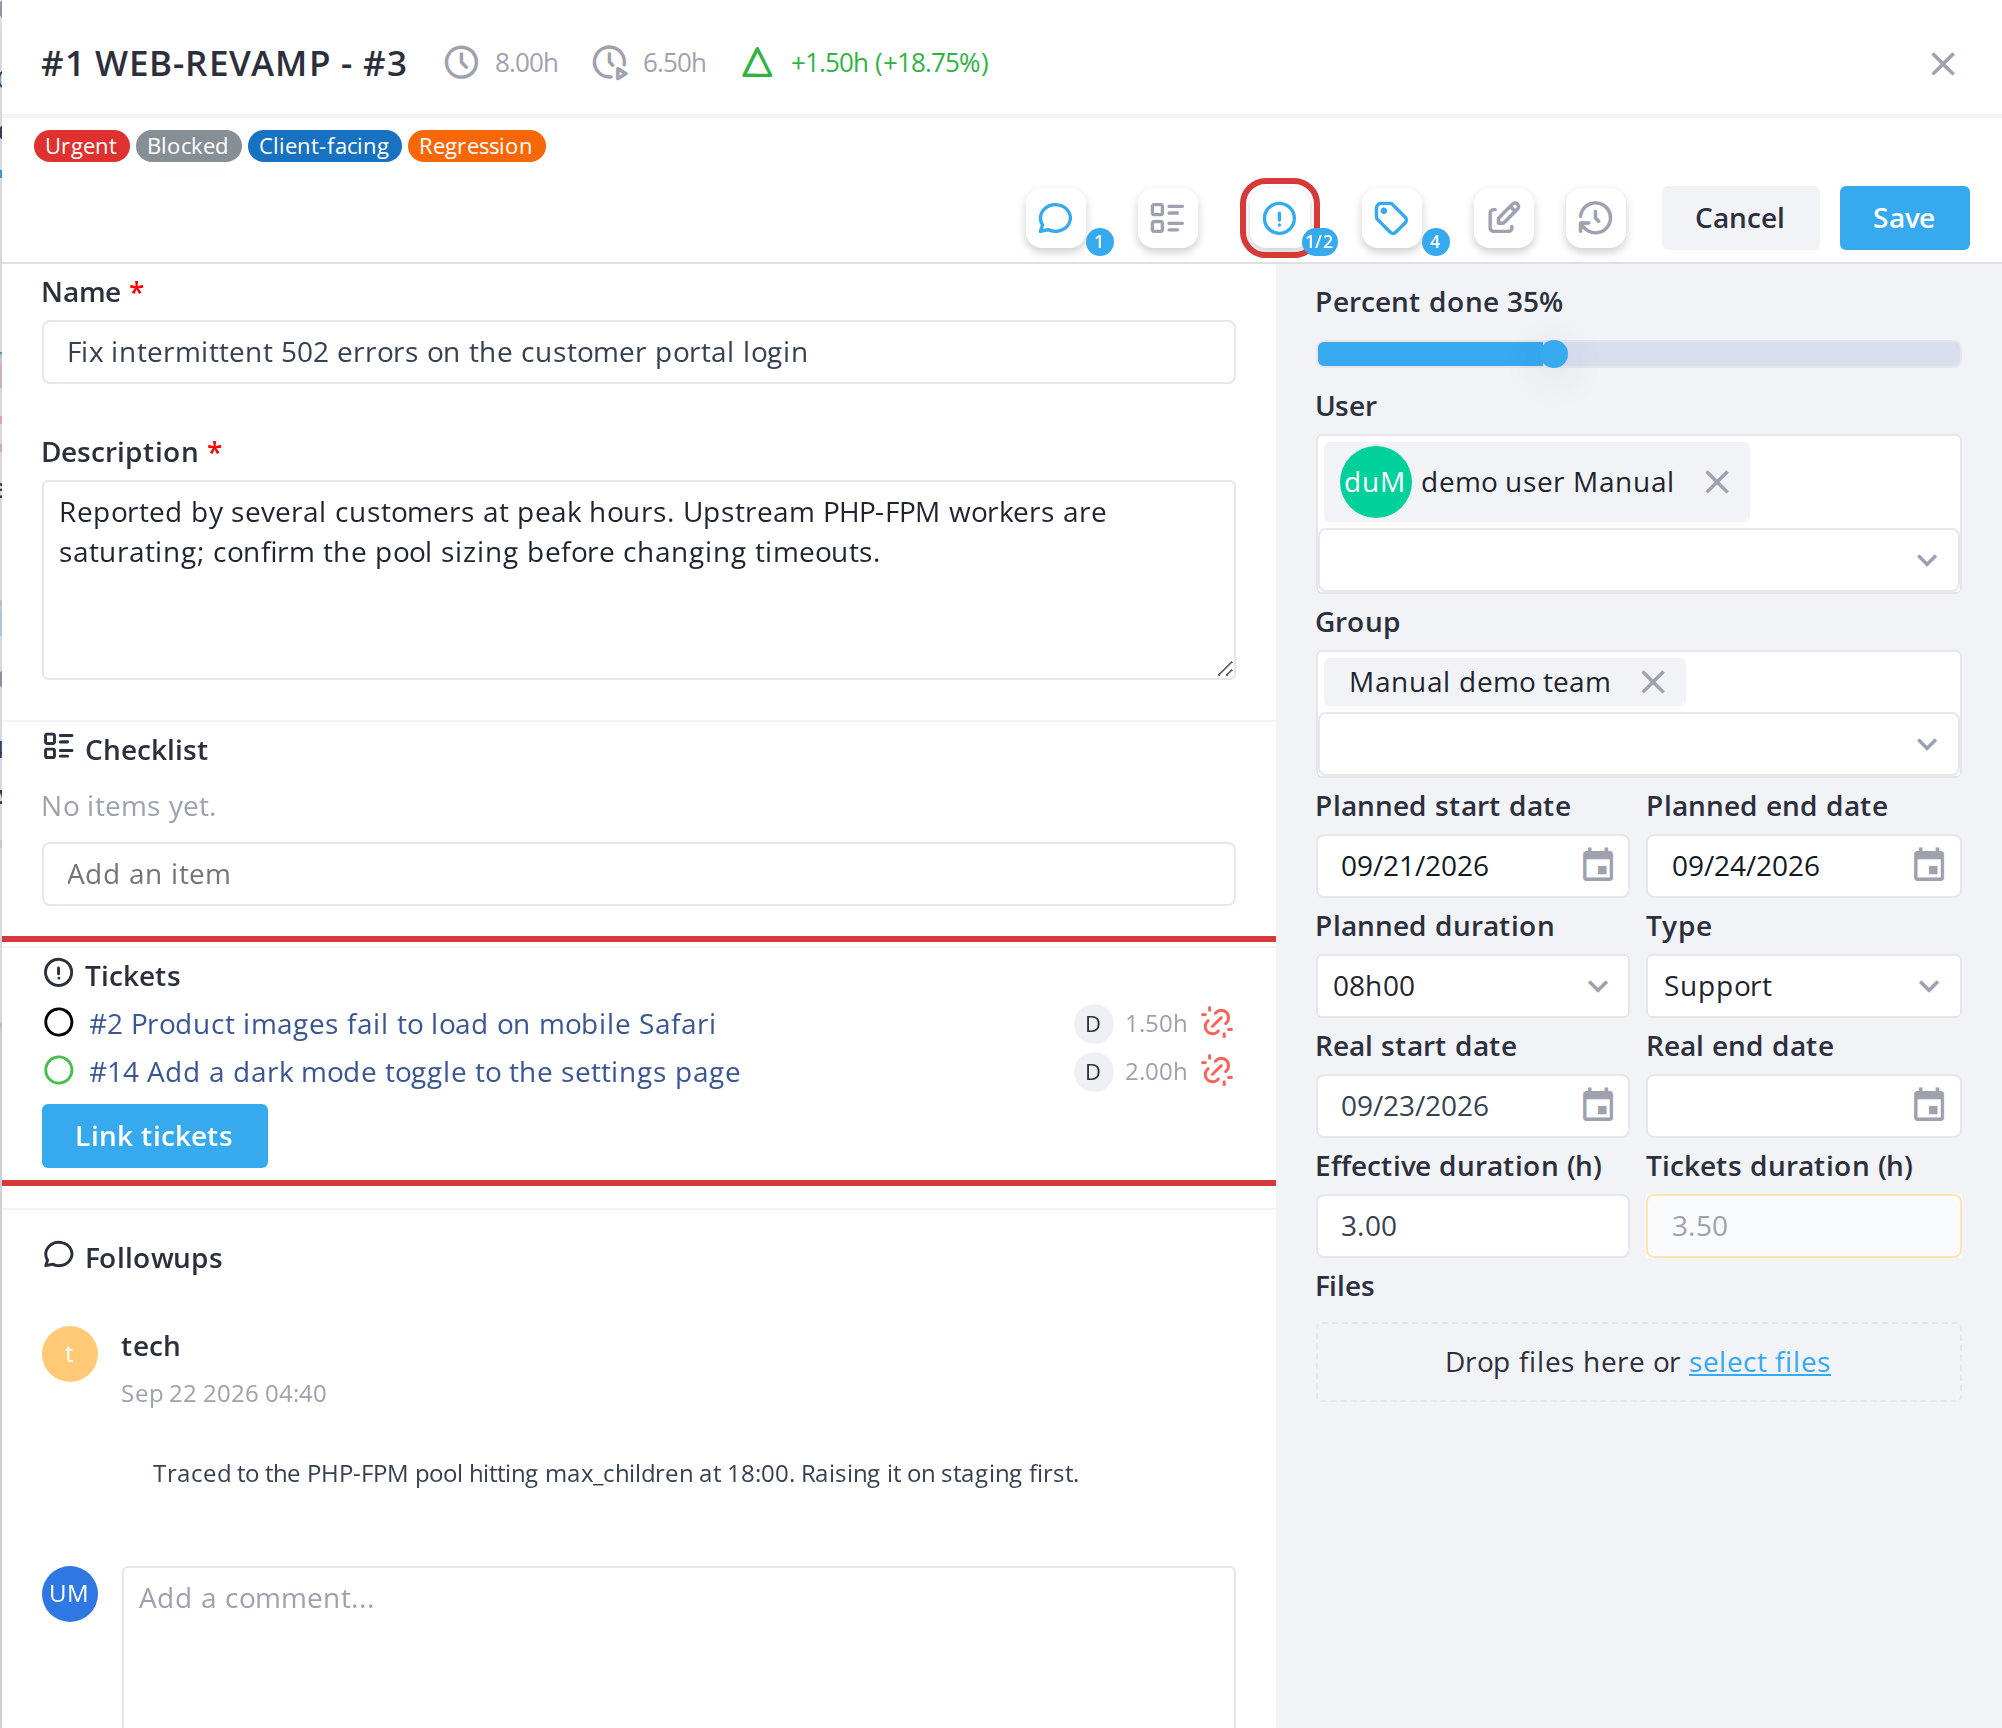
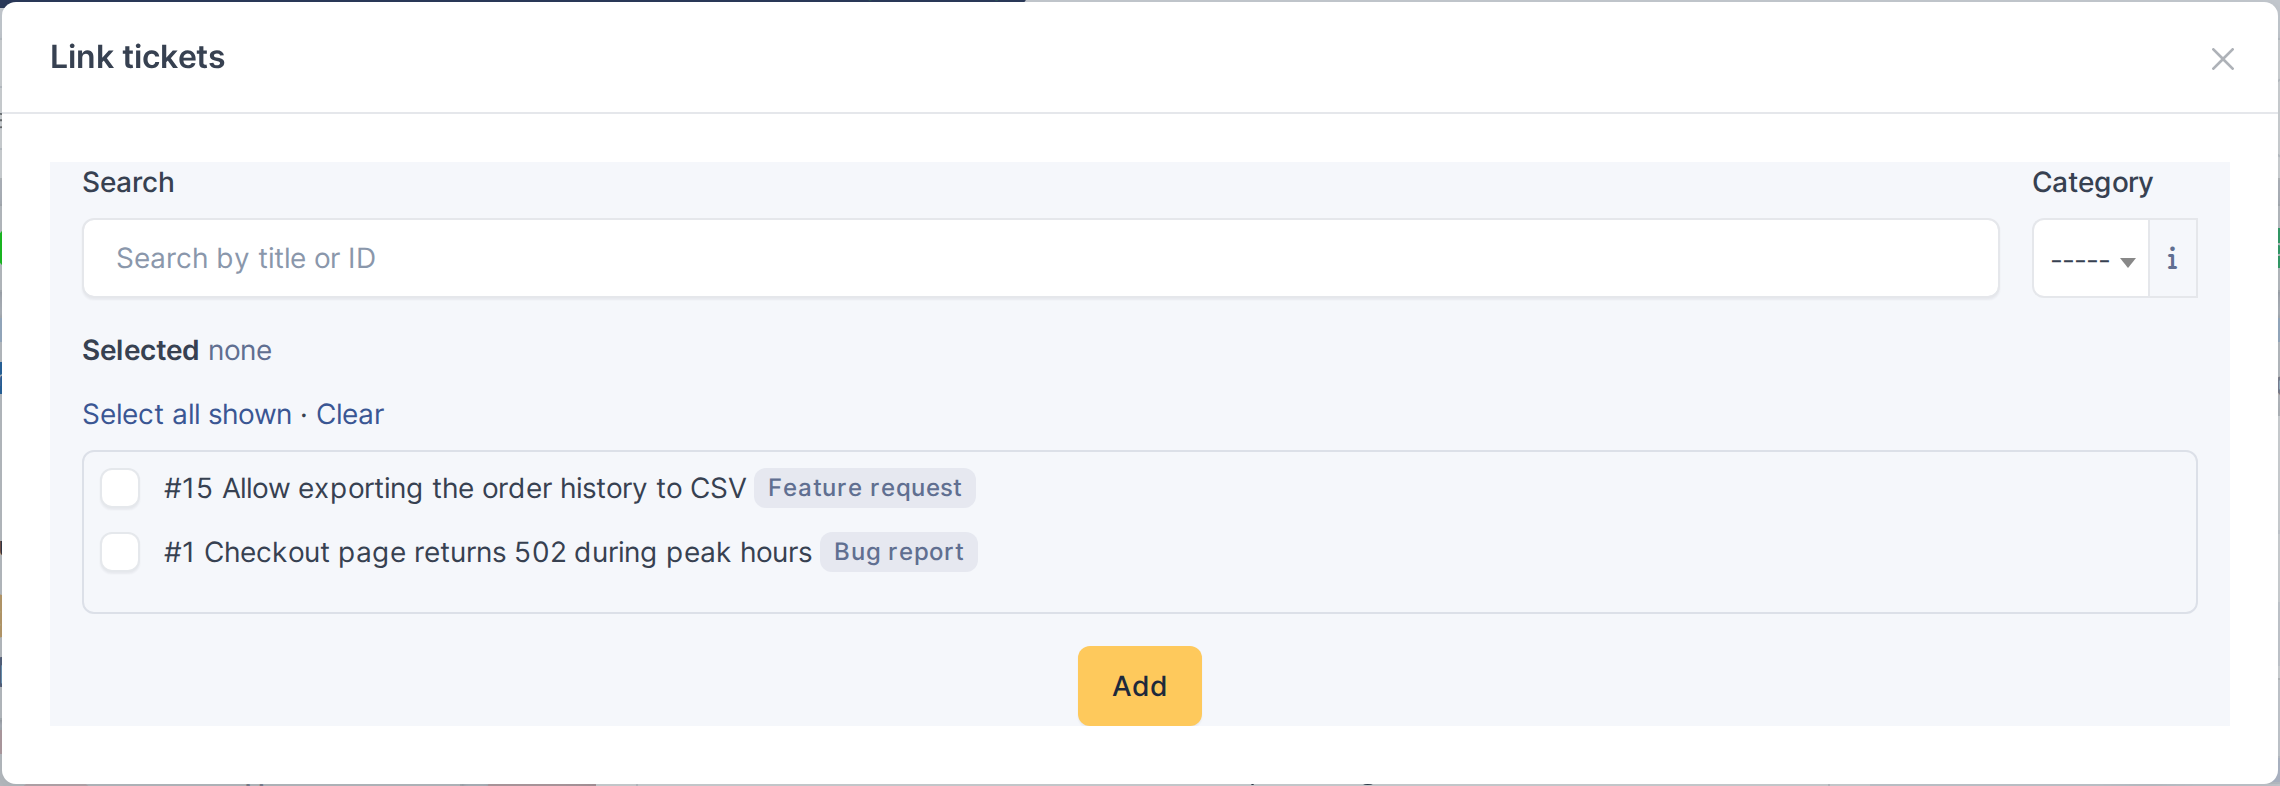
Open a task card. The Tickets section, under the checklist, lists each linked ticket with a ring showing its status, its number and title (a link to the ticket), its technician and the time logged on it. The ticket button in the window's button bar shows how many of the linked tickets are solved (here 1/2) and shows or hides the section.
5.3.6.2 Link or unlink a ticket
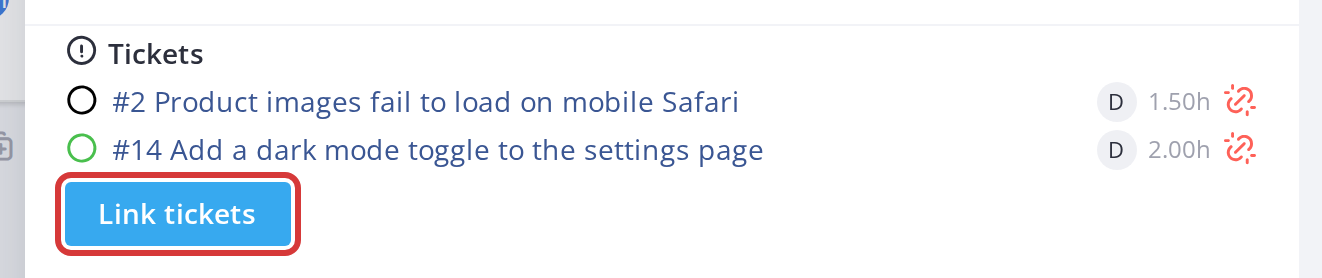
To link tickets, click Link tickets at the bottom of the section. It opens the same Link tickets window as the toolbar button (see 5.1.7.11 Link tickets to a project), with the same search, Select all shown and Clear, but showing only this task's board tickets. To unlink one, click the broken-link icon at the end of its row: the ticket is removed from the task only and stays linked to the project, so its own card stays on the board. Both need the Link tickets to a task right; without it the section is read-only.
5.3.7 Deleted task cards
When a task is deleted, its card remains on the board (grayed out) until it is purged. You can restore or purge deleted tasks.
5.3.7.1 Show deleted tasks
By default, deleted task cards are hidden. Click the trash icon in the toolbar to show them. Deleted cards appear faded with a "Deleted" label. They are not counted in the column totals, and no filter or search matches them. A deleted card can only be restored or purged, not edited or moved.
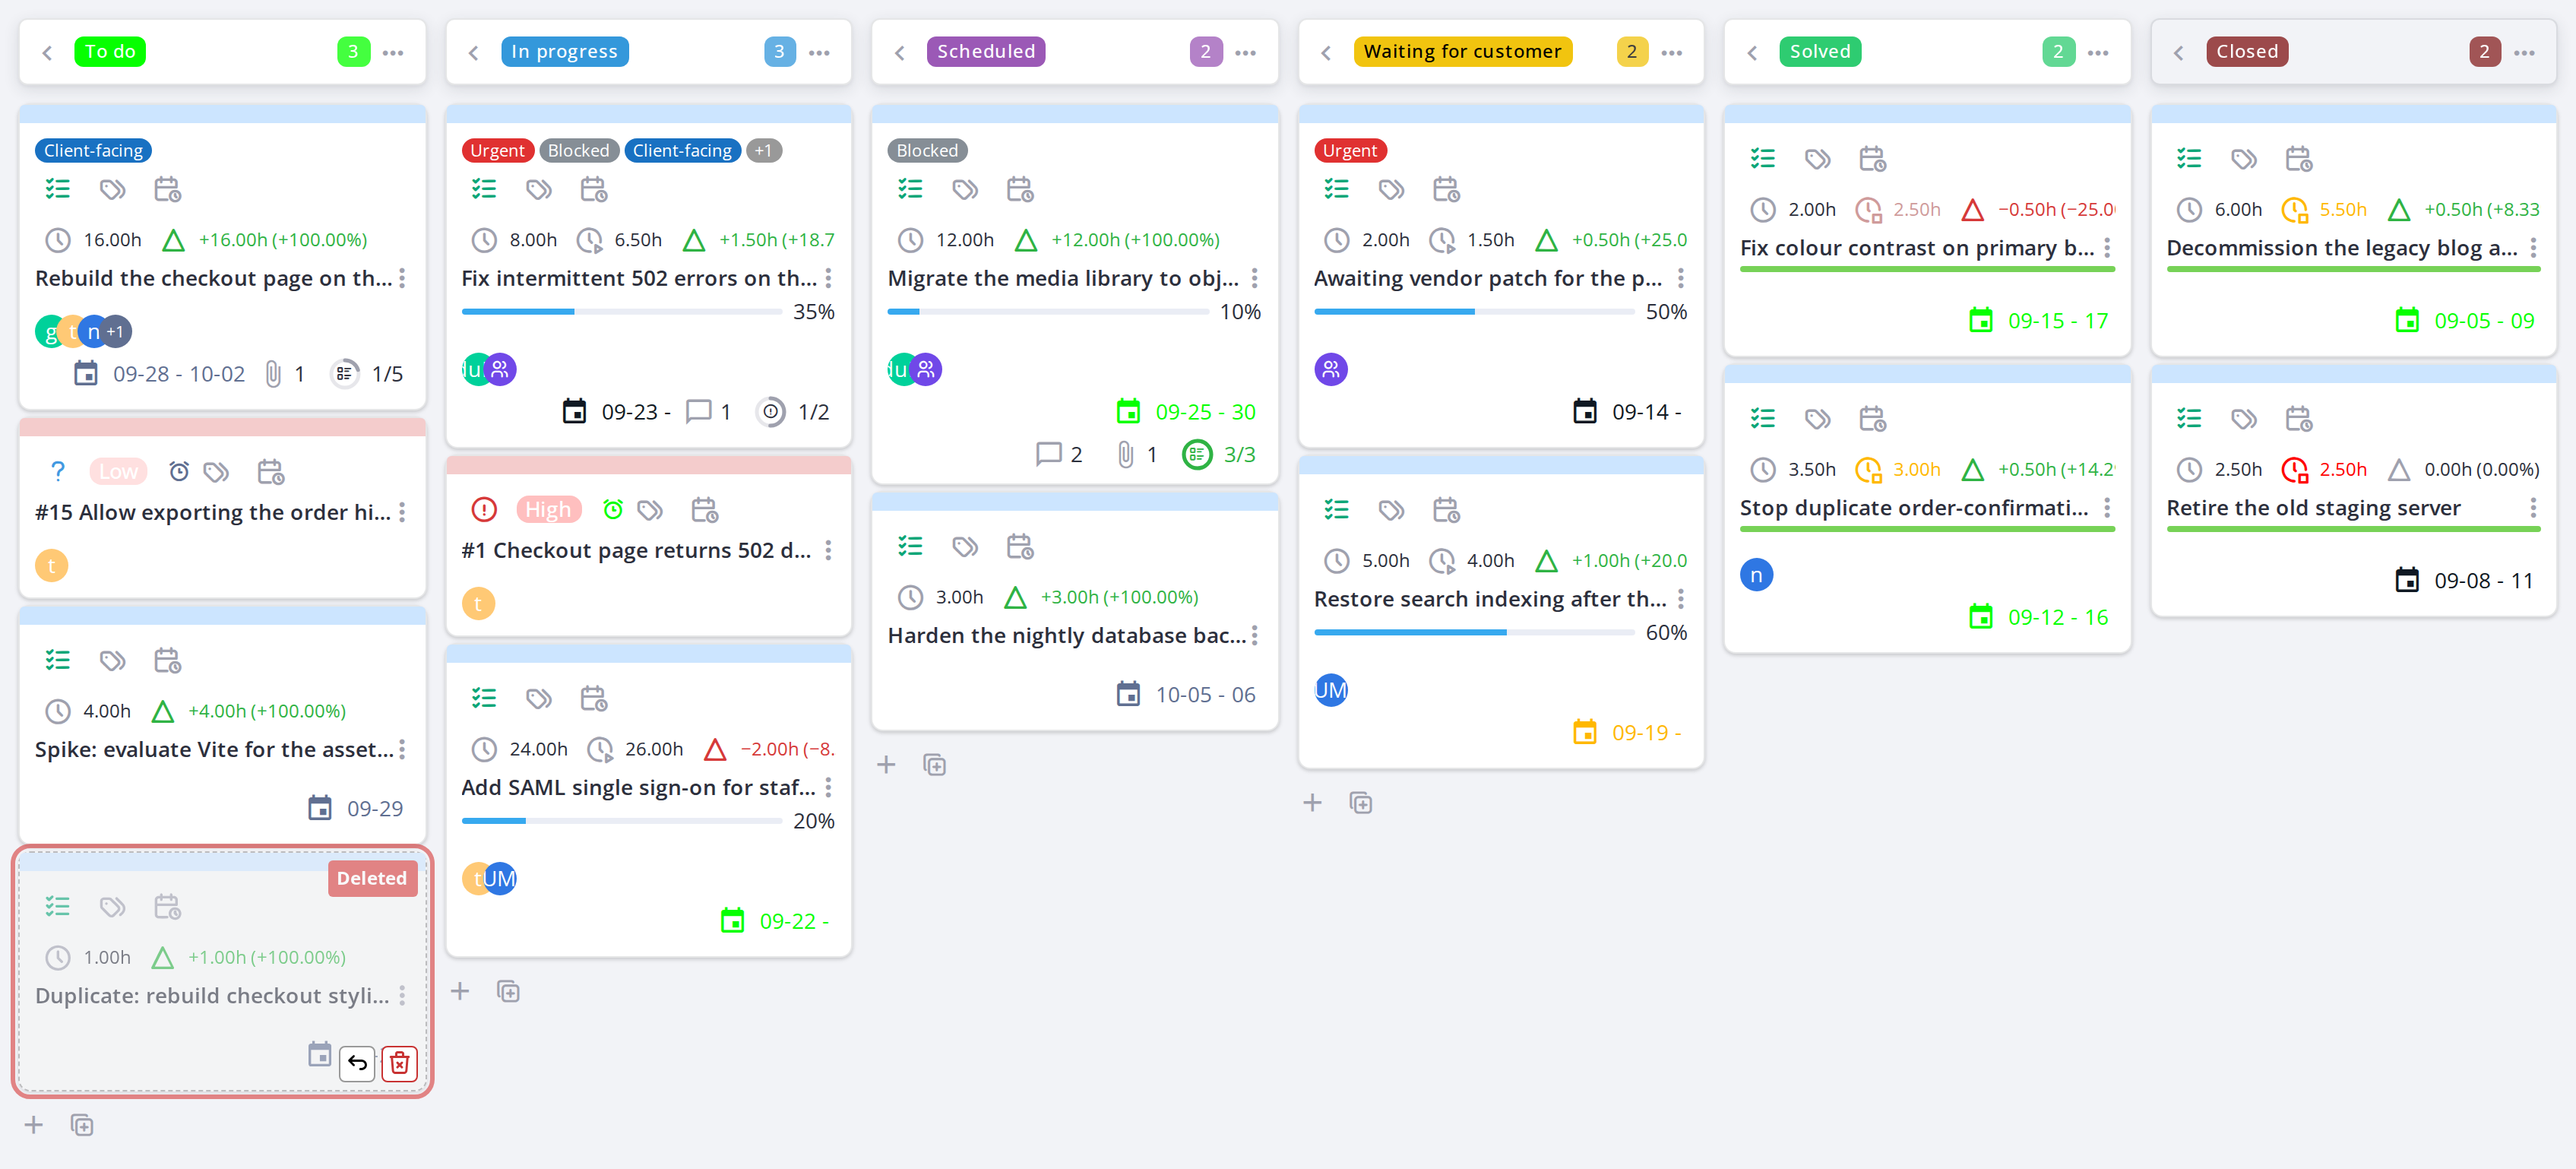
5.3.7.2 Restore a deleted task
Open a deleted task card and click Restore in the action bar. The task is restored and becomes fully editable again. You must have the Restore a card right.
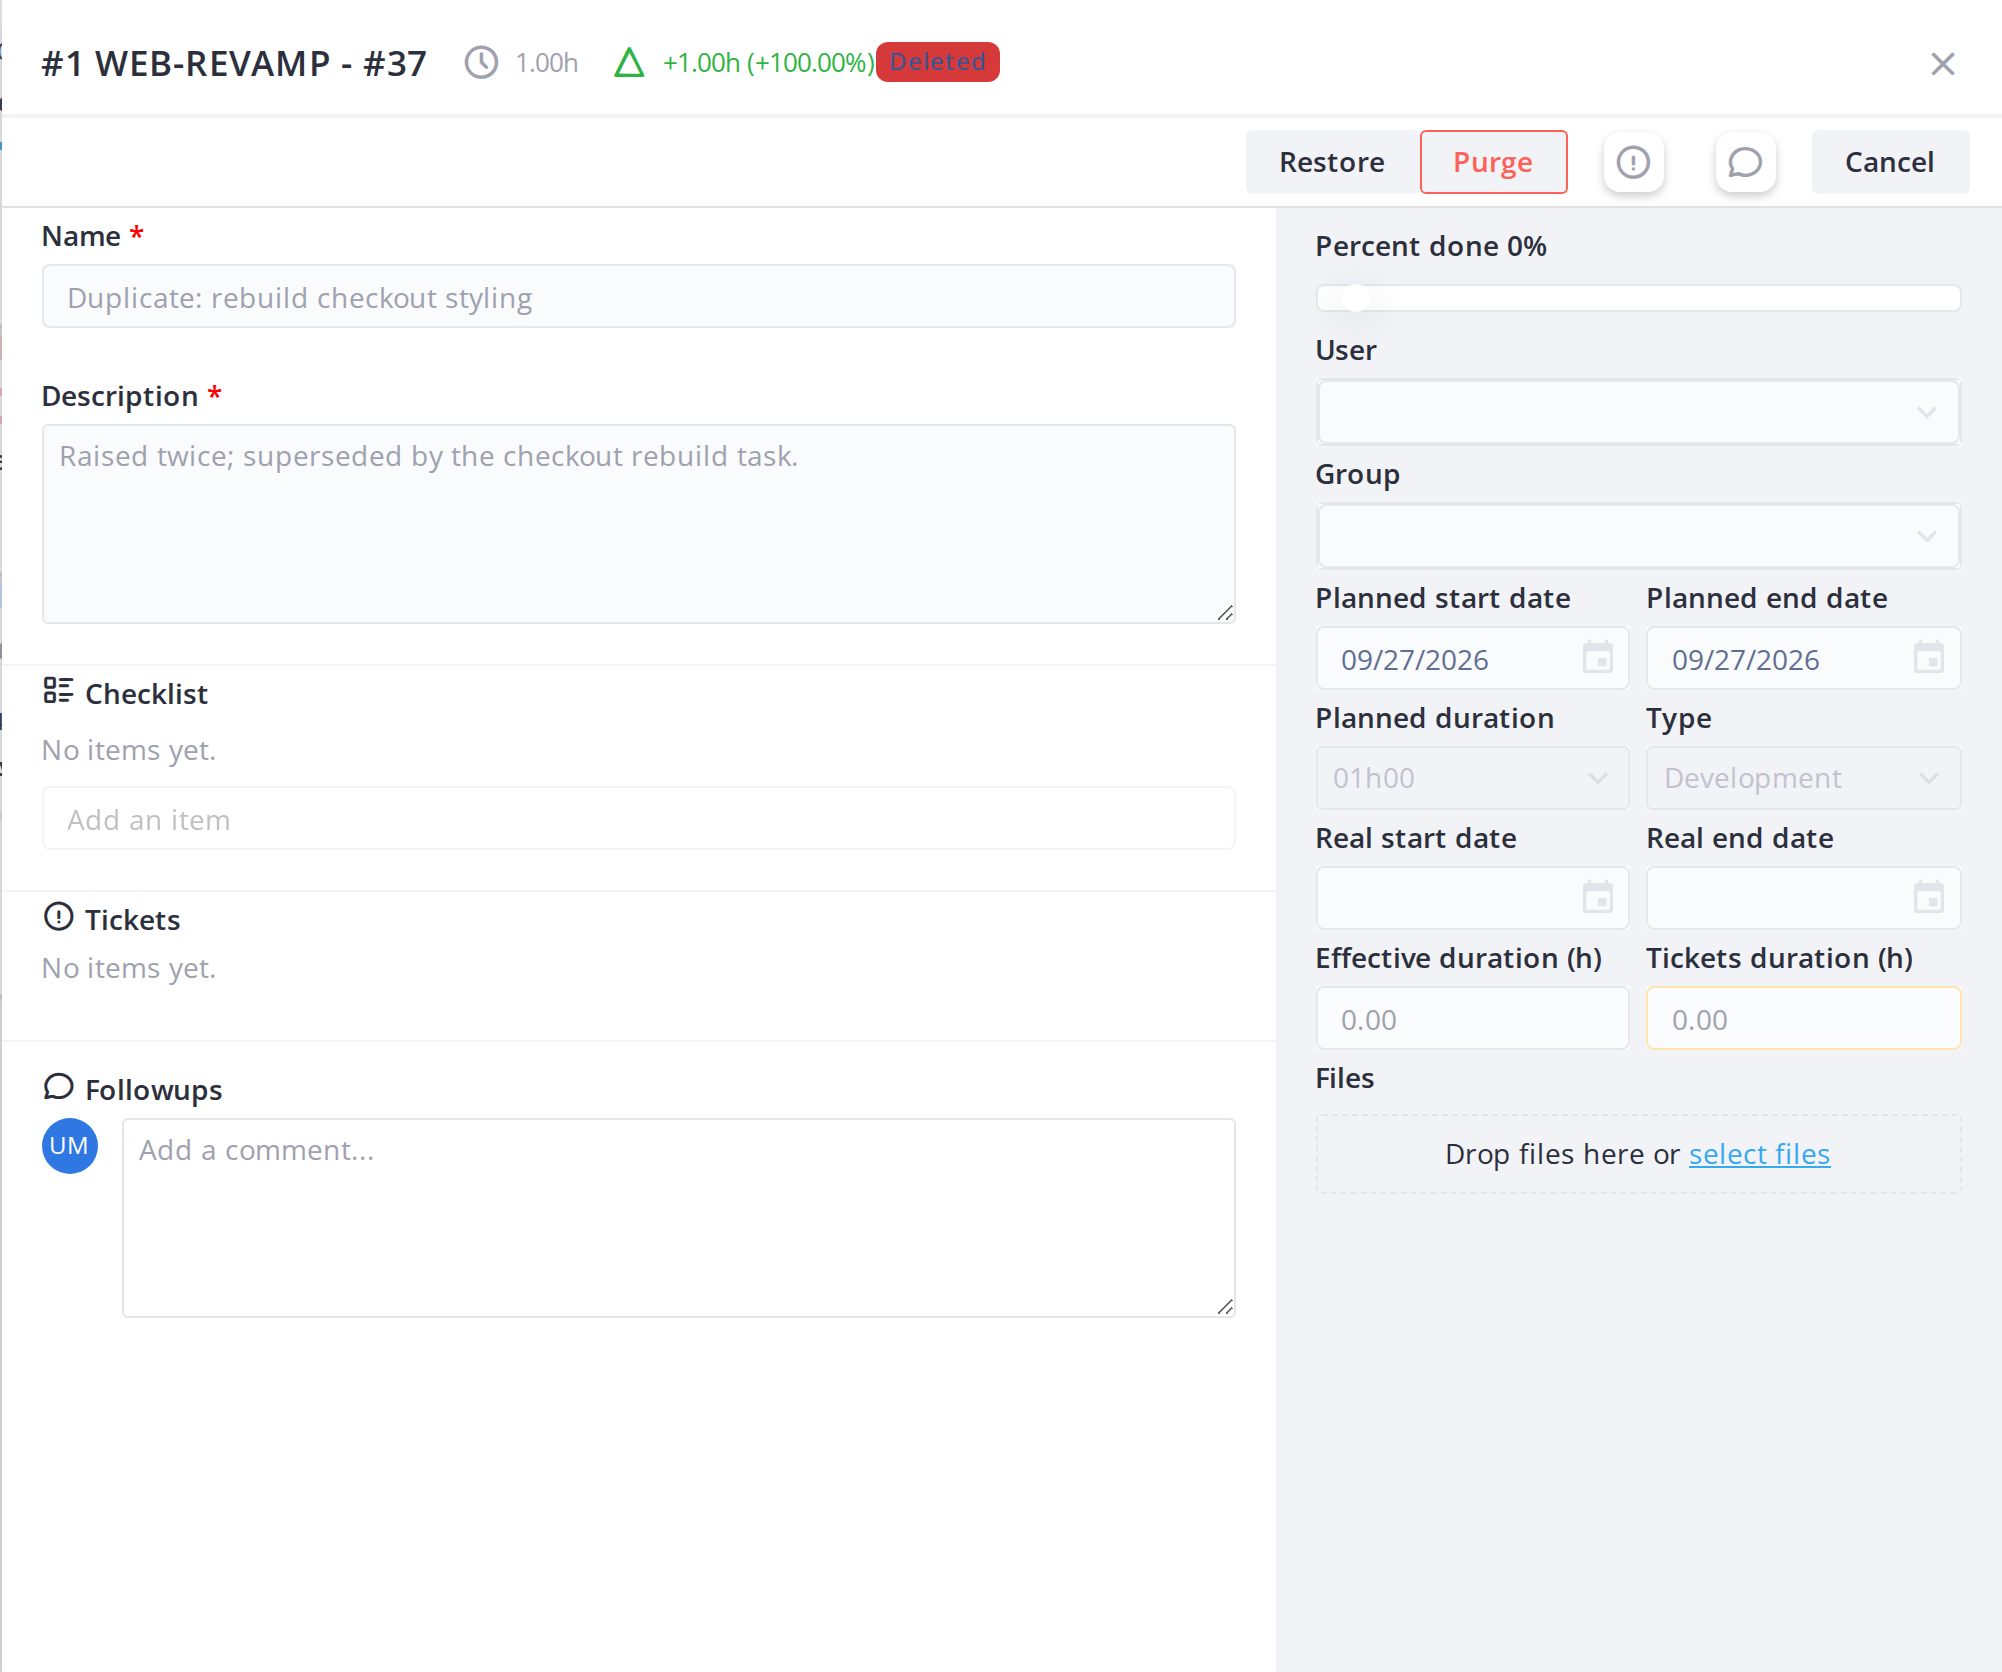
5.3.7.3 Permanently delete (purge) a task
Open a deleted task card and click Purge in the action bar. The task is permanently deleted and cannot be restored. You must have the Permanently delete a card right.
Note: Restoring and purging require their own rights (Restore a card and Permanently delete a card). Without them, deleted cards cannot be acted on.
Generated for Agile Project Management 2.2.0-
alpha.2beta.1 on GLPI 11.0 — 2026-09-25.27.