Login & Settings
Login
The login screen presents the authentication methods enabled for the app. The GLPI server URL is preconfigured; no server address needs to be entered.
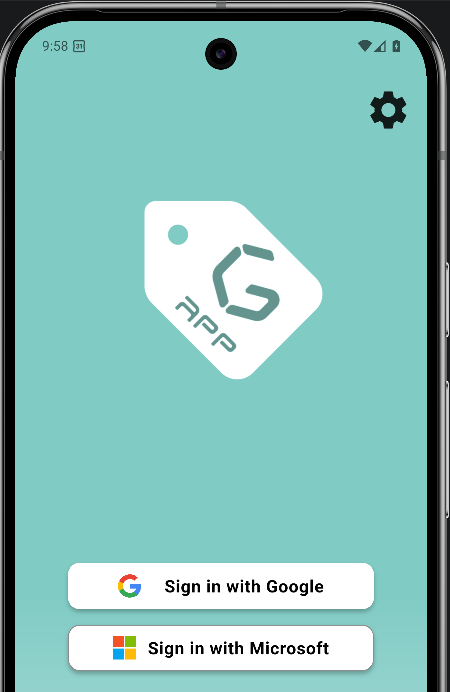
1. Email and password
Native GLPI authentication. Enter the username or email and the password, then tap the submit button.
2. Sign in with Google
SSO via Google Workspace, implemented with Firebase Auth. On Android the flow is native; on other platforms a WebView handles the authentication. The flavor can restrict access to specific email domains.
3. Sign in with Microsoft 365
SSO via Microsoft 365, also using Firebase Auth. The authentication opens in a WebView provided by the Firebase plugin.
Settings
The Settings screen groups every preference for the app instance: interface language, notification behaviour, log housekeeping, and session maintenance. It opens from the gear icon in the side menu (or from the login screen when no session is active).
The set of options depends on the session state: the Preferences and Diagnosis sections are always visible; the Security section appears only after a successful sign-in.
1. Preferences
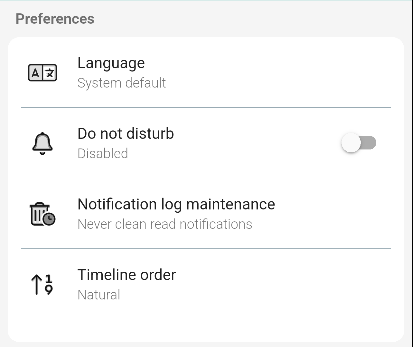
The Preferences card groups the options tied to the current session.
- Language sets the interface language. The default follows the system language; changing it prompts a re-login so the new strings load on every screen.
- Do not disturb silences every app notification while it stays on. Notifications are logged silently instead of producing sound or vibration. The toggle is OFF by default; tap it to enable or disable. When Time tracking is active, the option turns on automatically outside the workday and turns off when the workday starts. The manual toggle always overrides the automatic one.
- Notification log maintenance controls how often the in-app notification history is cleaned up. The subtitle shows the current cleanup rule, for example Never clean read notifications. Tapping the row opens a dialog with preset intervals and a custom interval in days.
- Timeline order switches the order in which timeline entries appear on ticket and task detail screens between Natural (oldest first) and the alternative order.
2. Set the notification log cleanup interval
The dialog that opens from Notification log maintenance lists preset intervals. Pick one, or open the custom interval to type a value in days.
- Set interval to clean logs pop-up title of the dialog.
- Interval options list preset choices (for example 1 day, 7 days, 30 days, never). Pick one to apply it immediately.
3. Use a custom cleanup interval
When none of the presets fit, the custom interval accepts a number of days.
- Set custom interval to clean logs pop-up title of the custom dialog.
- Input for interval (in days) the only field; enter a positive integer.
- Accept and confirm button applies the typed value and closes the dialog.
4. Security
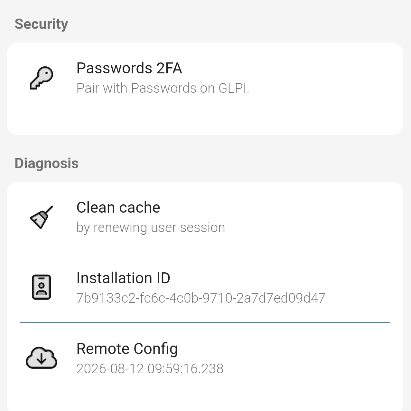
The Security card holds the integration with the GLPI Passwords plugin. It is only visible after a successful sign-in.
- Passwords 2FA pairs the app with the Passwords plugin on the GLPI server. After pairing, two-factor codes for entries stored in GLPI Passwords appear in the app.
5. Diagnosis
The Diagnosis card groups troubleshooting information and the tools used by support.
- Clean cache renews the local user session. Use it to apply profile, entity, or plugin changes without logging out and back in.
- Installation ID the unique identifier of the app instance on this device. Share it with support when reporting a problem.
- Remote Config the timestamp of the last successful fetch of the remote configuration. A stale value usually means the device could not reach the server.
- Gapp Version the build number of the app installed on the device. Tap it for more information (visual coverage pending).
6. Open Settings
The path is the same in every section.
- From the main screen open the side menu.
- Tap the gear icon Settings opens.
- From the login screen tap the gear icon. Settings opens with Preferences and Diagnosis; Security stays hidden because it depends on the authenticated session.
7. Settings with or without an active session
The screen layout is the same; only the Security card and the live values change.
- Not logged Preferences (Language, Do not disturb is hidden because no notifications can arrive yet, Notification log maintenance, Timeline order) plus Diagnosis (Clean cache, Installation ID, Gapp Version). The Security card is not shown.
- Logged Preferences (all four options, including Do not disturb) plus Security (Passwords 2FA) plus Diagnosis (Clean cache, Installation ID, Gapp Version, Remote Config).